Overview
Continuous Tests, also known as Continuous Monitoring, refer to a series of Tests that run consecutively to continuously monitor end-user experience. These Tests aim to promptly alert you to any issues in your infrastructure, preempting the need for users to report problems.
How It Works
A Continuous Test records all timers defined in your Application scripts, along with session metrics from Windows and your connection broker. It can also execute our EUX Applications to gauge user experience on your hardware. Each metric can be charted over extended periods within your Test.
Continuous Tests initiate a session to log in as a specific user, execute the designated Test, and log out upon completion. The results from all executions are displayed as a single, continuous set, allowing you to monitor performance graphs over extended periods. You can configure email alerts to notify you when specific counters exceed their assigned threshold values within a specified interval, helping you identify performance degradation.
When viewing a Continuous Test in the Login Enterprise sidebar menu > Results > Continuous Testing, you'll initially encounter a chart displaying your metrics. This enables you to promptly assess the success of your Test and the consistency of your results. For more information, see Viewing Continuous Testing Results.
Creating a Continuous Test
-
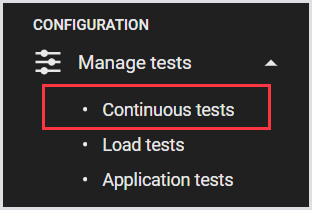
In the Login Enterprise sidebar menu, navigate to Configuration > Manage Tests, and select Continuous Tests.
-
In Continuous Tests, click “+“ on the top right to create a test.

-
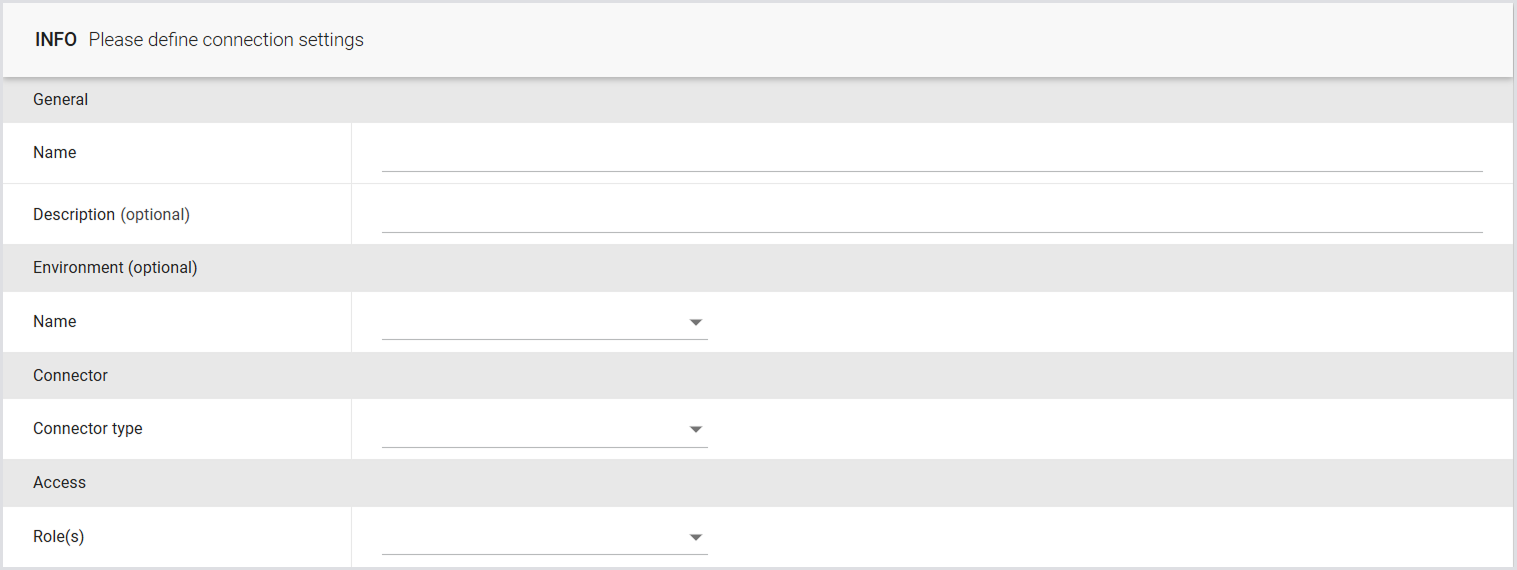
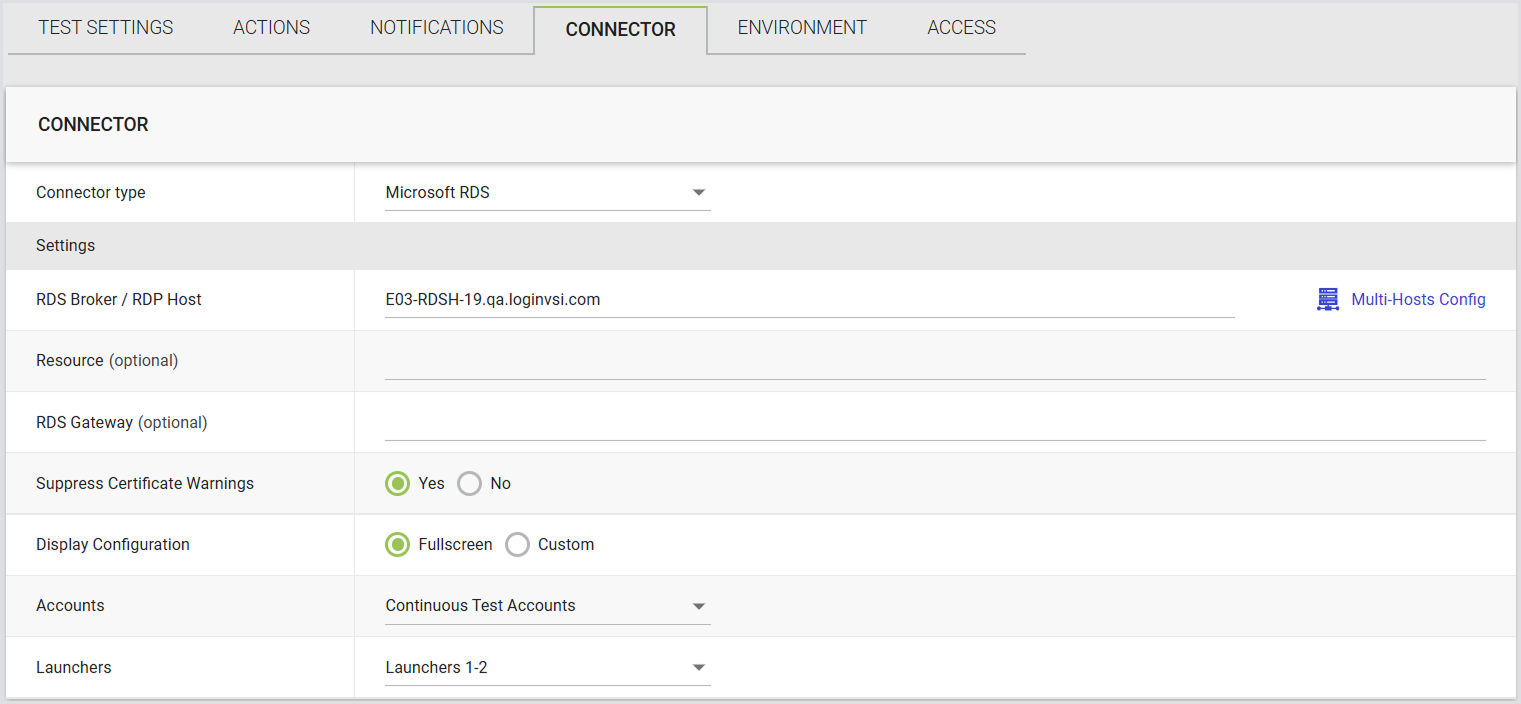
Define the connection settings:
|
Field |
Description |
|---|---|
|
Name |
The display name for the Test. |
|
Description (optional) |
An informative description of the Test. |
|
Environments (optional) |
The target environment where the Test will be conducted. For more information, see Configuring Environments. |
|
Connector |
The type of Connector to be utilized by the Launcher. Note: Each Connector has its own settings. Once you define your Connector, you need to specify the necessary information in the Settings section. For details, see Connectors. |
|
Access |
Select roles to control access to Test configurations and results. For more information, see Role-Based Access Control (RBAC). |
-
Click Save to apply the changes.
Configuring Continuous Test Settings
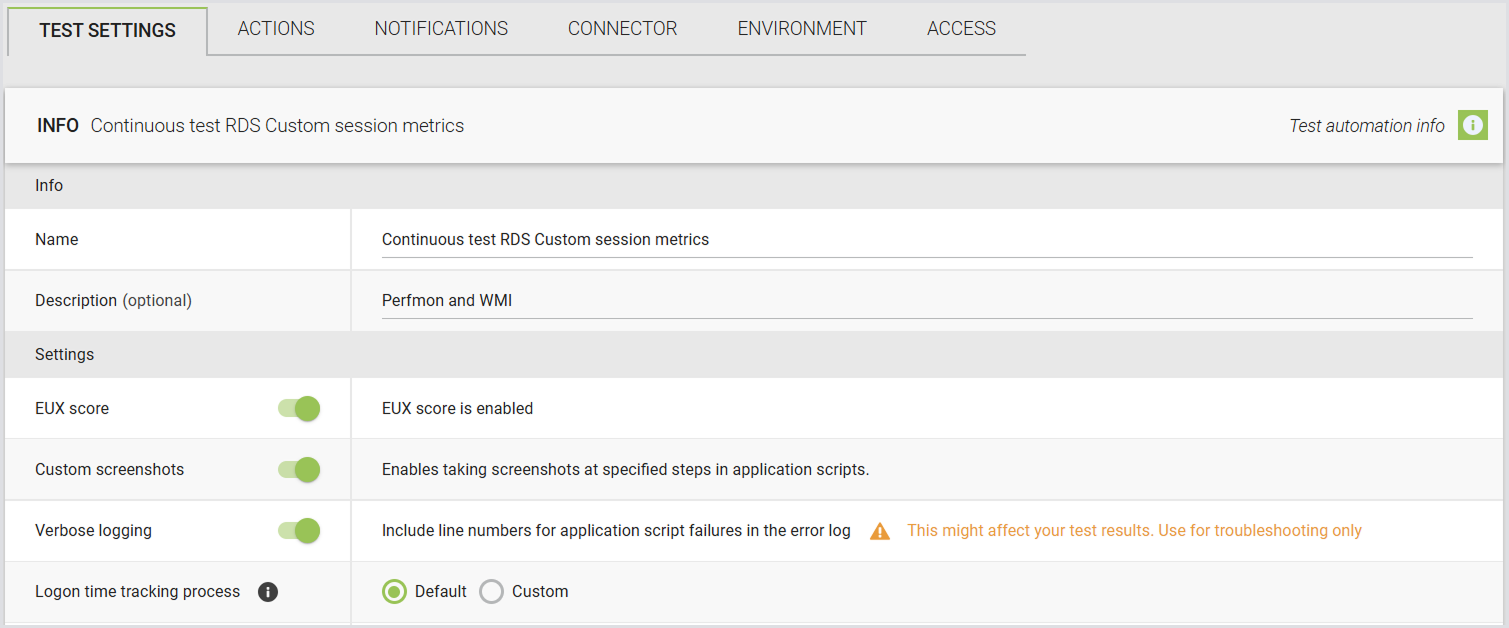
Once you’ve created a Continuous Test, you need to configure the Test settings, such as:
|
Setting |
Description |
|---|---|
|
EUX Score |
Enable or disable the calculation of the End User Experience Score during Test Runs. For details, see Calculating the EUX score and VSImax. |
|
Custom screenshots |
Enable or disable custom screenshots within Application scripts. For more information, see Taking Screenshots. |
|
Verbose logging |
Display the command line number that triggered an error during Application execution failures. Note: This may affect Test results as the line number is returned during execution. |
|
Logon time tracking process |
|
|
Enable schedule |
Configure the Test schedule, specifying whether it should run continuously, daily, or weekly. For more details, see Enabling Scheduling. |
Enabling Scheduling
Continuous Tests, unlike other available Test types, offer various scheduling options:
|
Setting |
Description |
|---|---|
|
Login every |
|
|
Run a session from each Launcher every |
|
|
Run concurrent sessions |
|
.png?cb=92a49421b3d7236ff5de524a1a71e6e5)
Daily and Weekly Schedules
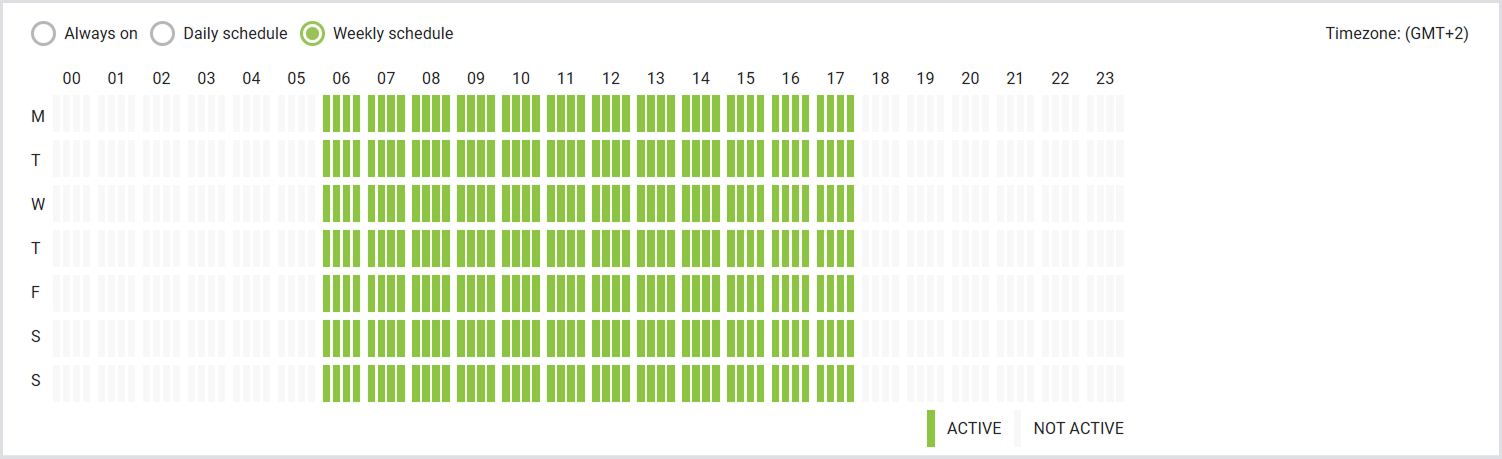
You can implement detailed scheduling for Continuous Tests, choosing between daily or weekly schedules. The following examples illustrate a Continuous Test schedule from 6 am to 5 pm on both a daily and weekly basis. This flexibility allows administrators to exclude scheduled downtime from the testing schedule.
Tip: Use your mouse to select the desired time frames within the scheduling interface. Each bar represents an hourly view, with each block representing 15 minutes. Remember to save your selections to confirm and apply your scheduling preferences.

Session Metrics Settings
Within a Continuous Test, you can also configure Session Metric settings, such as:
|
Setting |
Description |
|---|---|
|
Session Metrics |
Enable or disable the gathering of Session Metrics. |
|
Metrics group |
Choose the desired Session Metrics Group to specify which performance counters should be collected. |
|
Schedule (in which session) |
Specify the schedule for sessions. If you don’t want to collect Session Metrics in every session, specify how often it can run, e.g., 1 out of every X sessions. |

For more information on Session Metrics, see Managing Session Metrics and Viewing Session Metrics.
Actions
You can add the preferred Applications for the Virtual User to test. You can also add Application Groups, and “Waits.” For details, see Configuring Applications for Testing.
Notifications
One of the major advantages of Continuous Testing is that Virtual Users operate independently of any active real-user sessions. This allows them to effortlessly execute workloads, detect failures or performance degradation, and promptly and proactively alert IT Operations teams. For more information, see Managing Notifications.
Citrix Published Apps
You can connect to a Published Application using either the StoreFront or NetScaler Connector. The key difference between connecting to a Virtual Desktop and a Published Application is that the resource configured is an Application rather than a desktop. For details, see Citrix Netscaler 12.1 and 13.0 and Citrix Storefront.
Schedule Configuration
Define the time schedule during which the virtual user is active.
Actions List Configuration
You can configure Applications in the Actions list. It is recommended to set up Application scripts that correspond with the published apps. While you can add other Application scripts, they may not function correctly if they are not intended for the published Applications defined for that user. Ensure that each Application script includes "mainWindowTitle: *ApplicationTitle*" in the START parameter.
Note: We support only one Continuous Testing environment with a single Published Application resource in the configuration.
How It Works
When the Launcher initiates the session, it receives information from StoreFront or NetScaler indicating that the configured resource is a Published App. This information instructs the Virtual Appliance script executor not to start the Application as it would in a virtual machine (VM) or desktop environment. As a result, you can use existing scripts for published apps, such as the default Microsoft Word scripts.
Note: Since the start command is skipped for Published Apps, the "App start time" value is not collected, as it no longer applies.
Access
You can assign roles to Tests to control access to the Test configuration and results. By assigning roles, only users with the designated roles will be able to view or modify the Test configuration and results, depending on their permissions. For detailed instructions on creating and managing roles, permissions, and dependencies, see the Role-Based Access Control (RBAC).

Adjusting the Engine Start Timeout
Note: This setting is not available through the Login Enterprise UI. To adjust it, you need to use the API.
The timeout for the Engine-start setting controls how long the Virtual Appliance will wait for the Engine on the Target to come online after a session is launched, and before the connection is considered a failure (login failure). Since we cannot see what is happening during the login phase, all we can do is wait for the Engine to communicate with the Appliance. Or give up and abort the session.
The default timeout is 300 seconds (5 minutes).
You can modify this timeout on an individual Test by using the Public API to reconfigure the Test. A PowerShell script is available to make this process easier. For specific directions on setting the appropriate parameter for an individual Test, see Setting the Engine Start Timeout on a Test.
Key considerations:
-
Default timeout: If no value is specified, or the value is set to 0, the timeout defaults to 300 seconds (5 minutes).
-
Web interface limitation: This option is not available through the Appliance web interface. If you create a Test via the web interface, the timeout will be left empty and default to 300 seconds.
-
Update via API: To modify the timeout, first create a Test, then use the update endpoint to set the timeout. The timeout cannot be set during Test creation.
Starting a Continuous Test
In the Continuous Tests, switch the toggle next to the Test you’d like to start.

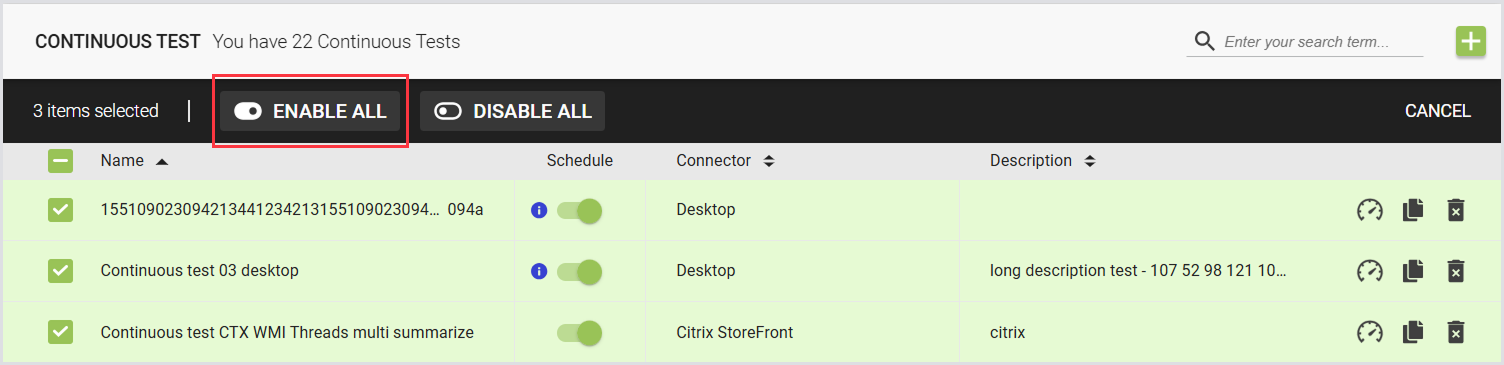
Enabling Continuous Tests in Bulk
If you have multiple Continuous Test runs, you can enable or disable them in bulk. This way, you’ll provide increased ease of management for larger Login Enterprise deployments. To perform bulk start/stop operations, select the checkboxes of all Tests that should be considered, and click Enable all.
Locations
If Launchers are attached to configured locations when a Continuous Test type is in progress, these Launchers will be visible in the map view. For more details, see Configuring Locations.
Best Practices
Continuous Tests provide flexible scheduling options that allow administrators to automate test execution and monitor environments over time. The following tips help ensure reliable scheduling and avoid common issues.
Choosing the Right Connector for Scheduling
Scheduling Continuous Tests requires a Connector capable of initiating user sessions.
The Desktop Connector cannot initiate sessions, so it cannot run scheduled tests based on specific times or intervals. If you need to schedule tests automatically, configure a real Connector that supports user logon.
Using Scheduling Options to Match Testing Needs
Continuous Tests can be configured in several ways:
-
Run continuously
-
Run during specific hours of the day
-
Run on specific days of the week
-
Run at fixed intervals
-
Run with a defined number of concurrent test instances
These options allow you to simulate ongoing workloads or periodic validation checks depending on your testing goals.
Time Zone Considerations
When scheduling a test, the appliance converts the configured time from your browser to Coordinated Universal Time (UTC) based on your current time zone.
However, the system does not store the original time zone or automatically adjust for daylight saving time (DST).
If your test schedule aligns closely with working hours and your region observes DST, you may need to manually adjust the scheduled time after the seasonal change.
Using Continuous Tests for Automation
Although the appliance is primarily designed as a measurement platform, Continuous Tests can also be used for other automation tasks, such as scheduling interactive actions or operational checks.
Because of their flexibility, Continuous Tests can function similarly to a task scheduler for executing scripted workflows.
Manually Triggering Tests with Desktop Connector
The Desktop Connector provides an alternative method for running tests manually.
You can trigger a Test Run directly from a machine by launching the connector .exe file with the appropriate parameters. This approach is useful when you need manual control over when tests start.
Note: Desktop Connector is not recommended for long-term production use when triggering Continuous Tests. After a Continuous Test iteration completes, the session remains logged in.
Continuous Test Results and Comparison
-
For information on the Continuous Test results, consult Viewing Continuous Testing Results.
-
For general guidelines on how to analyze Continuous Testing Session Metrics, see Viewing Session Metrics.