Overview
Login Enterprise enables testing of Applications installed on Target Windows hosts, focusing on critical metrics such as Application launch times and the performance of specific actions. These Applications serve as Workload files that the Virtual Appliance Target Engine executes, simulating Virtual User interactions.
Multiple Application Workloads can be organized into collections, i.e., Application Groups, which are assigned to Test scenarios. This structure allows for comprehensive and structured testing, ensuring that various Application sequences are effectively evaluated during each Test run.
Creating an Application
You can create an Application in one of the following ways:
-
Add an Application: Configure a new Application manually.
-
Import Application: Import an existing browser automation script.
Adding an Application
-
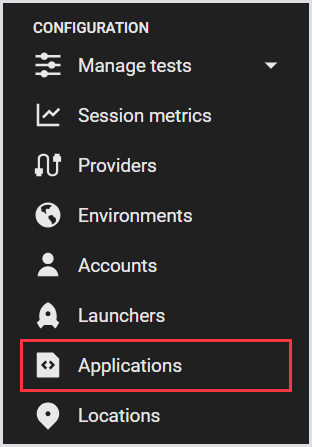
In the Login Enterprise sidebar menu, navigate to Configuration > Applications.
-
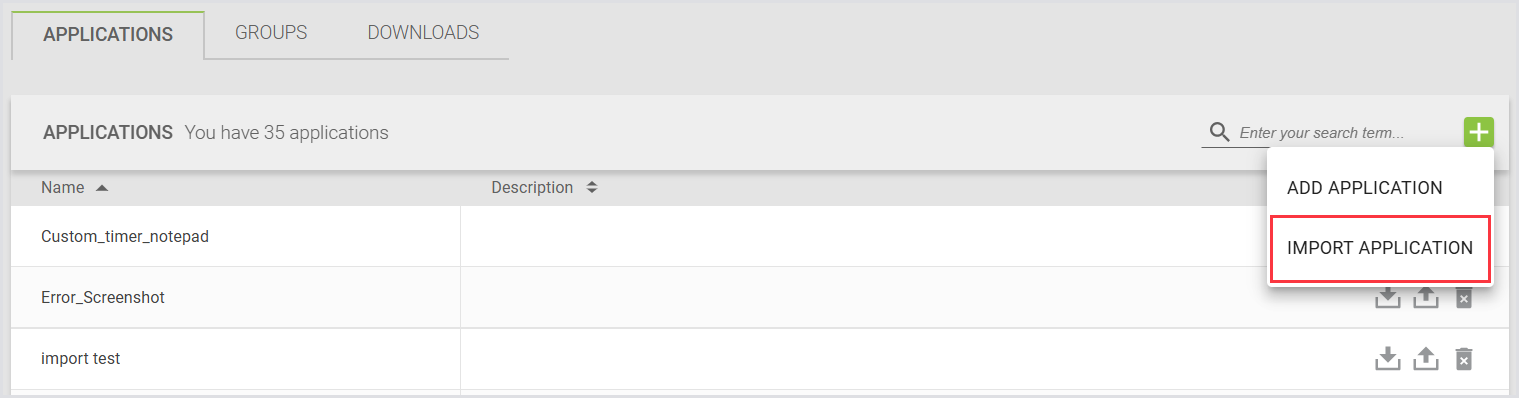
In Applications, click the green "+" on the top right, and then select Add Application.

-
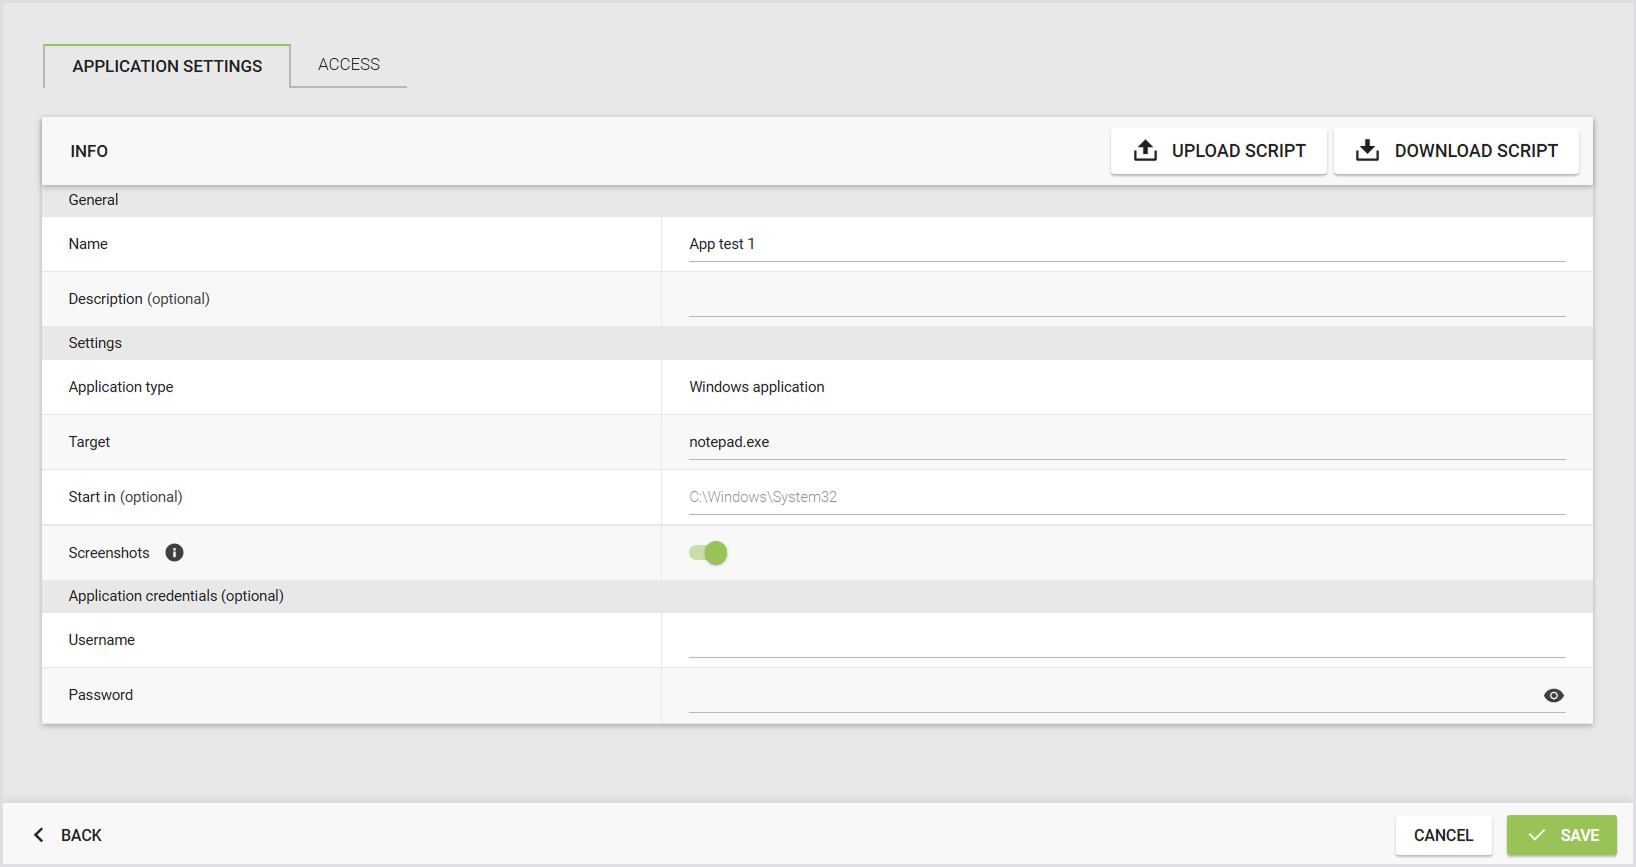
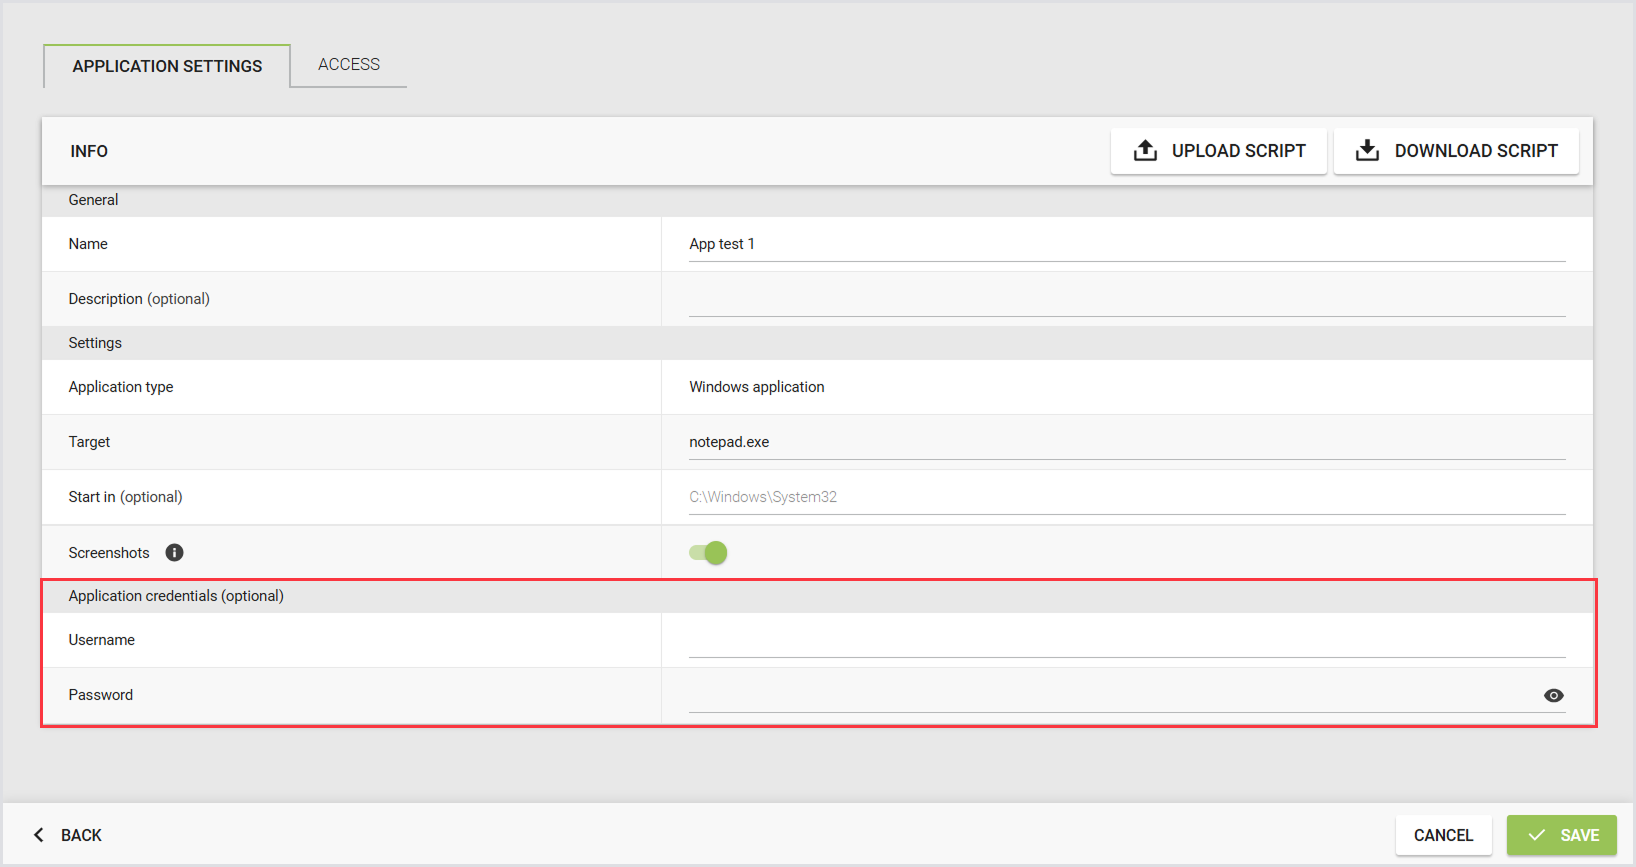
Define the Application settings by configuring the following:
|
General |
|
|---|---|
|
Name |
The name of the Application. |
|
Description |
A brief description of the Application and its purpose. |
|
Settings |
|
|
Application Type |
The type of Application workload to run. |
|
Target |
The Target Windows host where the Application will be executed. |
|
Start In (optional) |
The working directory from which the Application will launch. |
|
Screenshots |
Enable screenshots to help identify the Application or assist with action scripting. For details, see Taking Screenshots. |
|
Application Credentials (optional) |
|
|
Username |
The username for Application access. For more information, see Scripting Secure Application Credentials. |
|
Password |
The password for the specified user. For more information, see Scripting Secure Application Credentials. |
|
Access |
|
|
Roles |
Assign roles that are allowed to access or manage this Application. For details, see Managing Access to Applications and Application Groups. |
.png?cb=4073ddc28925573ac700cb58242100dc)
This will create an empty Application script, which you will normally want to update. For more information, see Downloading and Editing Application Scripts.
Note: Adding an Application here will automatically configure an Application Start Timer.
Importing an Application
-
In the Login Enterprise sidebar menu, navigate to Configuration > Applications.
-
In Applications, click the green "+" on the right, and then select Import Application.
After clicking Import Application and completing the process, you'll see a 'Validating...' pop-up message. This indicates that your script is undergoing validation.
Application Scripts
When uploading an application script, the system automatically prefills the following fields:
-
Name
-
Application Type
-
Target
You can configure the remaining fields, as necessary. For details, see Adding an Application.
Browser Scripts
When uploading a browser script, the system automatically prefills the following fields:
-
Name
-
Application Type
-
Browser
-
URL (if available)
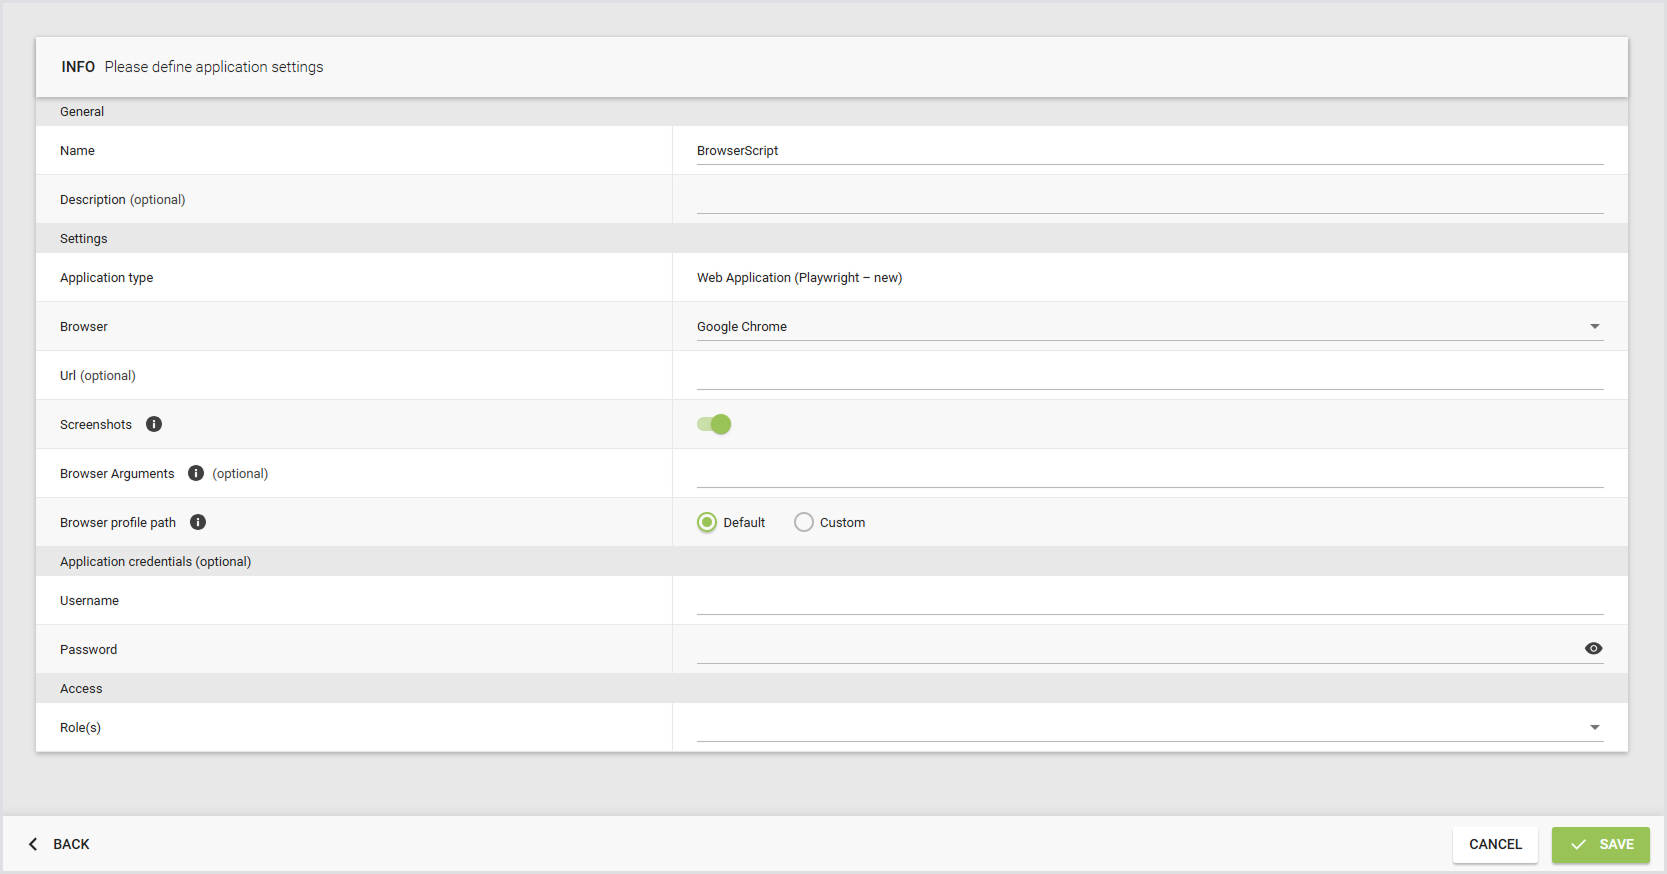
You can configure the remaining fields, as necessary. See the full configuration table below for details:
|
General |
|
|---|---|
|
Name |
The name of the Browser Script. |
|
Description |
A brief description of the script and its purpose. |
|
Settings |
|
|
Application Type |
The type of Application workload to run. |
|
Browser |
Select the browser in which the script will be executed (for example, Chrome, Edge, or Firefox). |
|
URL (optional) |
The URL that the browser opens when the script starts. |
|
Screenshots |
Enable screenshots to help identify the Application or assist with action scripting. For details, see Taking Screenshots. |
|
Browser Arguments (optional) |
Add arguments using the syntax specific to each browser. For example: use |
|
Browser Profile Path |
Specify a custom user profile path if it isn’t set to the default.
|
|
Application Credentials (optional) |
|
|
Username |
The username to access the application or website. For more information, see Scripting Secure Application Credentials. |
|
Password |
The password for the specified user. For more information, see Scripting Secure Application Credentials. |
|
Access |
|
|
Roles |
Assign roles that are allowed to access or manage this script. For details, see Managing Access to Applications and Application Groups. |
Creating an Application Group
Application Groups allow you to run multiple specified Applications together. You can attach these Groups to Continuous Tests, Load Tests, or Application Tests.
-
In the Login Enterprise sidebar menu, navigate to Applications and select Groups in the top menu.
-
In Groups, click the green "+" on the top right to create a new Application Group.

-
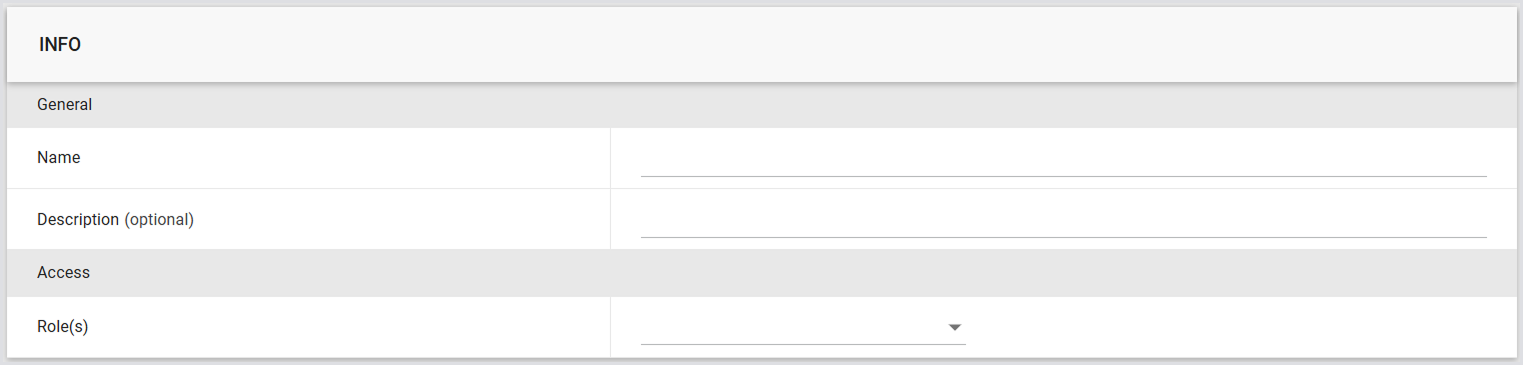
Define the Application Group settings:
|
General |
|
|---|---|
|
Name |
The name of the Application Group. |
|
Description |
A brief description of the Application Group and its purpose. |
|
Access |
|
|
Roles |
Assign roles that are allowed to access or manage this Application Group. |
-
In Applications, click Add Applications.
.png?cb=4f5c5baf693023b3030ae14093aad719)
-
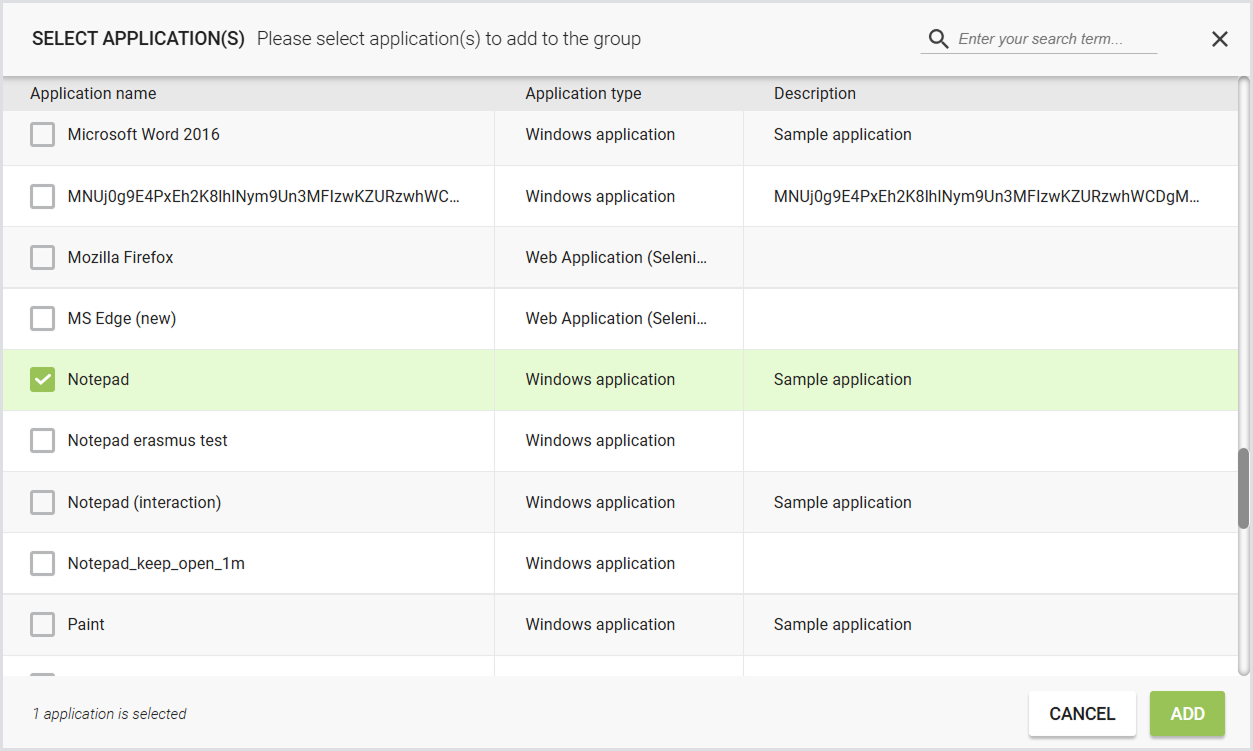
In the pop-up window, select the Applications you want to include in the Group, and click Add to confirm.
Adding Wait Actions
You can insert Wait actions between Applications to control the timing of execution.
-
In Applications, click Add Wait.

-
Specify the duration of the wait (in seconds).

-
Add multiple Wait actions as needed.
Tip: Applications and Wait actions can be reordered within the list:
-
Drag and drop items to change their position.
-
Wait actions can be placed between Applications to create pauses during the execution sequence.
This allows you to define the exact order and timing of Application workloads executed during a Test.
Run Once and Leave Application Running
You can configure how Applications behave during the Test run using the following options:
-
Run Applications Once: Each Application in the sequence is launched only once during the Test execution. For more information and use cases, see Run Applications Once.
-
Leave Applications Running: Applications remain open after they are launched, instead of closing before the next Application starts. For details and use cases, see Leave Applications Running.
These options allow you to control whether Applications are executed as independent launches or remain active throughout the Test scenario, depending on the testing requirements.
Note: There are 2 possible configuration options for Application behavior:
-
This can be configured at the Test level for single Tests.
-
This can also be set within Application Groups.
However, the configuration is not available for a single Application in the Application settings.
Run Applications Once
This option is intended for executing tasks that are only required once, such as configuring registry keys or performing specific automation setups at the beginning of a Test.
Load Test
In a Load Test scenario, you can attach multiple Application scripts, such as Excel and Word. For Excel, you can enable "Run once", while Word follows its default behavior.
During user sessions, actions will initiate with Excel first, followed by a 10-second pause, then Word. After that initial pass, the remainder of the Test will consist of Word running followed by a 10-second pause. This sequence repeats a # of times until the user logs off.
.png?cb=57b996478b81358a096ba06d518c2856)
Continuous Test
In a Continuous Test, enabling "Run once" is effective only when "Repeat all steps above" is configured to 2 or higher.

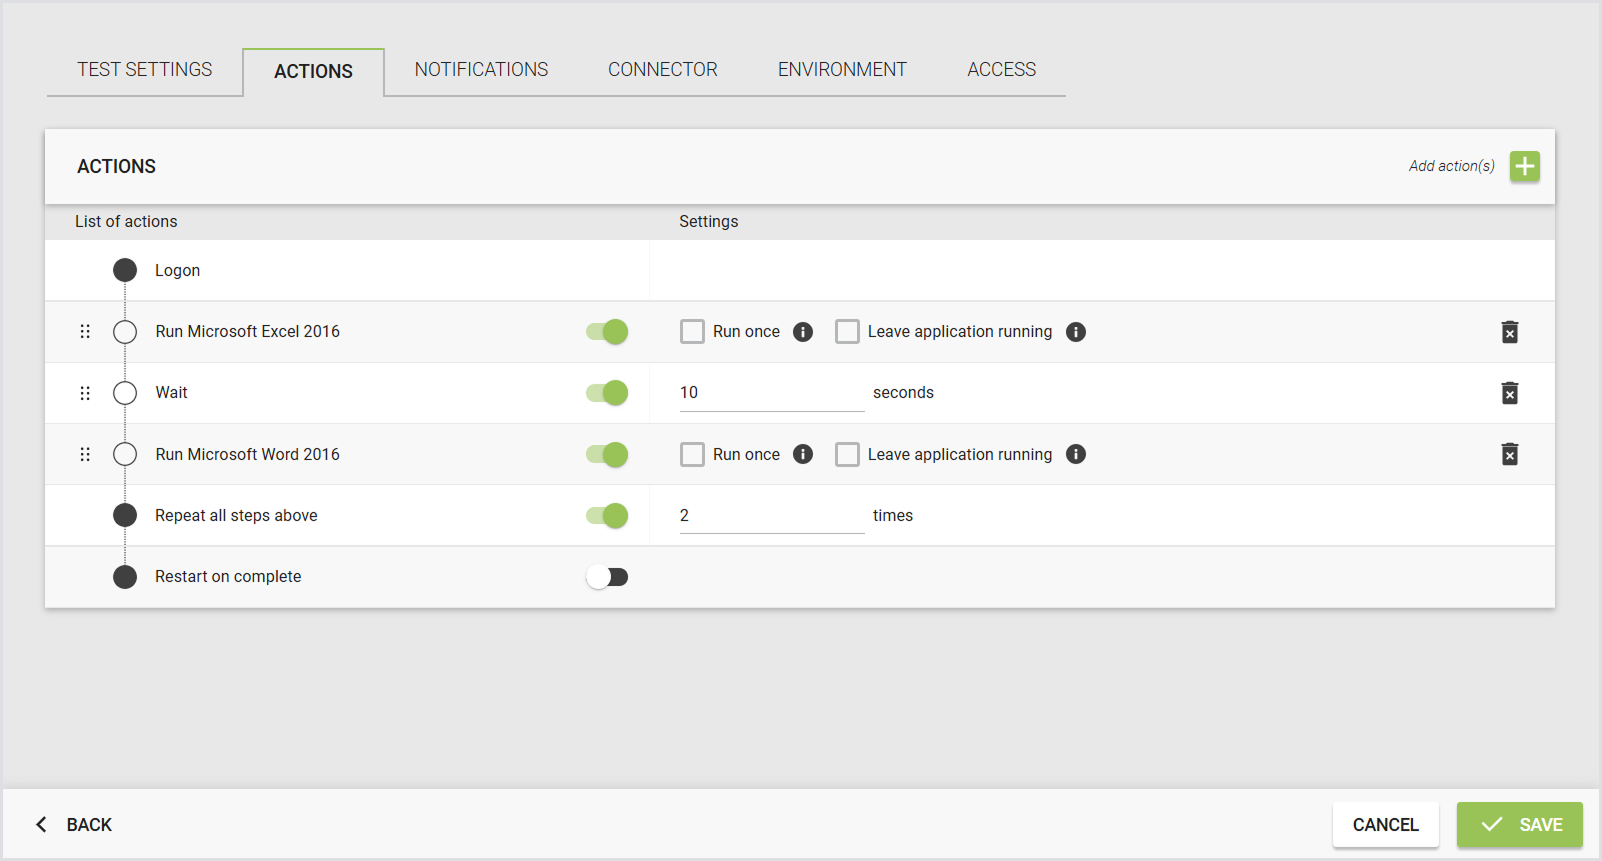
If disabled or set to 1, "Run once" has no effect, as the default behavior runs everything once. When enabled with a setting of 2 or higher, in a Continuous Test setup with Excel set to "Run once" and Word set to default, the behavior is as follows:
The user logs on, runs Excel once, waits 10 seconds, runs Word, waits 10 seconds, runs Word again, and then logs off.
Application Test
In Application Testing, there is no "Run once" option for Applications. Application Tests execute each Application once and do not repeat.
Leave Applications Running
This option ensures that the Application specified in the configured Application script continues to run in the background as Login Enterprise moves to the next Application script.
Important: Leaving Application Running does not apply to web scripts; it is only applicable to Application scripts.
This behavior mimics real user interactions, where Applications are often left open rather than closed after use. “Leave Application Running” can be used with “Run Once” to start a program and have it in the background for the entire Test Run without touching it again. However, if you have a repeating Test and you have not set “Run Once”, we will execute the script each time.
Note: It’s your responsibility to make sure any “Leave Application Running” script can handle it when it is executed a second time, and that any other Application Scripts that want to interact with the process know how to find its main window.
This feature operates consistently across all use cases of Login Enterprise. Here are some important considerations for successful use:
Application Title
Each command sent to an Application within Login Enterprise scripts requires identification of the Application. Typically, this identification is based on the Application's title. When using "Leave Application Running," it is crucial that the title of the focused action within a script is as unique as possible. This prevents commands from being sent to the wrong Application inadvertently open in the background.
Repeat Cycle
In Continuous Testing, there is an option to repeat steps, while in Load Testing, all actions are repeated by default. When "Leave Application Running" is enabled for an Application script, it may result in the same script (e.g., Excel) running multiple times without closing. Therefore, the script must be designed to handle subsequent runs seamlessly. For instance, if the first action in an Excel script is to open a file, ensure this action can be repeated at the script's end.
Process Started vs Process Running
Sometimes, the process you start, e.g., "start.exe", differs from the process that is running, e.g., "App.exe". If an Application is left running and the script is rerun, the script may attempt to start the initial process again, potentially causing unintended behavior.
Multiple Application Scripts of the Same App
When multiple Application scripts use the same Application and "Leave Application Running" is enabled, Login Enterprise may struggle to differentiate between Application instances. For example, if a script starts Word and another script attempts to start Word again, the Appliance may recognize that "word.exe" is already running and refrain from starting a new instance. Leaving multiple instances running concurrently can lead to unpredictable behavior. Consider launching the Application using a specific file, e.g., starting Word using a Word document to manage instances effectively.
Resource Usage
Leaving Applications open consumes more resources during testing compared to closing them. Be mindful of resource utilization when opting to keep Applications running after a script completes. Make sure you do not end up in a situation where you have 5 apps open that each take 25% of your memory.
Managing Access to Applications and Application Groups
You can control which users can view or manage specific Applications and Application Groups by assigning access roles. This helps ensure that only authorized users, the “owners” of the Application, can manage its settings or include it in Tests. For details, see Managing Access to Applications and Application Groups.
Downloading and Editing Application Scripts
Once you've added the Application, click the Download icon on the right to download the script. This serves as a backup and allows you to edit the Application script to include new timers and functions.
Note: After making updates to the script, upload the modified file back to Login Enterprise.

Click on the Application to make changes in its configuration if necessary. The Application Settings window opens.
You can also upload and download scripts from this window.
Scripting Secure Application Credentials
Login Enterprise lets you configure encrypted passwords for Applications. This password is encrypted and saved in a variable to be used in the Application scripts.
Configuring Credentials
-
In the Login Enterprise sidebar menu, navigate to Configuration > Applications.
-
Click on the Application you want to configure the credentials for.
-
In Application Credentials (Optional), fill in the username and password you want to use in your Application script.
-
Click Save to apply the settings.
Using Credentials in an Application Script
The credentials are transformed into a variable that can be used during scripting. There are two variables that you can use in the script:
-
ApplicationUser
-
ApplicationPassword
To use this, you can use the following command when you want to type it into a window. We assume that the user is called Login VSI and the password is Password!
Type(ApplicationUser,hideInLogging:true);
Type("{Enter}")
Type(ApplicationPassword,hideInLogging:true);
The result would be:
User
Password!
The option hideInLogging is best used when using passwords, as this function hides them from logging, so there is no potential security breach.
Login Enterprise Script Editor
The Login Enterprise Script Editor is a tool designed to assist administrators in creating custom Application workflows. These workflows can be seamlessly incorporated into various testing scenarios, including Application, Load, and Continuous Tests. By leveraging the Script Editor, administrators can streamline Test creation and execution, ensuring comprehensive and efficient testing processes tailored to specific Application requirements.
-
For details on the Script Editor, its benefits, use cases, and more, see Using the Script Editor.
-
Script Editor includes the Web Recorder for web apps, in addition to Script Recorder v1 for Windows apps. To learn more about the Script Recorder, its use cases, benefits, and more, see Using the Script Recorder.
Note: While you may still prefer using Visual Studio Code (VSCode), the Login Enterprise Script Editor is designed to provide a more integrated and supported experience. Although you can still use VSCode for scripting, it is not officially supported, and continued functionality is not guaranteed. We recommend using the Script Editor for the best results.
.png?cb=619a9f0e56bd55c1d20ca444215fa8b3)
Editing Application Scripts
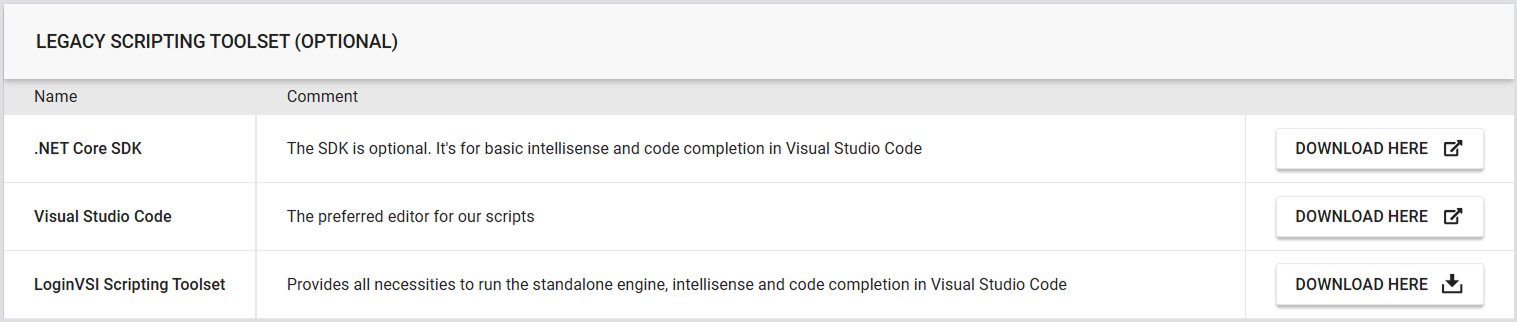
You can edit Application scripts using VSC. For this, ensure you have the necessary software:
-
Visual Studio Code with .NET Core support.
-
Scripting Toolset for code snippets, example workflows, and syntax highlighting.
Open Visual Studio and navigate to the extracted folder of the Script Toolset for customization.
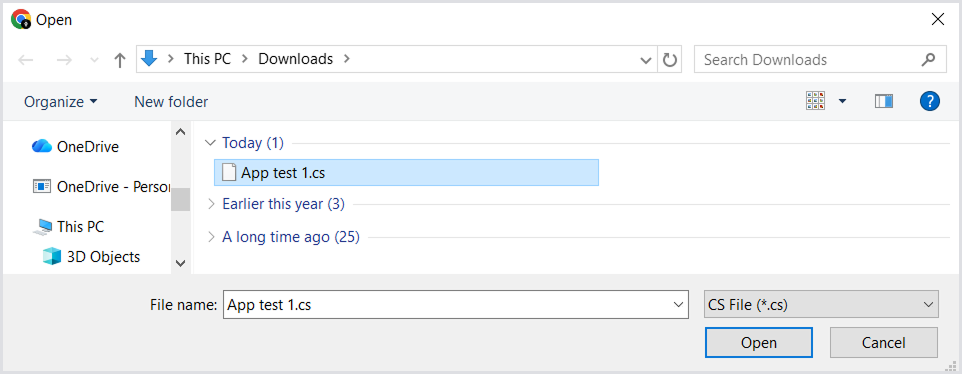
Once you’ve edited the Application script, click the Upload icon on the right to upload the script back to Login Enterprise. Login Enterprise checks scripts for syntax errors before uploading. Error messages provide clues for debugging.

Note: Script uploading will only support built-in scripting functions. For more information, see Scripting Functions Overview.
Troubleshooting Application Errors
To learn how to resolve Application errors, see Troubleshooting Application Errors.