Overview
While OpenID Connect is a modern and recommended protocol, many organizations continue to rely on SAML, which remains widely adopted and supported by most identity providers. To improve compatibility with existing enterprise environments, Login Enterprise supports SAML-based SSO in addition to OpenID Connect.
SAML provides a standardized, identity provider–agnostic approach. If an identity provider supports SAML, it can typically be integrated without provider-specific configuration. In contrast, OpenID Connect integrations may involve provider-specific differences at the implementation level, although the configuration experience for users is often similar across providers.
This section describes how to configure SAML-based SSO in Login Enterprise. The examples use Okta as the identity provider. Steps may vary depending on your provider, such as Microsoft Entra ID or others.
SAML SSO in Login Enterprise supports both identity provider (IdP)-initiated and service provider (SP)-initiated login flows.
How SAML Works
After SAML is configured:
-
Users are redirected to the identity provider for authentication.
-
If the user already has an active session with the identity provider, they are signed in automatically.
-
Otherwise, the user is prompted to enter their credentials.
User access in Login Enterprise is determined by the roles assigned to the user. For details, see Role-Based Access Control (RBAC).
Prerequisites
Before configuring SAML-based SSO, ensure that the following requirements are met:
-
An LDAP configuration is in place. For more information, see Configuring Authentication.
-
An identity provider (such as Okta) is configured.
-
A SAML application is created in your identity provider.
-
Users and/or groups are assigned to the application in your identity provider.
-
You have obtained the following values from your identity provider:
-
Identity Provider metadata URL
-
Identity Provider identifier (issuer)
-
Signing certificate or key
-
For instructions on creating and configuring a SAML application in Okta, see the Okta documentation.
Configuring SAML in Login Enterprise
-
Sign in to Login Enterprise using an account with administrative privileges.
-
Using a local admin account is recommended to prevent potential lockout if SSO is misconfigured.
-
-
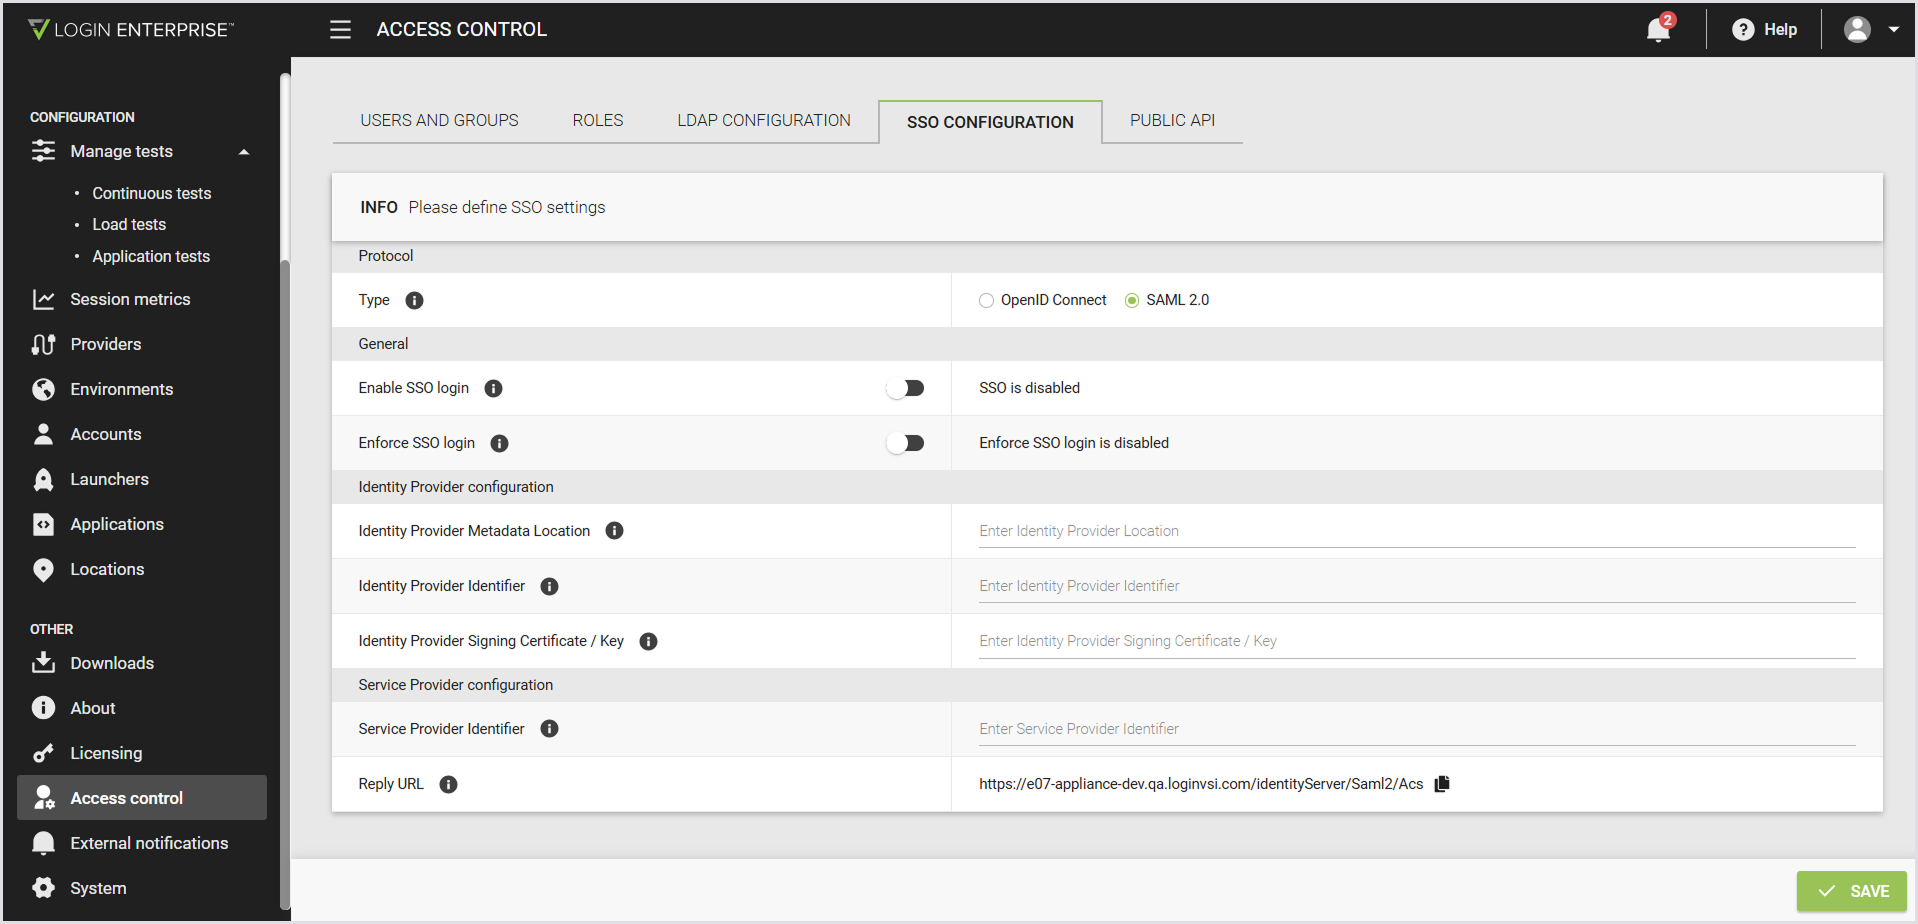
In the Login Enterprise sidebar menu, navigate to Access Control > SSO configuration.
-
Configure the following:
Note: Before configuring the Identity Provider fields, obtain the required values from your identity provider. These values are typically available in the provider’s SAML application settings or metadata. Because the exact steps and field names vary by provider, refer to your identity provider’s documentation.
|
Protocol |
|
|---|---|
|
Type |
The protocol used for SSO. For SAML, select the SAML 2.0 radio button. |
|
General |
|
|
Enable SSO login |
When disabled, the SSO login option isn’t available on the login page. |
|
Enforce SSO login |
When enabled, users can sign in only with SSO or a local admin account. |
|
Identity Provider configuration |
|
|
Identity Provider Metadata Location |
The URL to the SAML metadata XML provided by your identity provider. |
|
Identity Provider Identifier |
The unique identifier of your identity provider in the SAML configuration. |
|
Identity Provider Signing Certificate / Key |
The signing certificate or key used to validate SAML responses from the identity provider. |
|
Service Provider configuration |
|
|
Service Provider Identifier |
The Assertion Consumer Service URL that the identity provider redirects users back to after sign-in. |
|
Reply URL |
The Assertion Consumer Service URL that the identity provider redirects users back to after sign-in. |
-
Save the configuration.
Testing the Configuration
After you configure SAML-based SSO, verify that authentication works as expected.
-
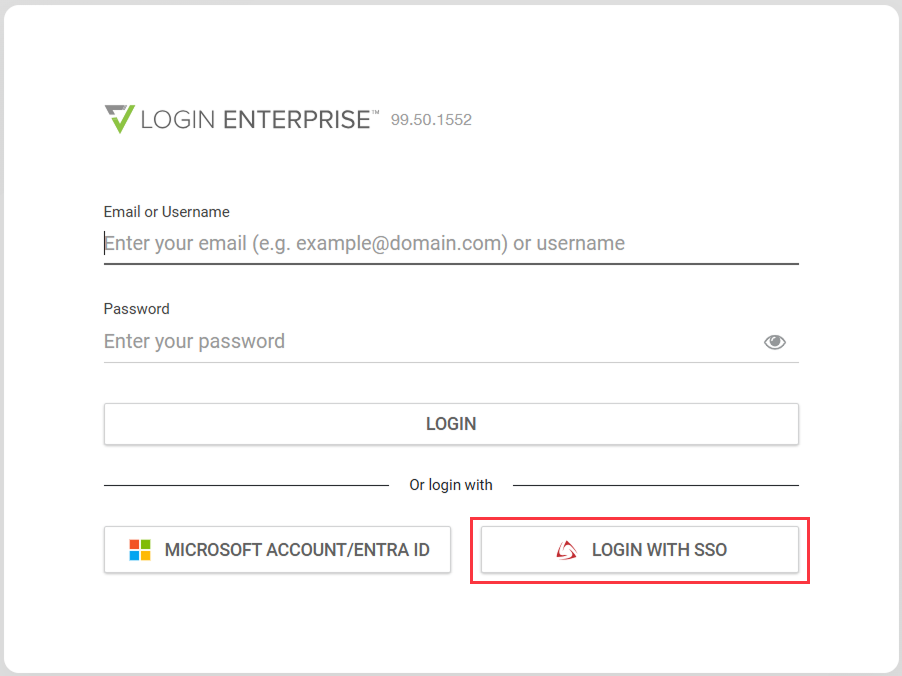
Sign out of Login Enterprise.
-
Select Log in with SSO.
-
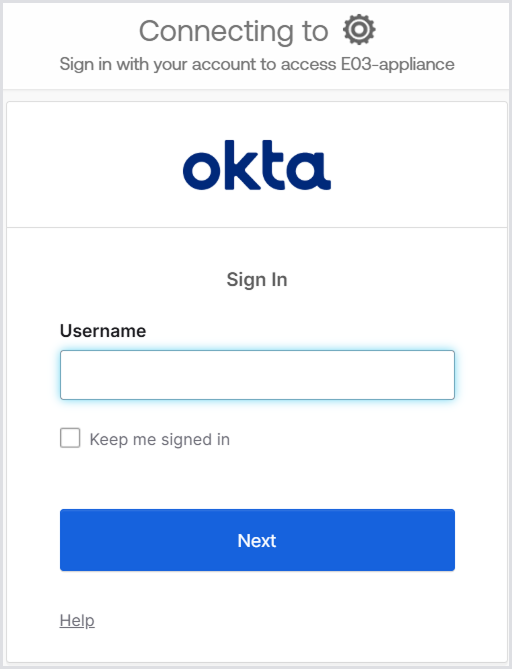
You are redirected to your identity provider's sign-in page (for example, Okta).
-
If you already have an active session with your identity provider, you are signed in automatically.
-
Otherwise, you are prompted to enter your credentials.
-
-
Optionally, confirm that you’re assigned the correct roles based on LDAP group membership.