Overview
Custom images let you import and manage operating system images for use in Windows 365. You can add images from different Azure sources: managed images or from an Azure Compute Gallery image.
Choosing an Image Source
-
Managed image: Use this option to import a single managed image from your Azure subscription.
-
Azure Compute Gallery image: Use this option to import an image from an Azure Compute Gallery, where images are organized by definition and version.
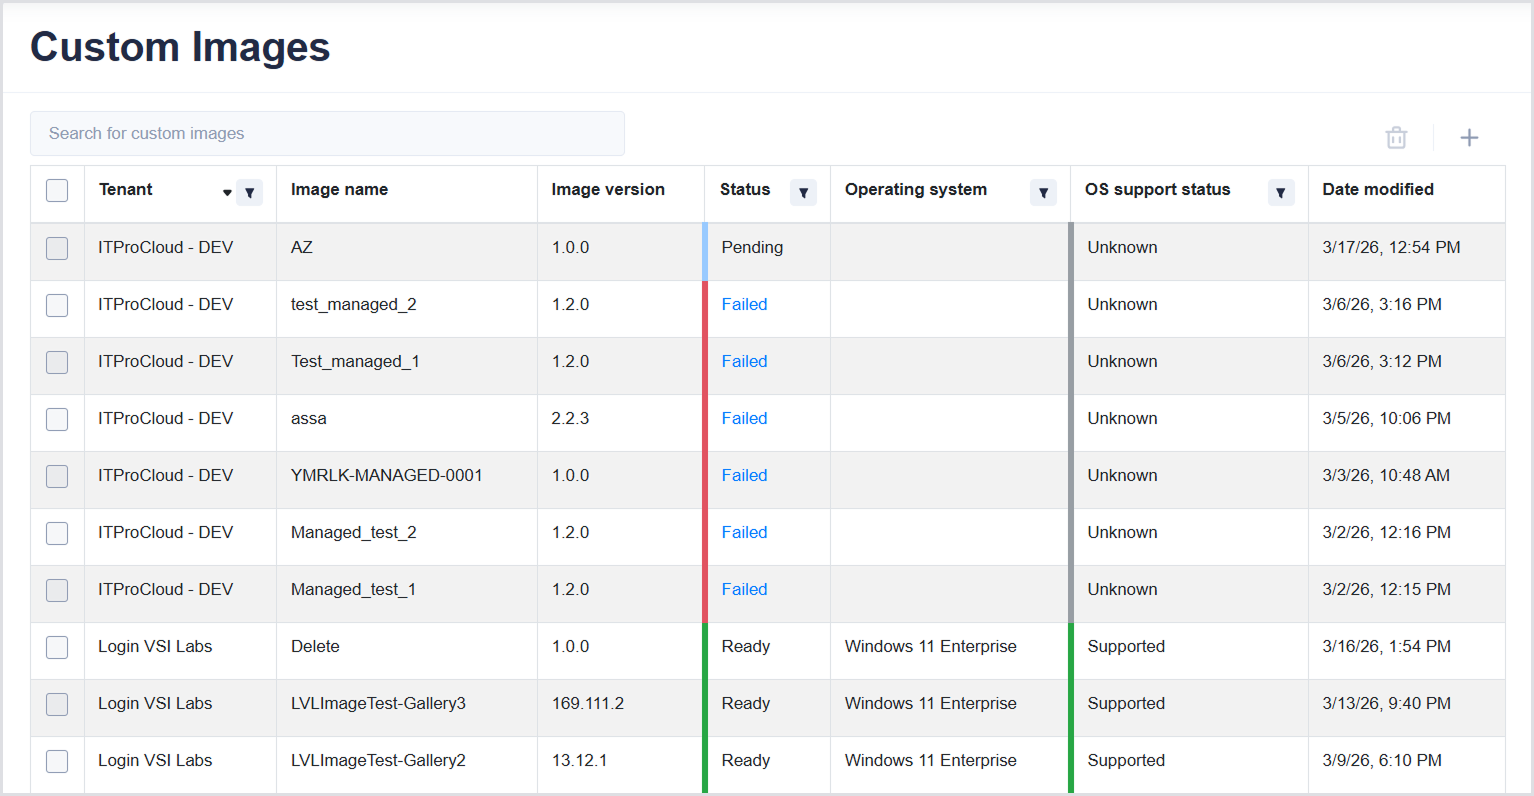
Viewing Custom Images
-
In Windows 365, select Custom Images.
.png?cb=828c6fe8add2f7eaddd1093737957f79)
-
(Optional) In the search box, enter a keyword to filter images. The table describes the information shown for each image:
|
Column |
Description |
|---|---|
|
Tenant |
The tenant associated with the image. |
|
Image name |
The name of the custom image. |
|
Image version |
The version of the image in |
|
Status |
The current state of the image.Possible values:
|
|
Operating system |
The operating system of the image (e.g., Windows 10 Enterprise). |
|
OS support status |
Indicates whether the operating system is currently supported. |
|
Date modified |
The date and time when the image was last updated. |
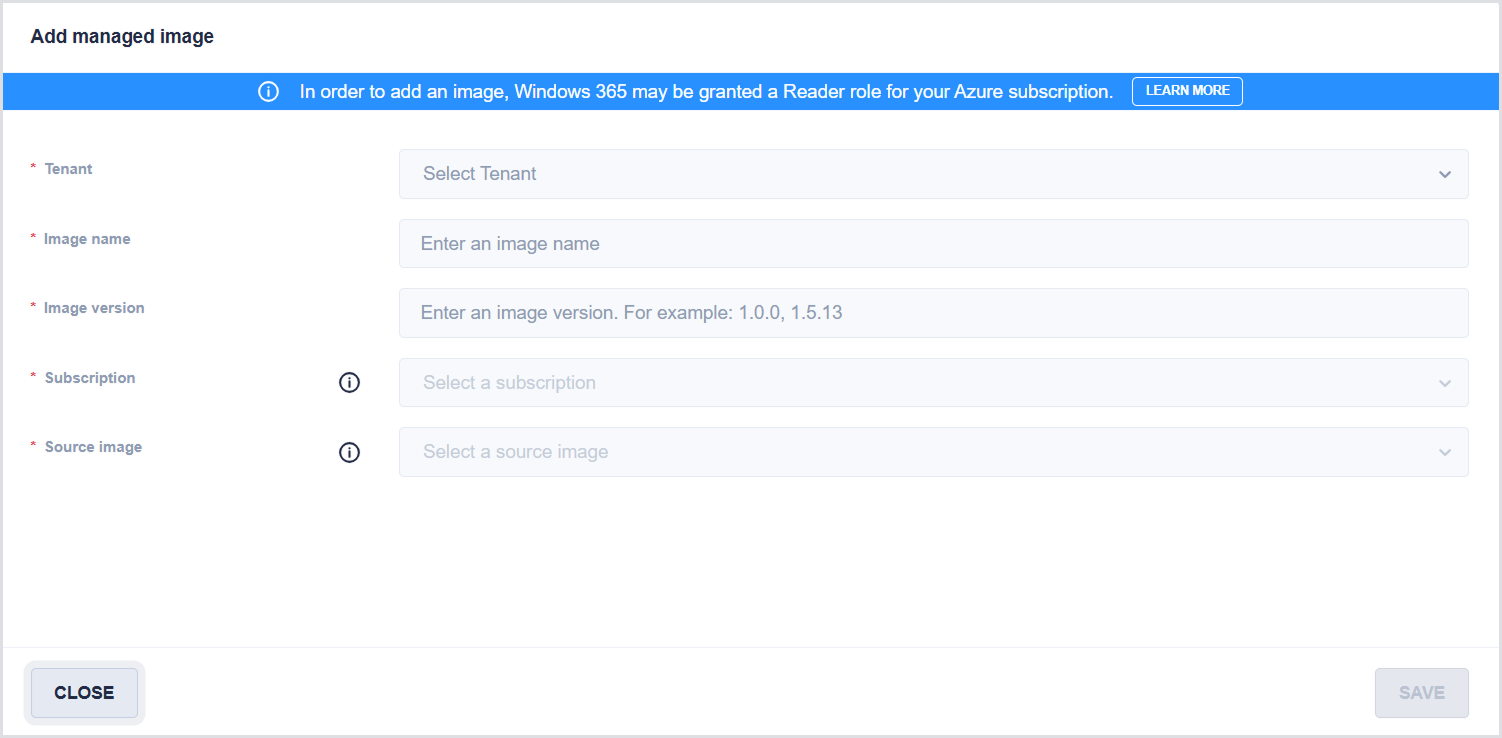
Adding a Managed Image
Before you begin, you must have access to the Azure subscription. Windows 365 may be granted the Reader role for the subscription. For details, see the Microsoft documentation.
-
To the right of the Custom Images table, click “+” and then select

-
In Add Managed Image, enter the following:
-
Tenant: Select a tenant.
-
Image name: Enter an image name. Allowed: letters (A–Z, a–z), numbers (0–9), and characters (-, _, .)
-
Image version: Enter an image version. The version must follow
Major.Minor.Patchformat (for example,1.0.0). Note that the combination of image name and version must be unique within a tenant. -
Subscription: Select a subscription. Note that as part of this process, you grant Windows 365 permissions in your Azure subscription.
-
Source image: Select a source image. This list includes images in the selected Azure subscription. Images must be generalized from generation 2 VMs running Windows 10 Enterprise or later.
-
-
Click Save.
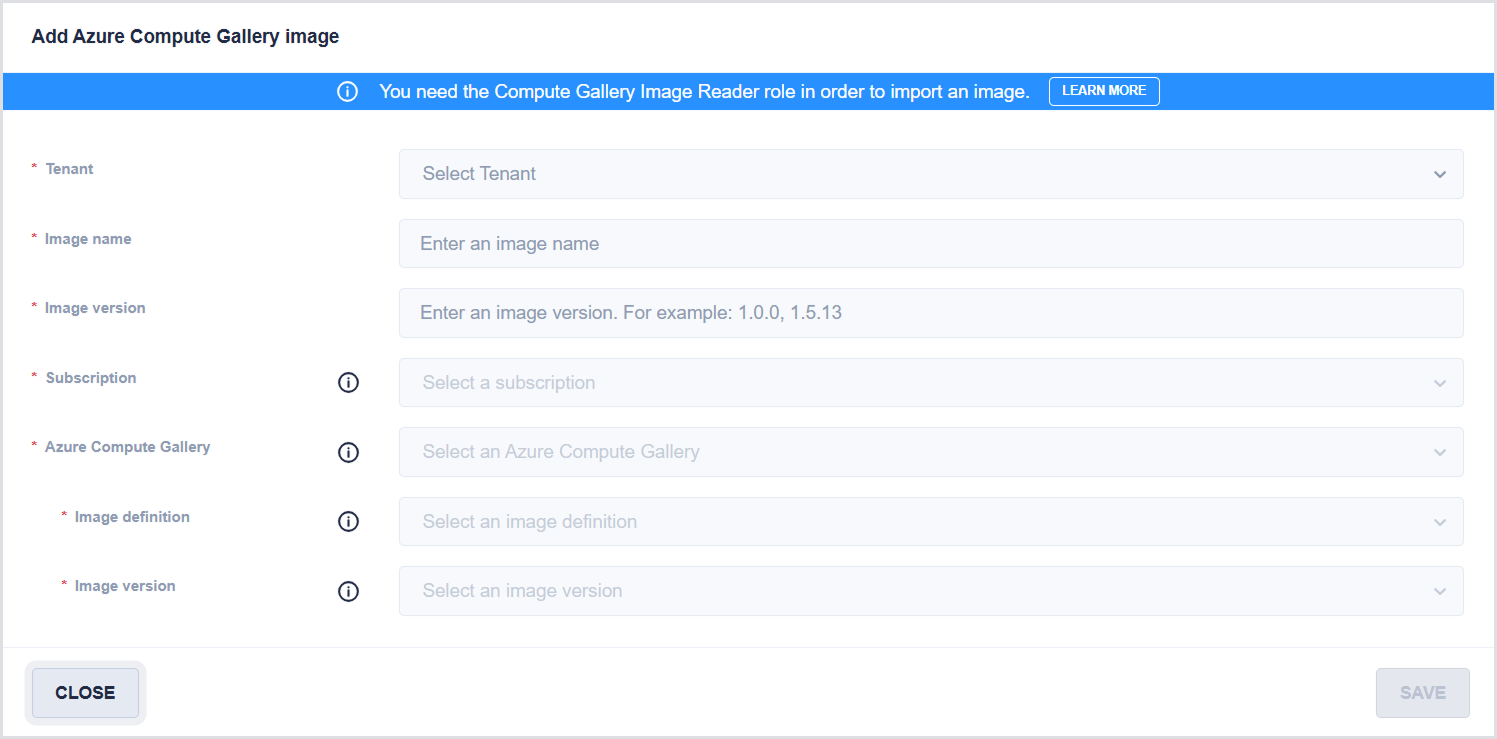
Adding an Azure Compute Gallery Image
Before you begin, you must have the Compute Gallery Image Reader role. To learn more, see the Microsoft documentation.
-
To the right of the Custom Images table, click “+” and then select

-
In Add Azure Compute Gallery Image, enter the following:
-
Tenant: Select a tenant.
-
Image name: Enter an image name. Allowed: letters (A–Z, a–z), numbers (0–9), and characters (-, _, .)
-
Image version: Enter an image version. The version must follow
Major.Minor.Patchformat (for example,1.0.0). Note that the combination of image name and version must be unique within a tenant. -
Subscription: Select a subscription. Note that you grant Windows 365 permission to access this subscription.
-
Azure Compute Gallery: Select a gallery. This is the Azure Compute Gallery that includes the image you want to import.
-
Image definition: Select an image definition. The image definition contains the image version you want to import.
-
Image version: Select an image version from the gallery. Note that the available versions depend on the selected image definition.
-
-
-
Click Save.
Updating Images
-
Select one or more images in the table.
-
Click Update.
Deleting Images
-
Select one or more images in the table.
-
Click the Delete (trash) icon.
-
Confirm the deletion.
The delete option is unavailable until you select at least one image.