Overview
Login Enterprise uses certificates to provide increased security as a standard part of its infrastructure.
It is common for enterprises to use their own Certificate Authority (CA), and therefore, Login Enterprise lets you customize which certificates are used.
Certificates are used by browsers for the Web UI and internal communications between the Launchers and the Targets being tested. The Launcher installs it automatically, and the Target Engine ignores SSL errors by default. However, the Target Engine stops ignoring SSL errors after importing your own certificate.
If you regenerate a certificate, install a new server certificate, or change the hostname, any installed Launchers must be reinstalled whenever your certificate changes.
Default Self-Signed Certificate
By default, Login Enterprise runs with a self-signed certificate on the virtual appliance. This lets you get Login Enterprise up and running quickly and requires you to proceed even though the certificate is untrusted.
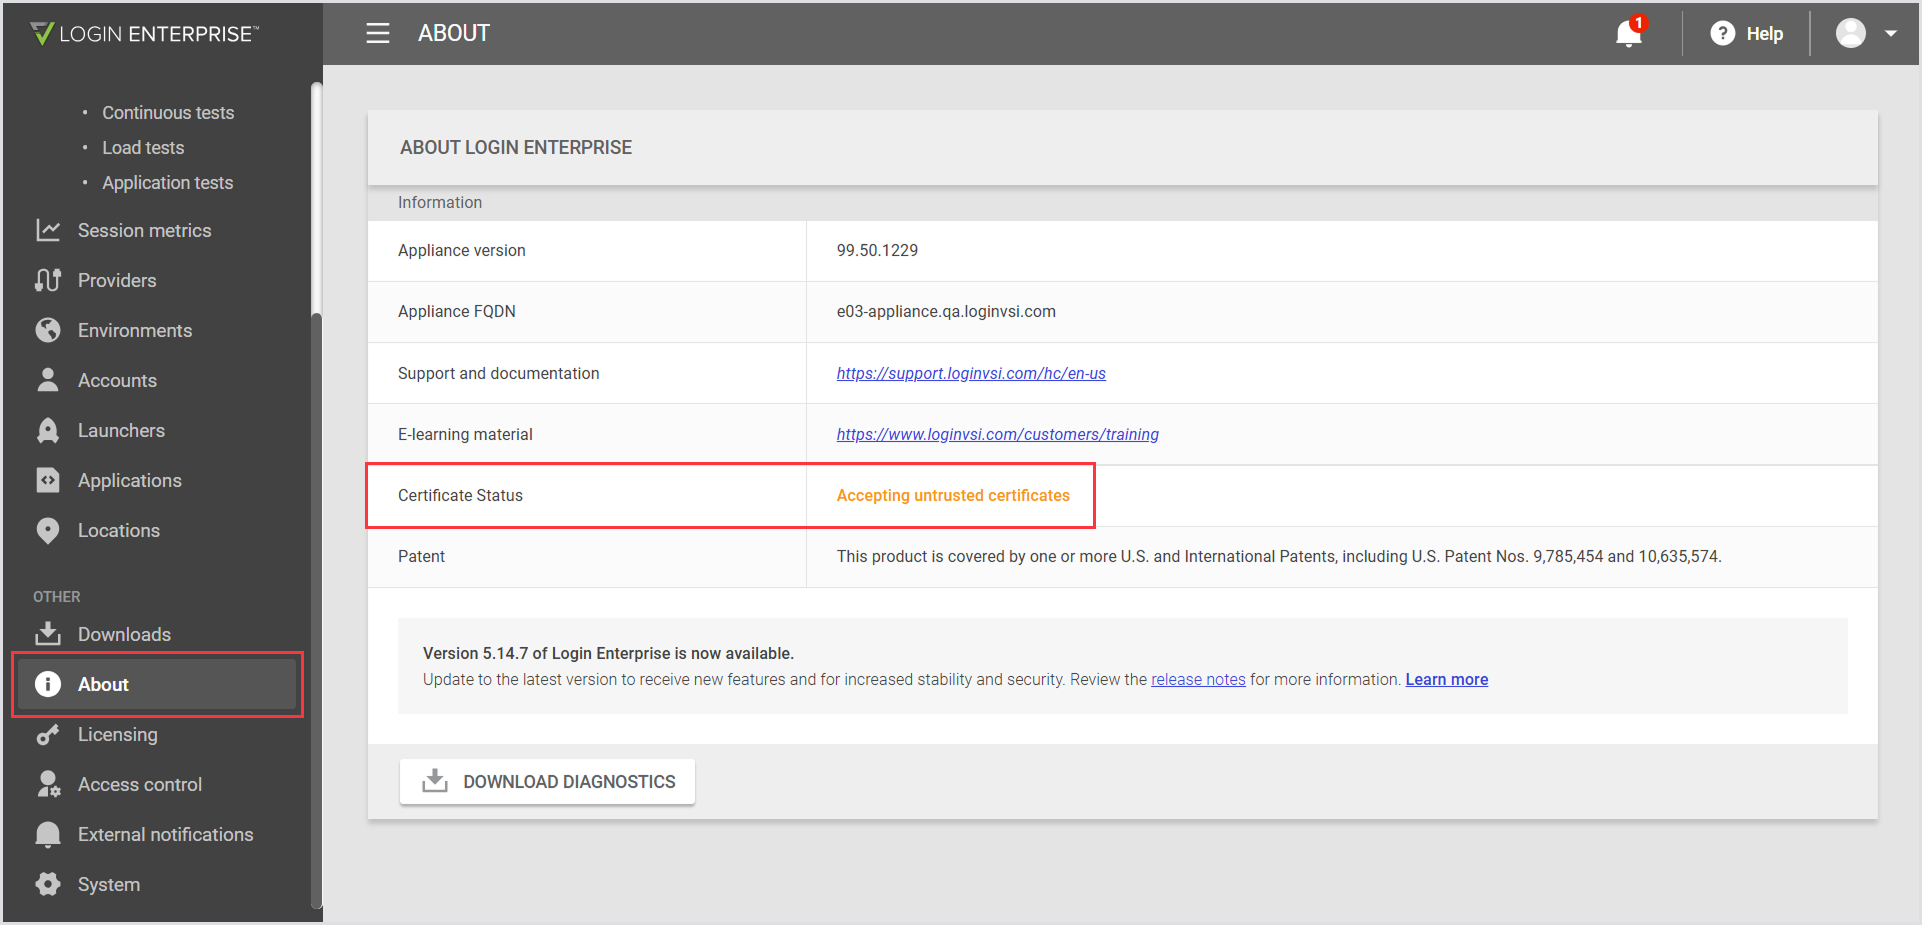
To verify the certificate status:
In the Login Enterprise sidebar menu, navigate to Other > About:
Installing a New Certificate
If your new certificate was issued by an internal Enterprise or Standalone CA, we recommend importing the root CA certificate and any intermediary certificates before proceeding with the new certificate install. This will ensure that the certificate chain is trusted on the appliance. For more information, see Importing a Root CA Certificate. For the certificate requirements, see Encryption Technology.
The PFX should only contain the server certificate and server key.
To install a new certificate:
-
Log in to the appliance console or use SSH to connect as
admin. For more information, see Using the Maintenance Menu. -
Use WinSCP or an equivalent SFTP client to upload the
pfxcertificate to the/certificatesfolder in the root of the appliance, e.g.,/certificates/mycert.pfx-
If using WinSCP, select the SFTP protocol for the connection type
-
-
Select Apply new certificate from the appliance console menu.
a. Specify the full path to thepfxfile, including the filename, e.g.,/certificates/mycert.pfx, and press Enter.
b. Specify the password for thepfxfile and press Enter. -
This will automatically switch the product to use the Trusted SSL mode. To verify the certificate status, refresh the Web UI to see that it is trusted, or in the Login Enterprise sidebar menu, navigate to Other > About. The certificate status will be available in the Information section:
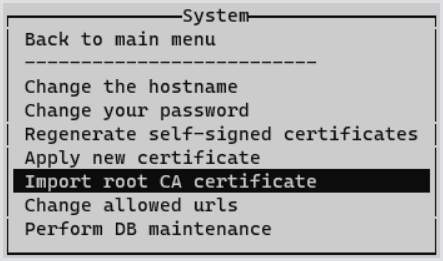
Importing a Root CA Certificate
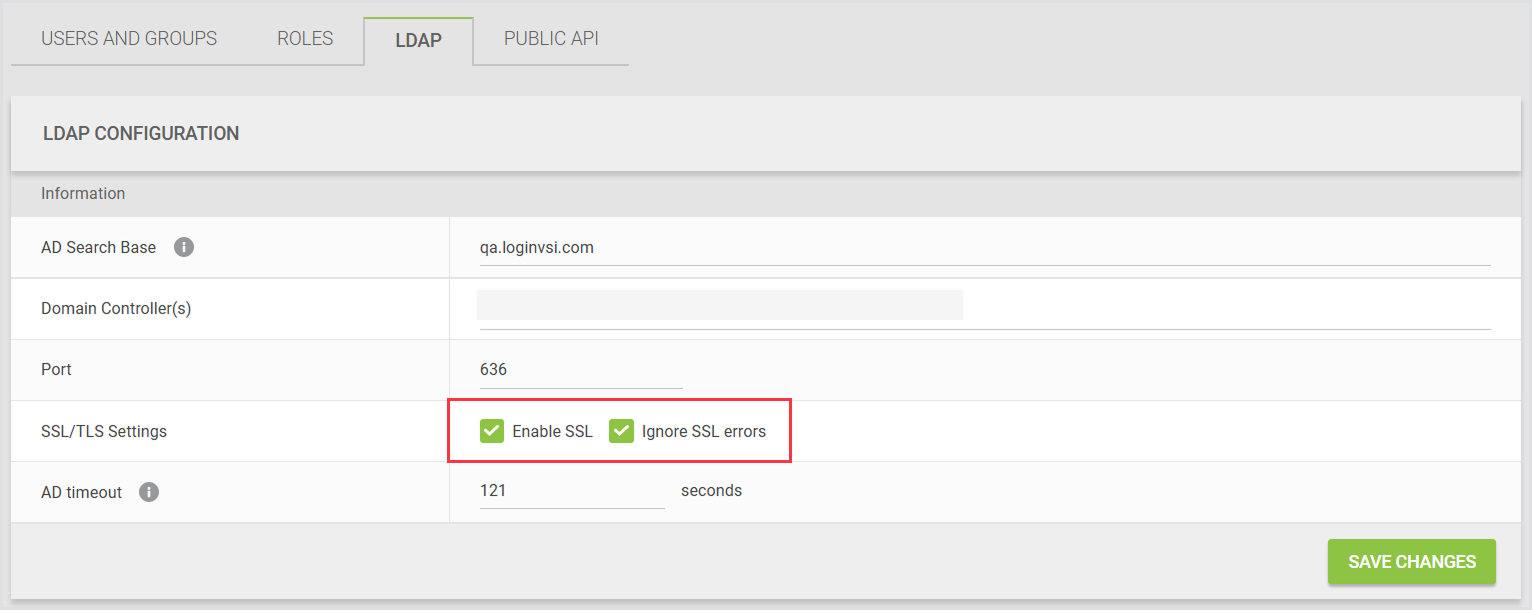
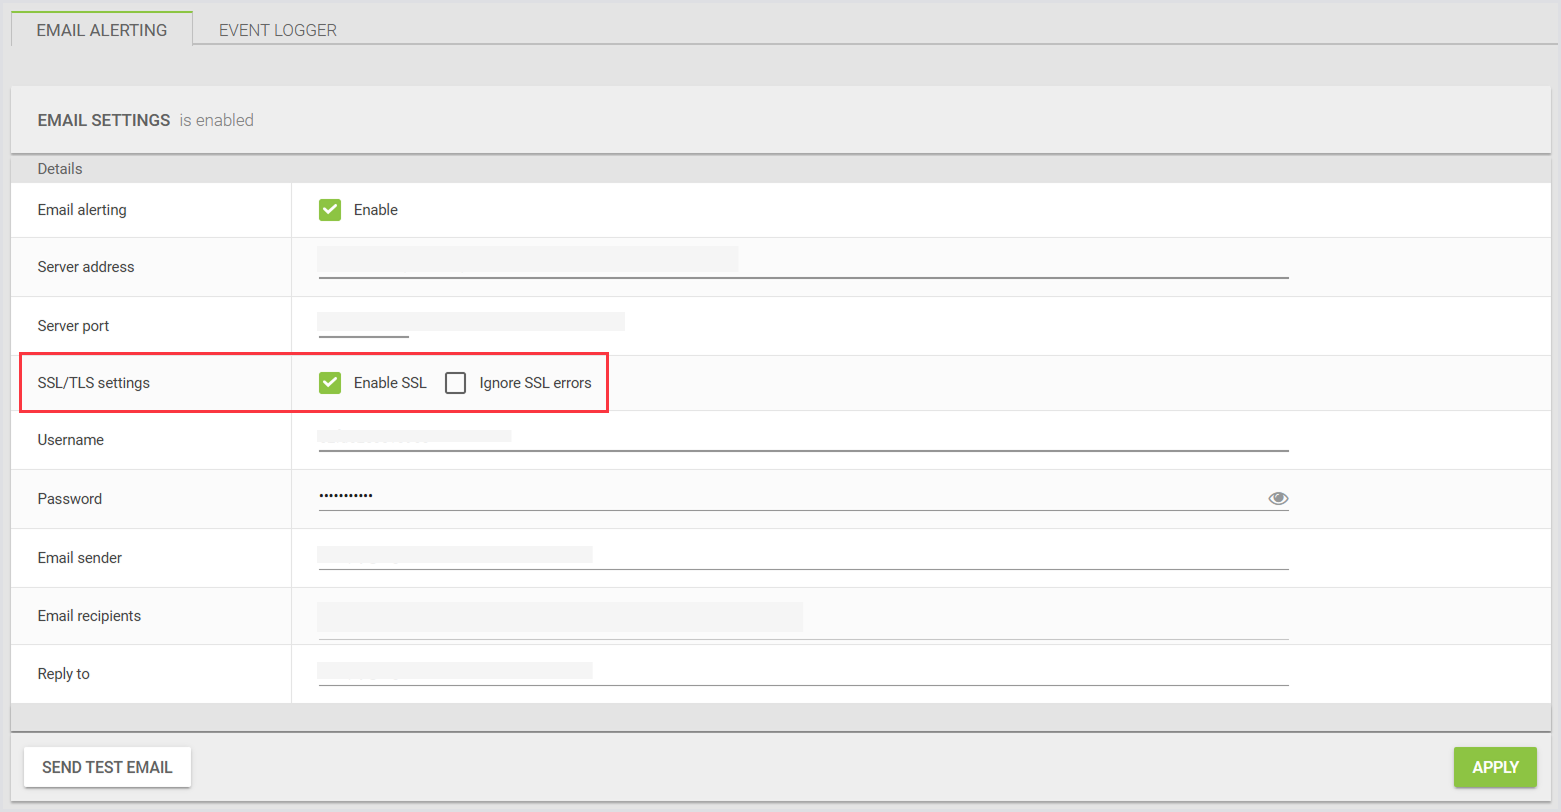
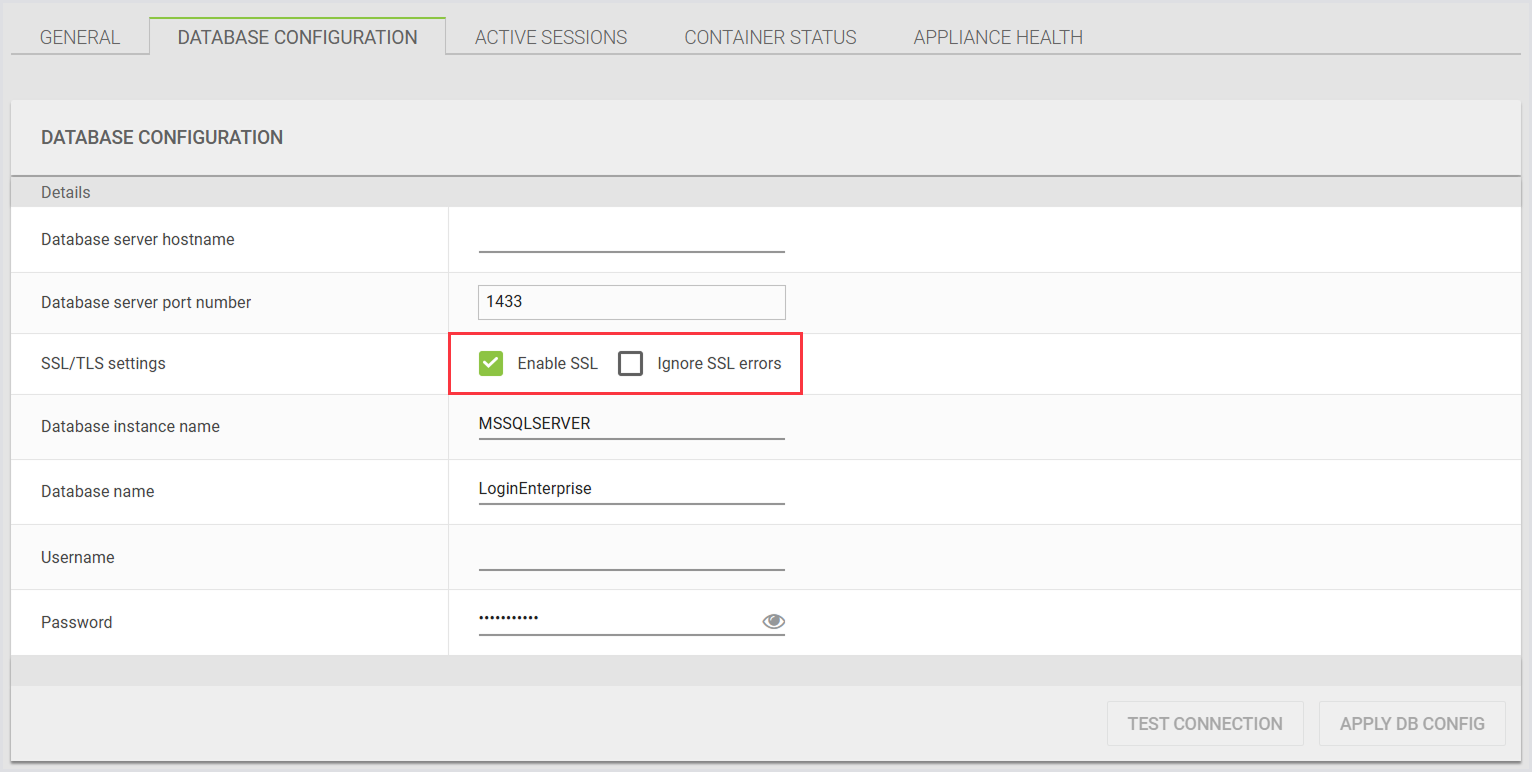
Login Enterprise lets you import root Certificate Authority (Root CA) certificates. This functionality is useful when you have an internal CA that generates certificates for your organization. Once a valid certificate is imported, if you use an internal CA, SSL can be enabled for the AD authentication, Email, and Database configuration settings.
There are 3 areas in the Login Enterprise where you can enable SSL:
-
Access control > LDAP
-
External notifications > Email alerting
-
System > Database configuration
To import a root CA certificate:
-
Use WinSCP or an equivalent SFTP client to upload a root CA certificate to the
/certificatesfolder in the appliance, e.g.,/home/admin/mycert.crt -
Log in to the appliance console. For more information, see Using the Maintenance Menu.
-
Navigate to Main > System > Import root CA certificate.
-
Specify the full path to the newly uploaded
.crtfile, e.g./home/admin/myCert.crt -
Restart the Login VSI services when prompted to apply the changes.
Switching Back to Self-Signed Certificates
At times, certificate installation may fail. If this is the case and you'd like to reuse the self-signed certificate supplied with the appliance, take the following steps:
-
Log in to the appliance console. For more information, see Using the Maintenance Menu.
-
Select Regenerate self-signed certificates from the appliance console menu.
-
This will automatically reset the product to accept any SSL certificate.
Troubleshooting
Problems after Applying a New Certificate
For problems after applying a new certificate, first make sure your root CA and any intermediate certificates are properly imported/installed on the appliance.
If the certificate being applied was issued by an External CA (DigiCert, Sectigo, GlobalSign, etc.), make sure your Appliance’s public certificates are up to date. For this, run apt install ca-certificates from Bash.
If the certificate was issued by an Internal Enterprise or Standalone CA, ensure the certificates in the trust chain (root and intermediates) have been uploaded to the appliance in the .pem (base64) format with the .crt extension and imported through the pdmenu > Import root CA certificate.
When a certificate is successfully imported, it should show 1 or more were “added.”
If it shows “0 added”, it could mean the certificate was already imported or that the certificate file extension was not .crt.
When using the Import root CA certificate option through pdmenu, the certificate will be copied to /usr/local/share/ca-certificates/, and a symbolic link to that file is created with the .pem extension in /etc/ssl/certs/. To verify that the certificates exist in the proper directory, run the commands below in Bash.
ls -la /usr/local/share/ca-certificates/
ls -la /etc/ssl/certs/ | grep "local/share"
Allowed URLs
The allowed URLs list contains a list of URLs that are allowed to be used to access the Login Enterprise and can be modified in the System > pdmenu. The first entry in the allowed URLs list should contain the FQDN of the certificate that was applied to the appliance. The appliance uses the first entry in the allowed URLs list as the ServerURL in the appsettings.json file for applications like the Launcher, Event logger, and Appliance Guard.
Some Certificate Requirements
Whatever the SANs of your certificate are, they must be:
-
DNS resolvable to your appliance, and
-
One of them must be the first entry in your ALLOWED_URLS key in the
/loginvsi/.envfile.
If your local hostname is not listed in the SAN field, and you can't regenerate the certificate to include it, consider changing the hostname to match the certificate. However, your ALLOWED_URLS and any client attempting to access the appliance must use a name in the SAN field, including a wildcard certificate pattern match, if a SAN exists. Otherwise, it must match the Subject field.
If you change the hostname, make sure you reset pi_guard along with restarting services to get the containers recomposed.
systemctl restart pi_guard
loginvsid restart
Ignoring Certificate Errors on Debian
We understand that some customers operate in environments where SSL communications are inspected or intercepted, leading to certificate verification errors when downloading packages with apt or our ISO with curl. These errors can disrupt your workflow and make it difficult to manage software packages efficiently.
To address this, we've introduced a feature in the PDMenu that detects SSL certificate issues during the update process. When a certificate problem is identified, you'll be prompted to allow insecure connections if needed. This feature modifies the commands to ignore certificate errors, specifically by adding the --insecure flag to curl and adjusting the configuration for apt.
The following sections provide step-by-step instructions on how to enable and disable the “Ignore certificate errors” option for both apt and curl.
Enabling "Ignore certificate errors" option
-
Open PDMenu.
-
Launch the PDMenu from your application menu or by running
pdmenufrom the terminal.
-
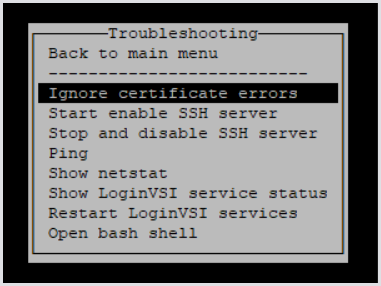
Navigate to the Troubleshooting section.
-
Use the arrow keys to select
Troubleshootingand pressEnter.
-
Select "Ignore certificate errors".
-
Find the option labeled “Ignore certificate errors” and press
Enter.
-
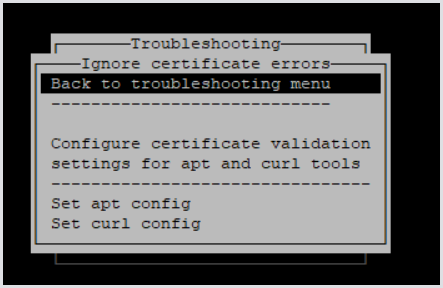
Configure certificate validation settings.
-
You will see the following submenus:
-
Set apt config -
Set curl config
-
Ignoring Certificate Errors for apt
-
Select "Set apt config".
-
Use the arrow keys to highlight
Set apt configand pressEnter.
-
Enable ignoring certificate errors.
-
Follow the on-screen prompts to configure
aptto ignore certificate errors. This will add the necessary configuration to theaptsettings.
After configuring apt to ignore certificate errors, you can verify the changes by performing operations that involve SSL connections. In cases where a certificate is expired, untrusted, or cannot be validated, appropriate error messages will be displayed, confirming that certificate validation is enabled.
Ignoring Certificate Errors for curl
-
Select "Set curl config".
-
Use the arrow keys to highlight
Set curl configand pressEnter.
-
Enable ignoring certificate errors.
-
Follow the on-screen prompts to configure curl to use the
--insecure flag. This will adjust thecurlcommand settings accordingly.
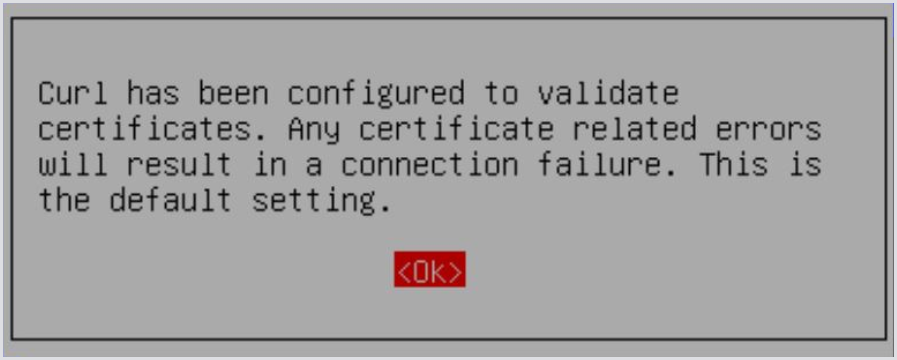
After configuring curl to ignore certificate errors, you can verify the changes by performing operations that involve SSL connections. In cases where a certificate is expired, untrusted, or cannot be validated, appropriate error messages will be displayed, confirming that certificate validation is enabled.
Disabling the "Ignore Certificate Errors" Option
-
Open PDMenu.
-
Launch the PDMenu from your application menu or by running
pdmenufrom the terminal.
-
Navigate to the Troubleshooting section.
-
Use the arrow keys to select
Troubleshootingand pressEnter.
-
Select "Ignore certificate errors".
-
Find the option labeled “Ignore certificate errors” and press
Enter.
-
Configure certificate validation settings.
-
You will see the following submenus:
-
Set apt config -
Set curl config
-
Restoring Certificate Validation for apt
-
Select "Set apt config".
-
Use the arrow keys to highlight
Set apt configand pressEnter.
-
Disable ignoring certificate errors.
-
Follow the on-screen prompts to remove or comment out the configuration that ignores certificate errors for
apt.
The certificate validation will be ignored.
Restoring Certificate Validation for curl
-
Select "Set curl config".
-
Use the arrow keys to highlight
Set curl configand pressEnter.
-
Disable ignoring certificate errors.
-
Follow the on-screen prompts to remove the
--insecure flagfromcurlcommands.
By following these instructions, you can effectively manage SSL certificate issues using the PDMenu interface, ensuring smooth package management. Remember to re-enable certificate validation once the immediate issues are resolved to maintain the security and integrity of your system.
Login Enterprise Services Not Starting
Various configuration errors can cause some of the Login Enterprise microservices to fail to start. The specific number of services not starting depends on the major version of Login Enterprise, but they have the same underlying cause. Below are some common factors known to cause this issue that are worth considering.
Starting 8 Services (v6) or 10 Services (v5)
SSL Certificate-related issues
Since the Appliance uses SSL communication between the containers, certificate problems can cause the appliance to be unable to determine that a service has started.
-
FQDN of the certificate does not match the first entry in the Allowed URLs or the Hostname of the Appliance.
-
A Certificate or Certificates missing (typically Root or Intermediate Certs).
-
Certificates not meeting the minimum requirements.
-
Certificates not including the correct purpose (Server Authentication).
-
FQDN of the certificate does not resolve to an address reachable from the appliance.
The first step would be to:
-
Log in to the Appliance through SSH using the admin account.
-
Go to Troubleshooting > Open bash shell, and run the command:
openssl s_client -connect FQDN:443 -showcerts | more
The FQDN you specify should be the name used in your certificate, set as the first entry in the Allowed URLs setting. Read the output to determine if there is a problem with an unreachable host, a name mismatch, or missing root CA certificates.
Alternatively, reverting to self-signed certificates allows the appliance to generate and apply its own SSL certificate. For more information, see Switching Back to SSL Certificates.
For troubleshooting the 'Services not starting' message, review the contents of the most recent /loginvsi/logs/ApplianceGuard*.log file. Or, use the following command:
journalctl -u pi_guard
If you want to follow the pi_guard log, use one of the following commands:
tail -f /loginvsi/logs/ApplianceGuard*.log
journalctl -u pi_guard -f
Based on the error messages that are encountered in the pi_guard log, you will need to take the appropriate action to resolve the issue.
-
For missing Root or Intermediate Certs, see Importing a Root CA Certificate. Please note that the steps will need to be repeated for each Root or Intermediate Cert, as only one is allowed at a time.
-
If you see a message related to a name mismatch in the
pi_guardlogs, check whether the FQDN of the Cert and the first entry in Allowed URLs match. For information on allowed URLs, see Changing Allowed URLs. -
If your FQDN is unreachable because it is intentionally outside the available network, you can work around this by adding the certificate’s FQDN to the localhost lines in /etc/hosts.
-
Or, you can regenerate your certificate to include both the external FQDN and the internal hostname as SANs in the certificate, and specify the internal hostname as the first Allowed URL entry.
For the encryption requirements for the SSL Certificate, see Encryption Technology.
The SSL Certificate must also be at least 2048 bits in length.
Starting 7 Services (v6) or 9 Services (v5)
If you are using an external Microsoft SQL Server database, the system will fail to come up if that database is unavailable. It will get stuck waiting at “9 Services”. Verify that the SQL server is operational and that your specific database is being served. If you are unsure whether you are using an internal or external database:
-
Log in to the Appliance through SSH using the admin account.
-
Go to Troubleshooting > Open bash shell, and run the command:
grep COMPOSEFILE /loginvsi/.env
The path of the Docker Compose file listed there will tell you whether it’s internal or external. If you don’t know what your configured database server is, or it has changed and you need to update the configuration, contact Login VSI Support at support@loginvsi.com.
Starting 8 Services (v5)
If you have run out of disk space, you may get stuck in a state waiting for 8 services to start up. You may still be in this state after expanding the disk and the filesystem. To see whether you are out of disk space:
-
Log in to the Appliance through SSH using the admin account.
-
Go to Troubleshooting > Open bash shell, and run the command:
df -k /
If you are out of space, follow the instructions on expanding the Login Enterprise disk space to recover. If you still can’t get all the services started, contact Login VSI Support at support@loginvsi.com.
In rare instances, you may see a message stating 'Starting 8 Services' that does not progress. This is likely to occur on an Appliance where an external database has been configured. If the database connection was set up in 4.6. x or prior and has not been reapplied since it was set up, the related connection string may be missing some key parameters.
The resolution to this issue is to log in to the Login Enterprise and reinitialize the database connection information. Once the connection is reinitialized, you may need to restart the services or reboot the Appliance for the services to come back online.
APPLIANCE_GUARD_URL mismatch issue
Appliance Guard is the service that monitors the Login Enterprise services. If it is misconfigured, your services will be unable to start correctly. To fix the mismatch issue, take the following steps:
-
Access the Appliance’s bash shell via the troubleshooting menu.
-
Check the IP address of the Docker network adapter.
Use the following command to check the IP address associated with the Docker network adapter:
ifconfig docker_gwbridge
This command will display detailed information about the specified network adapter, including its IP address.
-
Update the APPLIANCE_GUARD_URL
Once you have identified the IP address associated with the docker_gwbridge interface, you need to update the APPLIANCE_GUARD_URL configuration accordingly. This involves manually editing a configuration file. Edit the file /loginvsi/.env and find the APPLIANCE_GUARD_URL entry.
-
Restart services
Run loginvsid restart or select the Restart LoginVSI Services in the Troubleshooting section of the menu. Wait for the services restart to complete.
-
Test connectivity
Test the connectivity of your appliance to ensure that it can communicate properly using the updated APPLIANCE_GUARD_URL configuration.
By following these steps, you should be able to resolve the APPLIANCE_GUARD_URL mismatch issue and ensure that your appliance functions correctly within the Docker environment using the docker_gwbridge interface.
If you have questions or need additional information about the certificates, feel free to contact our support at support@loginvsi.com.