Overview
The Web Recorder v1 is a tool integrated into the Script Editor to capture user interactions within web applications. Web scripts recorded with the new Web Recorder use Playwright. This version supports a subset of actions and is optimized for browser-based apps. Some features are still under development, and limitations are described in the related section.
-
For general information on the Script Recorder and related use cases, see Using the Script Recorder.
-
For an overview of Playwright functions, the specific commands used to automate and interact with web applications using Web Recorder v1, see Web Recorder Functions (Playwright). In most cases, you do not need to work with those functions directly if the recording plays back successfully as captured. That page is intended primarily as an advanced reference for users who need to review, adjust, or extend recorded functions.
Getting Started
Download the latest Script Editor package containing the Web Recorder v1 from your admin or setup email. For details, see Downloading and installing the Script Recorder.
Creating a New Application
-
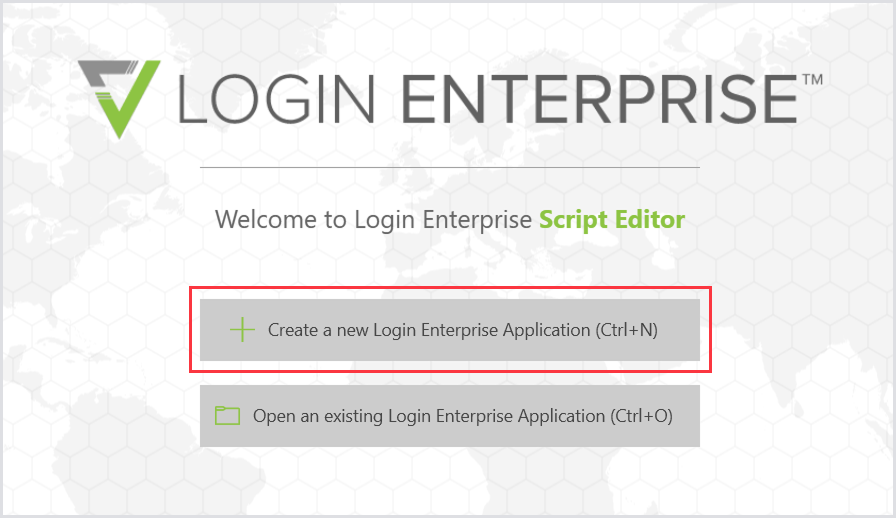
In Login Enterprise Script Editor, click Create a new Login Enterprise Application.
-
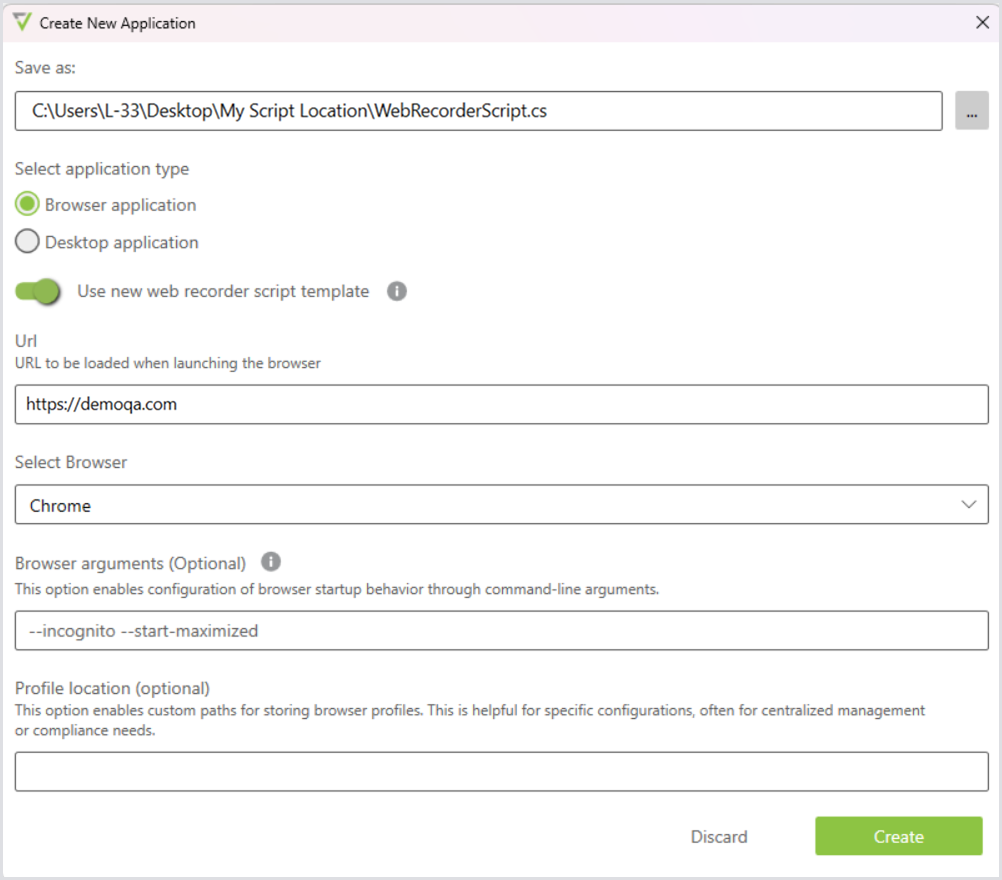
Click the three-dot icon to the right of Save as, choose a folder for the script, and enter a file name.
-
In the Select application type, select Browser application.
-
Next to Use new web recorder script template, enable the toggle to use Web Recorder, which creates the web script in Playwright format.
-
In the URL, enter the start page of your web application.
-
In the Browser, select your preferred browser, e.g., Chrome.
-
In Browser arguments (Optional), configure how the browser starts by entering command-line arguments, if needed. For example, you can add flags to enable specific features or disable extensions. For more information, see Using Browser Arguments via a Magic Comment.
-
In Profile location (Optional), enter a custom path for storing the browser profile if your environment requires centralized management or compliance-related configurations. Otherwise, leave this field blank.
-
Click Create to generate the script template. Once the template is created, the Record button appears; click it to start the new recording session.
Note: Web Recorder uses the default browser installed on your machine.
Starting the Recording: Recording the Script
In the Script Editor top menu, click Record to start the recording.

When the recording starts, a player opens where you can perform actions.
The web page must be DOM-ready before the Recorder can highlight UI elements. Once it is, the Recorder draws green borders around the elements so you can see which ones you're recording.
Web Recorder supports the following actions:
-
Mouse scroll
-
Left click
-
Right-click (Browser context menu clicks are not supported)
-
Double-click
-
Typing and special keys (Enter, arrows, etc.)
-
Hover actions using the hotkey Alt + H
-
Browser JavaScript popups (alert, confirm, prompt)
-
Interactions within iFrames
-
Browser arguments
When hover capture is enabled, all hover events are recorded until you disable it. Use this feature carefully, as there are no visual indicators when it is active. Hovering over an element before enabling the hotkey will not capture it; you must move away and back.
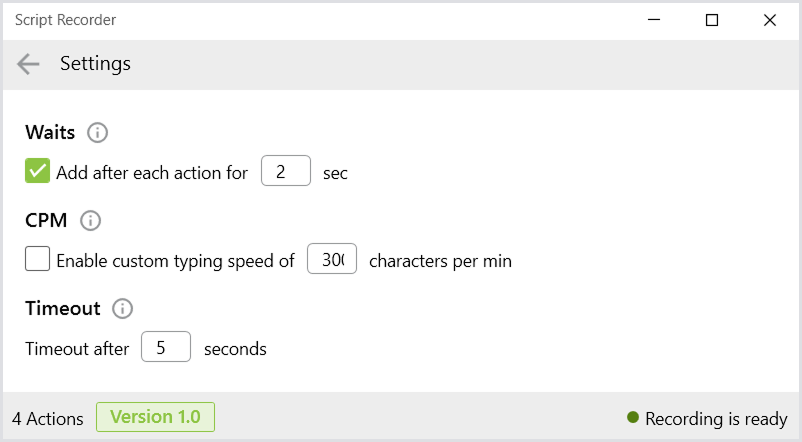
You can adjust waits and timeouts after the recording is complete and before generating the script. By default, the recorder applies a 2-second wait and a 5-second timeout to each step. You can change these default values in the General Settings, or modify them per action.
Stopping the Recording: ScriptResultWindow
When you stop the recording, the ScriptResultWindow shows an overview of all recorded steps (before generating the script, right after the recording was stopped).
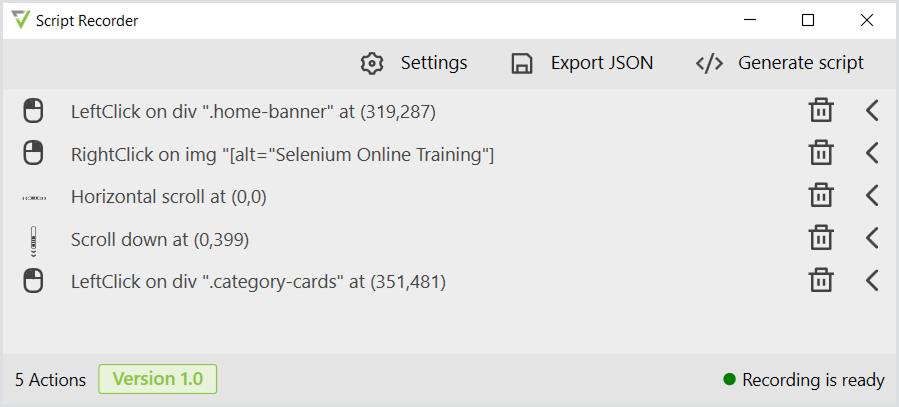
In the Overview screen, you can adjust Settings, export the script as JSON, and generate the script to run it.
Settings
General
Note: Changes made in General settings apply to all action settings.
|
Option |
Description |
|---|---|
|
Waits |
Adds a pause after each recorded step in the script. |
|
CPM (Characters Per Minute) |
Adjusts typing speed. If you leave the checkbox unselected, the default value will be used. If you select the checkbox, the CPM value will appear in the script. The default is 300 characters per minute. |
|
Timeout |
Specifies how long the Recorder repeatedly attempts to find the target element before the action fails. If the element is not found within the timeout, the action fails. The default is 5 seconds. |
Action
Note: Changes made in Action settings apply only to the selected action.
The following settings are displayed in the UI but aren’t currently supported: Recording interaction, Mouse move, and Continue on error.
|
Option |
Description |
|---|---|
|
Waits |
Adds a pause after each recorded step in the script. Mainly used to make script execution more realistic. Avoid adding waits between timed (Timer) actions if they would artificially increase the recorded measurement. |
|
CPM (Characters Per Minute) |
Adjusts typing speed. If you leave the toggle unselected, the default value will be used. If you select the toggle, the CPM value will appear in the script. The default is 300 characters per minute. |
|
Timeout |
Specifies how long the Recorder repeatedly attempts to find the target element before the action fails. If the element is not found within the timeout, the action fails. The default is 5 seconds. |
|
Selector |
Lets you choose and test a selector on recorded actions. For details, see Selector. Note: Selector testing is available while the recording is paused, because the browser page must still be attached. If the recording is stopped, the browser is closed, and selector testing will not work. |
|
Inner text |
Optional inner text filter. It is passed to Playwright as ‘innerText' and used by the Engine’s text-narrowing cascade. To learn more, see Inner Text. |
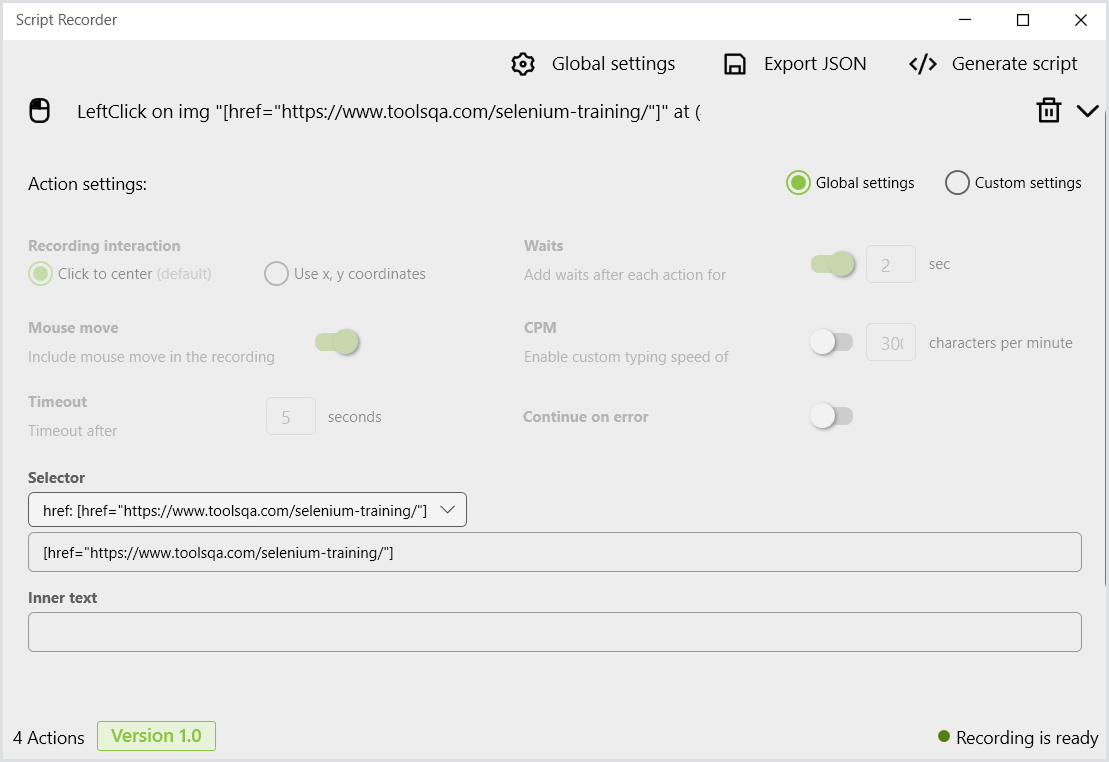
When you open an action step, the settings are shown automatically. Action steps can use global settings or custom settings:
-
Global settings: The action step uses the global settings. The settings are read-only and can't be changed in the action step.
-
Custom settings: The action step uses custom settings. Select this option to make the fields available for editing in the action step.
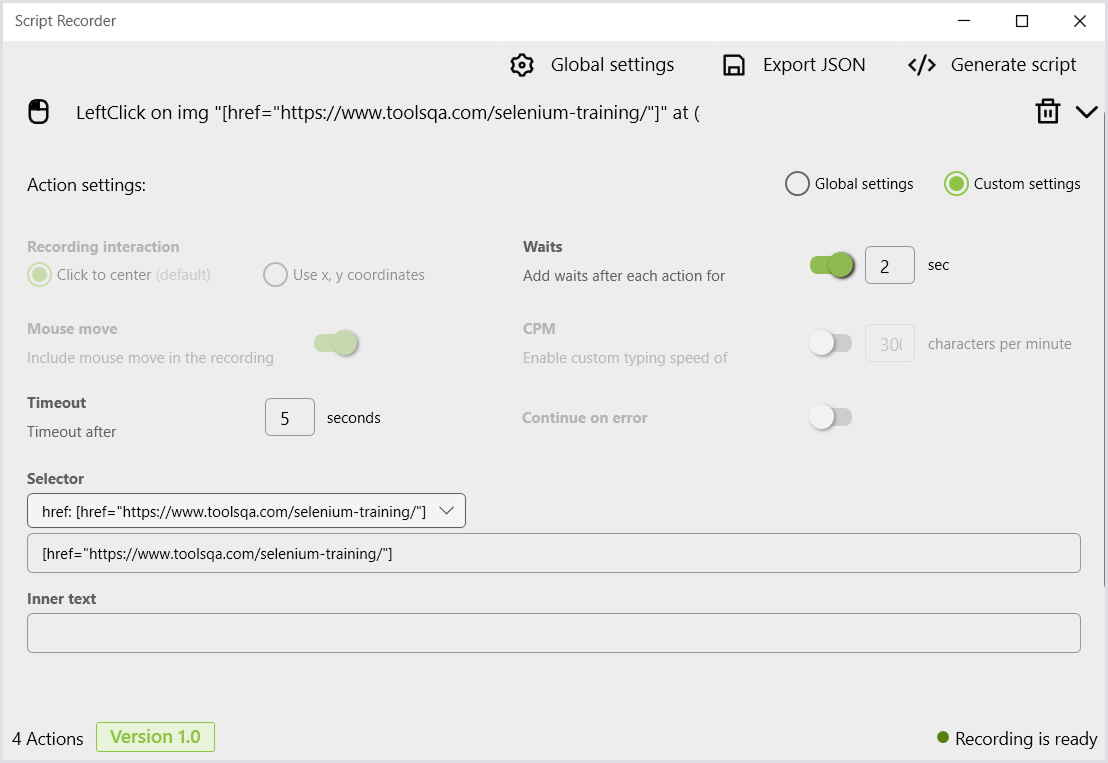
Note: Selector and Inner Text parameters are always available for editing and can be configured for both Global and Custom settings. To learn more, see Selector and Inner Text.
Editing an Action Name
You can change the name of each action to make it more descriptive. The action name is shown in the script as a comment before the corresponding step.
To edit an action name:
-
Hover over the action.
-
Select the pencil icon.

-
Enter a new name.
-
Click Submit.
Selector
When you record actions, the Recorder detects the underlying DOM structure and generates selector candidates to identify each web element.
The Recorder checks these candidates against the page layout and automatically assigns the first option that matches exactly one element, using this priority order:
-
test-id: Dedicated automation attributes (like
data-testid). Most stable. -
id: The element's unique HTML ID.
-
form: Form-specific attributes (
name,placeholder, orfor). -
href: The hyperlink destination URL (links only).
-
accessibility: Labels used by assistive tech (
aria-label,alt, ortitle). -
general: The shortest unique CSS path.
-
attr: CSS paths using generic attributes. Most brittle; used as a last resort.
You can choose or override the selector while the recording is paused, then test whether the selected selector resolves to the intended element.
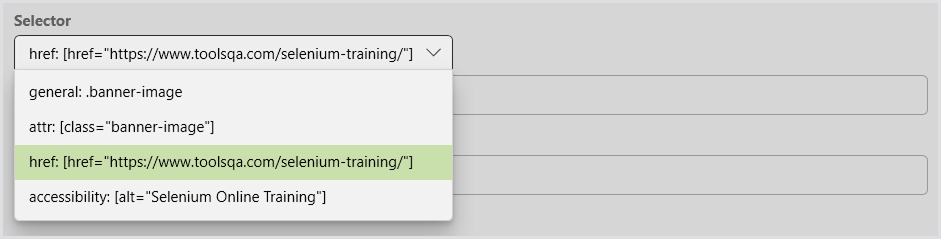
Note: If a higher candidate matches multiple elements, the Recorder skips it and moves down the list. If no single selector is unique, the element's innerText is used as a tiebreaker.
Filtering During Recording
The Recorder automatically discards unstable data during recording, including session-randomized IDs (such as :r1:), state classes (such as -hover or -active), and direct clicks on icons inside buttons (the Recorder automatically targets the parent button instead).
Element Resolution During Playback
During test playback or when using the Test button, the Engine uses a fallback chain to locate the element, stopping at the first step that finds a single match:
-
Inner text alone: If the text is unique, the selector is ignored entirely. The Test button follows the same resolution logic as playback, so the test result should match what the generated script will do.
-
Selector alone: Used if the text matches multiple elements.
-
Selector + inner text combined: Used if steps 1 and 2 are both ambiguous.
-
Partial selector + inner text: The final fallback strategy.
Inner Text
The innerText refers to the text content within a web element. The Engine uses it during playback in the following ways:
-
Recording tiebreaker: If no selector candidate is unique on its own (a candidate matches two or more elements), the Engine automatically uses the element's
innerTextas a tiebreaker to find a unique match. -
Playback step 1: During test execution or when you click the Test button, the Engine evaluates the
innerTextalone first. If the text is completely unique on the page, the Engine matches the element immediately and does not evaluate the selector.
Note: The Engine applies the combination of a selector and innerText (Step 3 of playback) only when the text alone and the selector alone are both ambiguous.
Running the Script
-
In the ScriptResultWindow, click Generate script.
.png?cb=f074efbf77f3755838396d672d2a60c5)
-
Copy the generated script to the clipboard:
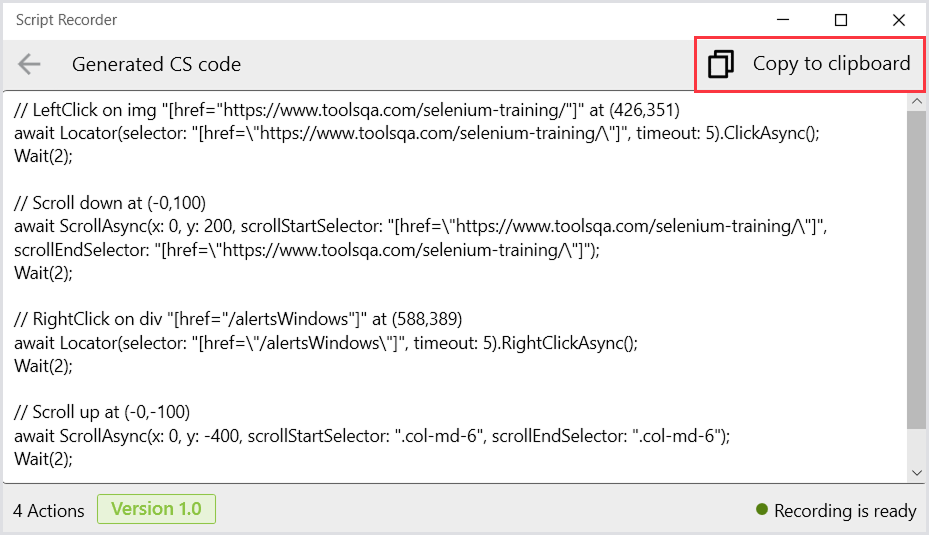
Note: Script Recorder doesn’t support notifications, such as “Copied to the clipboard.” So, once you copy the script to the clipboard, it's saved; the Recorder is just not letting you know. You can now proceed and paste the script into the Editor.
-
Paste the copied script into the Script Editor:
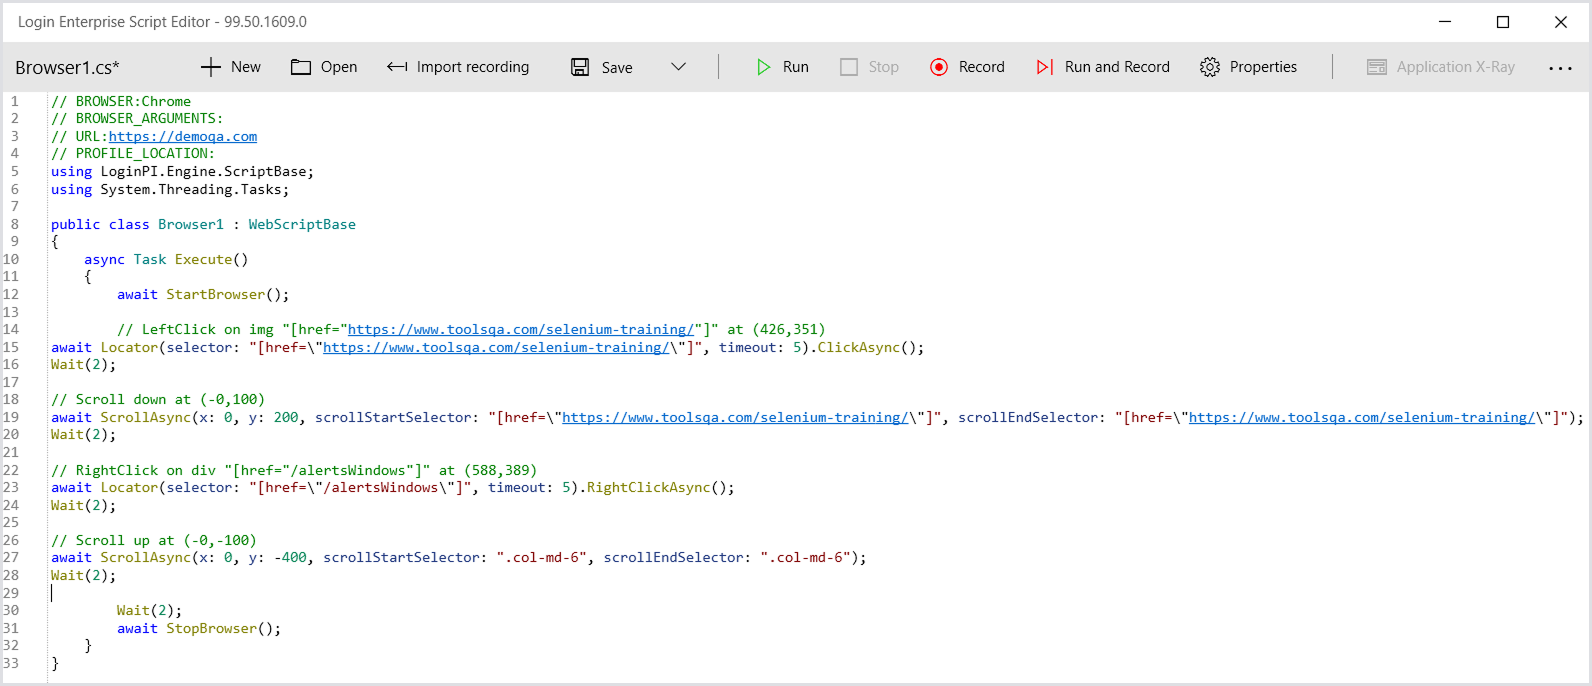
-
In the Script Editor top menu, click Run to run the script.

The script should be available under the Debug Output tab:
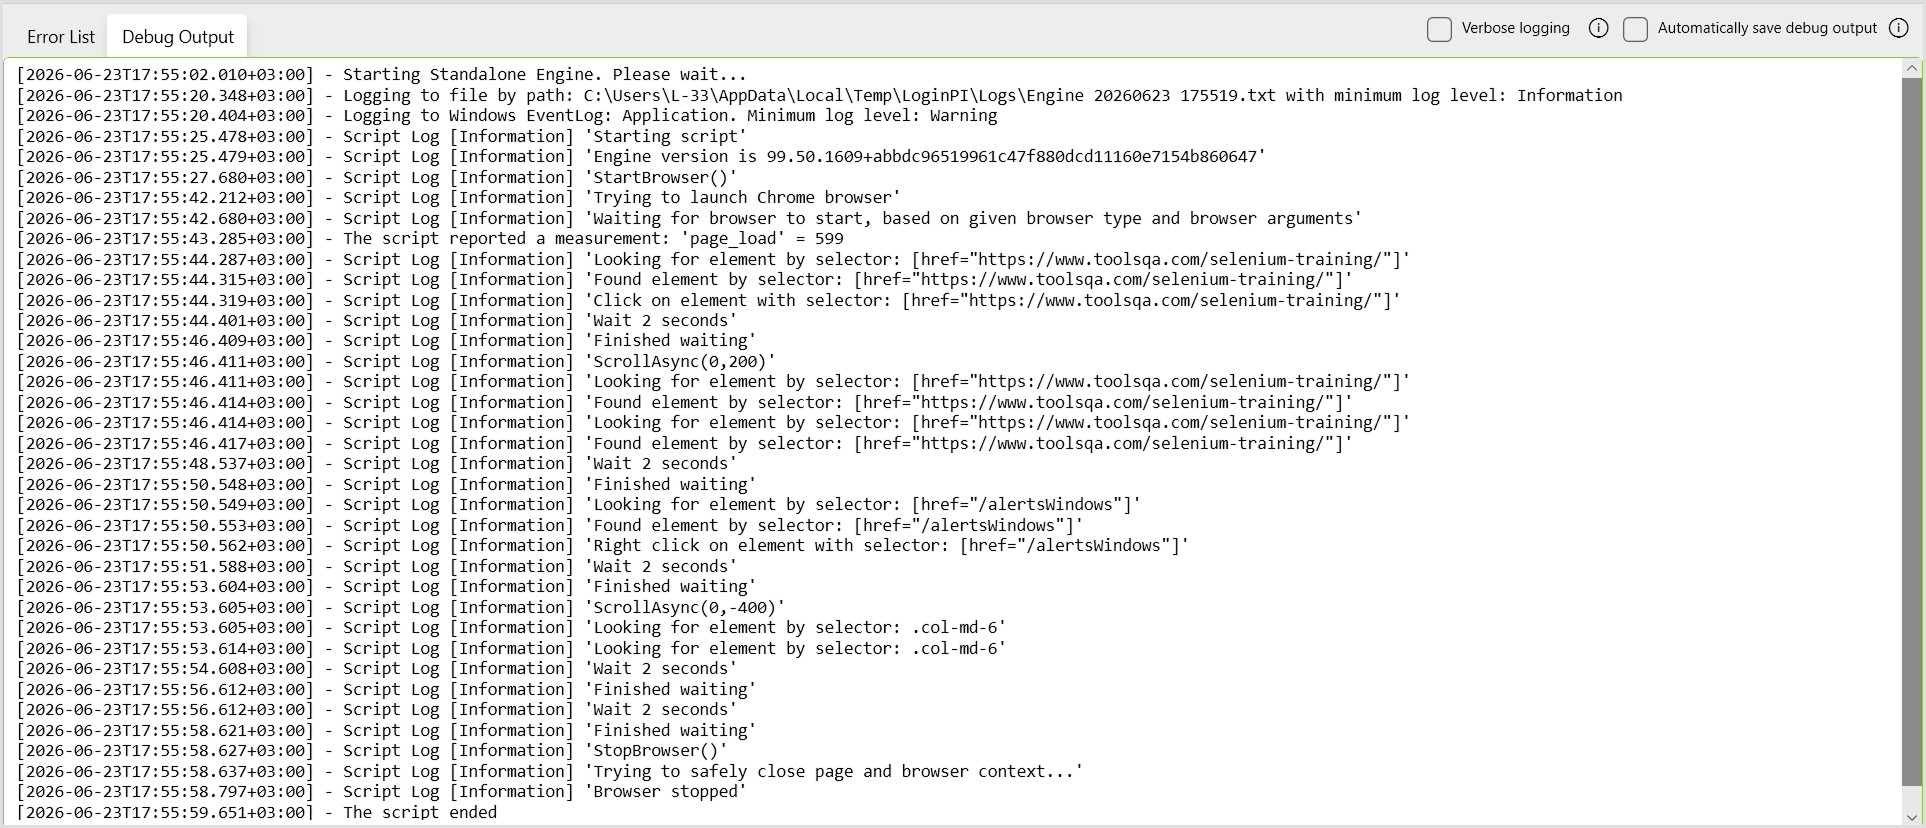
For more information on using this part of the Recorder, see Debugging with Script Editor.
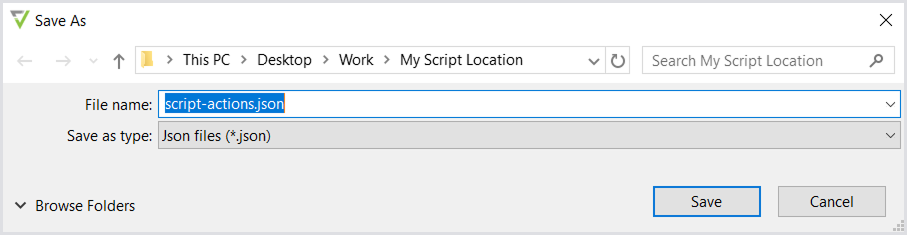
Exporting the Script as JSON
This option provides additional information on script failures, facilitating feedback submission and analysis.
Importing the Script as JSON
Alternatively, if you already have an existing script recording (JSON file), click Import recording in the Script Editor top menu and proceed with the steps described above.

Restrictions and Limitations
|
Aspect |
Details |
|---|---|
|
Supported applications |
Browser-based only. Browser apps such as Teams and Spotify are not supported. |
|
Supported functions |
Not all functions are supported in the new template. For details, see the Web Recorder Functions (Playwright). |
|
Framework used |
Uses the Playwright framework. Mixing Playwright scripts with Selenium or WinApps scripts is unsupported. |
|
Missing features |
Run and record toggle, click coordinate settings, and mouse movement playback (from WinApps recorder). |
|
Unsupported actions |
Mouse drag, multi-tab recording, right-click browser menu, key combinations (e.g., Ctrl+C/V). |
|
Wildcard selectors |
Not supported. |
|
Web Recorder script template |
Code snippets captured by Application X-Ray and/or UI Inspector are not supported. |
Recommendations
|
Recommendation |
Explanation |
|---|---|
|
Browser installation |
The Web Recorder will use the browser installed on the machine where the script is run. To ensure reliable playback, make sure a supported browser is installed on all machines where the test will run. |
|
Script management |
Export and import scripts regularly. |
|
Script compatibility |
Avoid mixing different script engines and script types within your projects. |
|
Cookie pop-ups |
We recommend waiting a few seconds before interacting with cookie pop-ups, as the recorder may need time to detect them. |
|
Hover recording |
Alt + H captures the hover action for the element your cursor is on at the moment you press the hotkey. Place your cursor on the desired element and press Alt + H to record the hover. |
|
New recordings |
Web scripts created with the new Web Recorder use Playwright. Older Selenium-based web workloads are still supported for backward compatibility. However, for new recordings, we recommend using the new Web Recorder because the Playwright-based format is more modern and generally more resilient. |
Tutorials
Using Browser Arguments via a Magic Comment
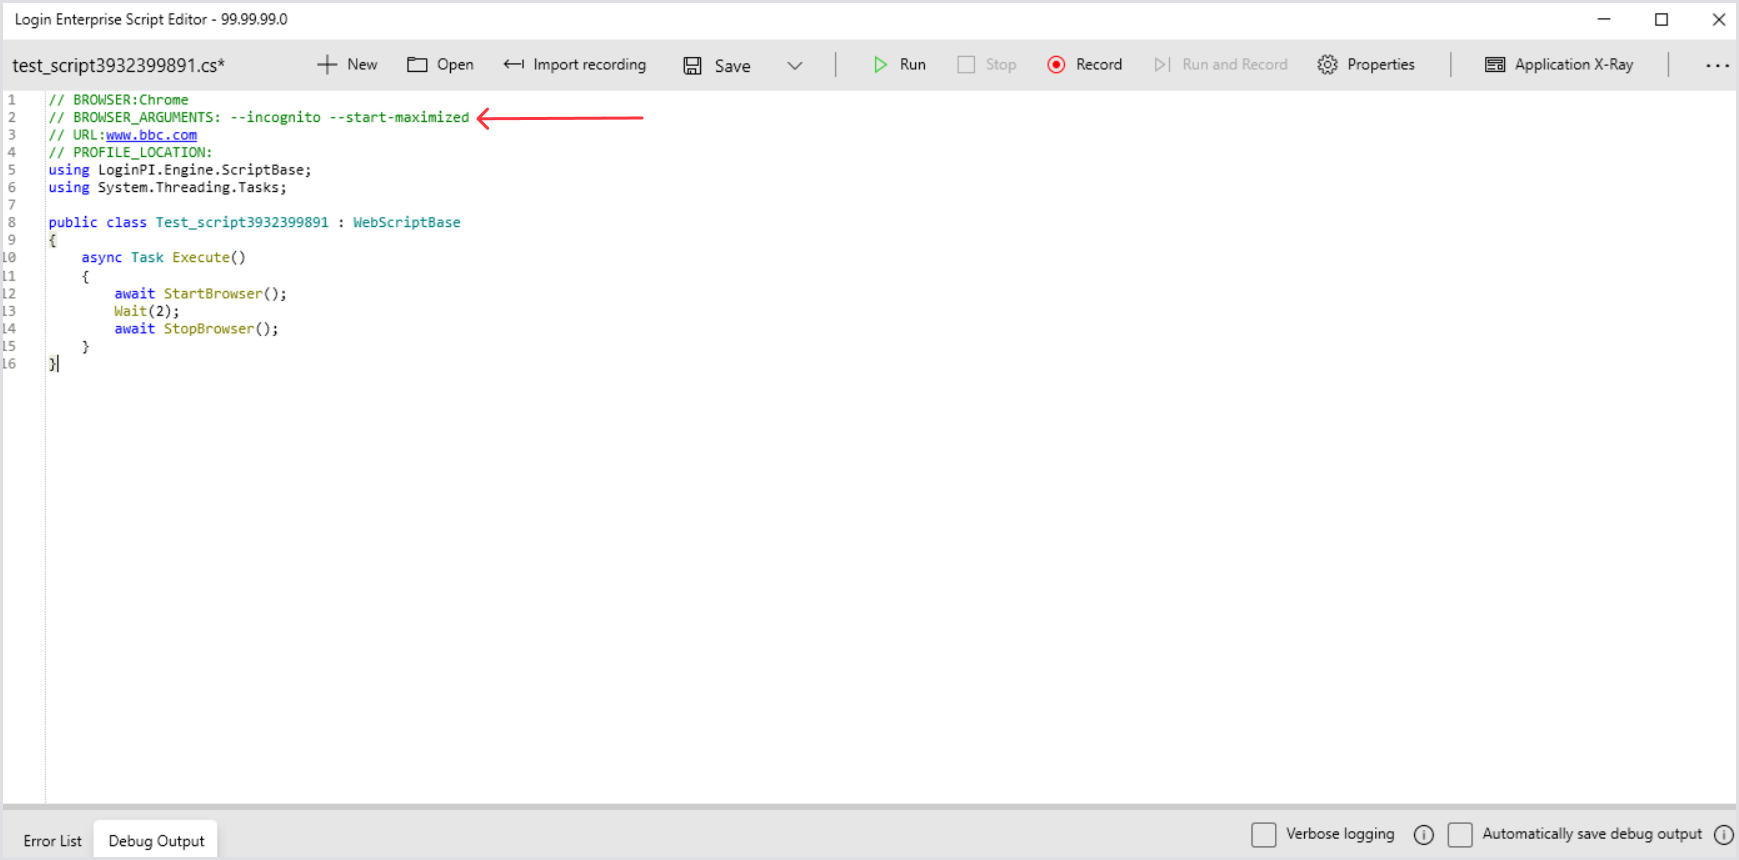
You can pass arguments to the browser by using a magic comment in your script. This allows you to control how the browser behaves during recording and playback.
The most common use cases include:
-
Recording and playing back web applications in incognito or private mode.
-
Recording and playing back with the browser window maximized.
This feature also supports any other valid browser arguments.
How to Use
Insert the magic comment at the top of your script with the appropriate browser arguments. See the screenshot below for an example.
Note: Browser arguments may vary depending on the browser type. Make sure to use the format required by your browser.
Examples
Chrome
--incognito --start-maximized
Edge
--inprivate --start-maximized