Overview
This section walks you through deploying the Login Enterprise Virtual Appliance (OVA) into a Nutanix AHV environment. By running Login Enterprise on Nutanix, you combine Nutanix’s enterprise-grade infrastructure, high availability, rapid scalability, and simplified management with Login Enterprise’s powerful endpoint performance testing and automation.
Prerequisites
Before you begin, ensure you have:
-
Nutaniх Prism Central access and an AHV cluster are already configured.
-
Administrator privileges in Prism Central to upload and deploy OVAs.
-
Subnet defined for the VM’s network interface.
-
Login Enterprise OVA download URL (or the .ova file downloaded locally). Refer to Downloads.
Deployment Steps
-
Log in to Prism Central with administrator credentials.
-
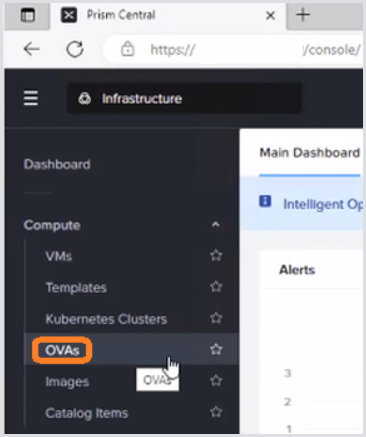
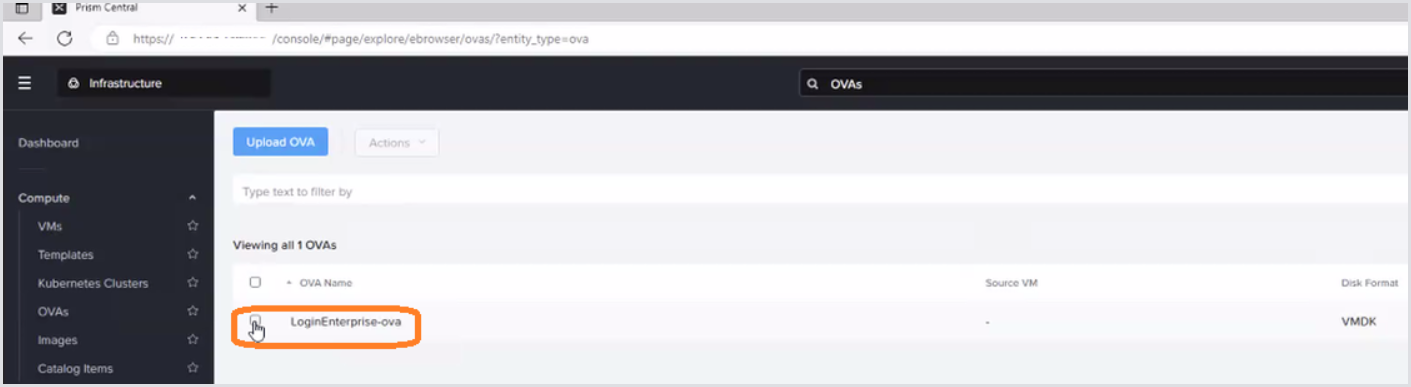
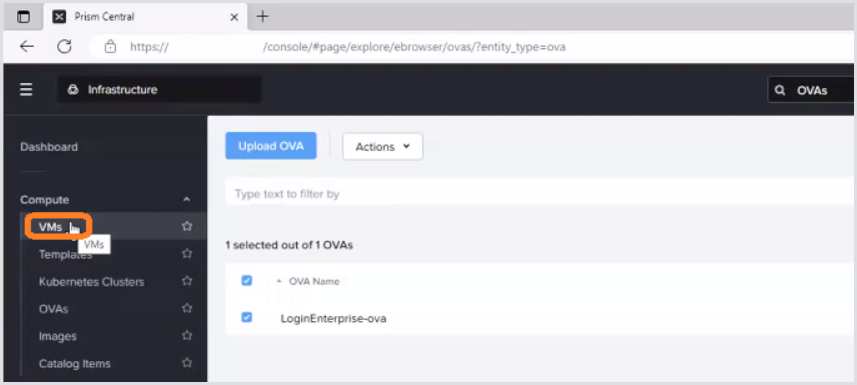
From the main menu, select OVAs.
-
Click Upload OVA to start the upload. You can upload from a local file or upload via URL.
Upload from a Local File
-
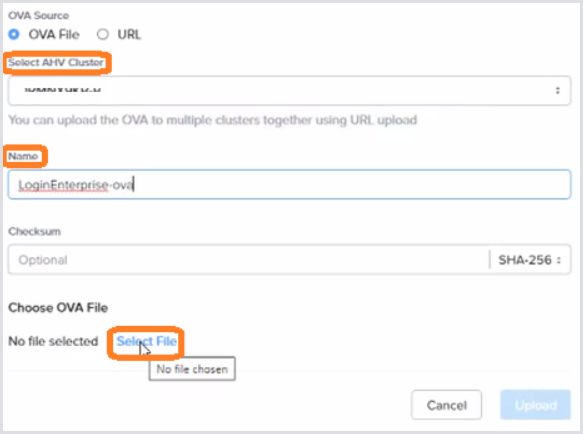
In the OVA Source dialog, ensure OVA File is selected.
-
(If required), choose the target AHV cluster.
-
(If required) Enter a Name for the OVA.
-
Click Select File, browse to your downloaded Login Enterprise .ova, and open it.
-
Monitor the upload progress until complete.
Upload via URL
-
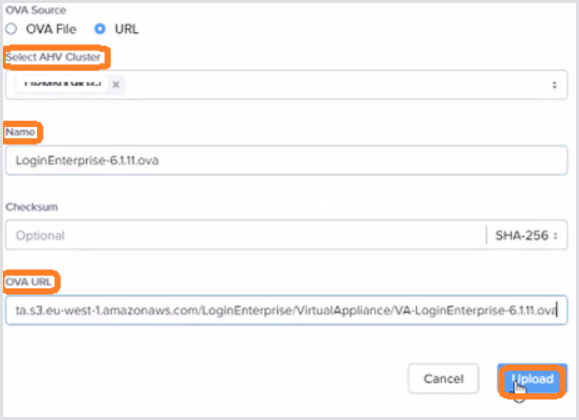
In the OVA Source dialog, select URL.
-
Enter a Name for the OVA.
-
Paste the Login Enterprise OVA download URL. The .ova URL can be retrieved from Downloads, under the Nutanix download (get the URL from the Download button for it).
-
Click Upload and monitor the task creation.

-
Confirm OVA availability.
-
Watch the real-time updates (upper right).
-
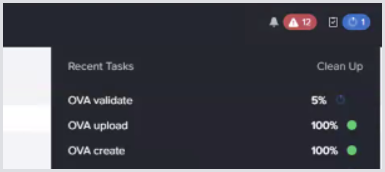
b. Once uploaded, verify the OVA appears on the OVAs page.
-
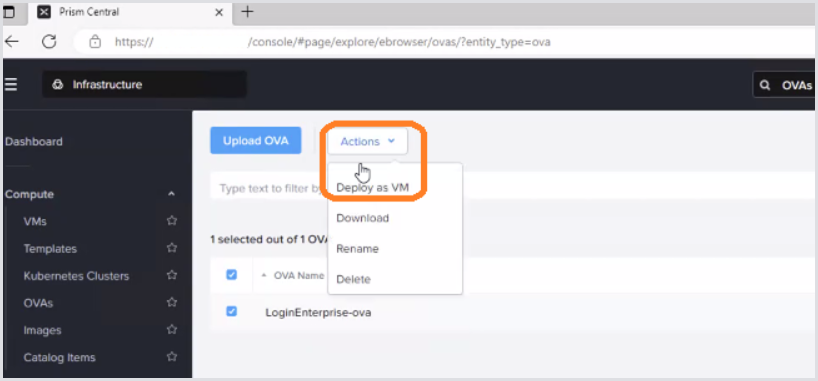
Deploy as a VM.
-
Select the new OVA, click Actions > Deploy as VM.
-
b. In Deploy as VM, configure the following:
|
Field |
Description |
|---|---|
|
Name |
Enter your desired VM name. |
|
Description |
Optionally, describe the VM. |
|
CPU & Memory |
Default (1 vCPU × 4 cores, 8 GB) is sufficient; adjust later if needed. |
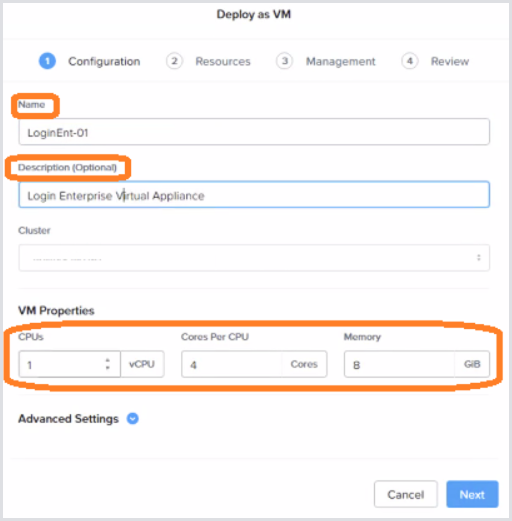
c. Click Next.
-
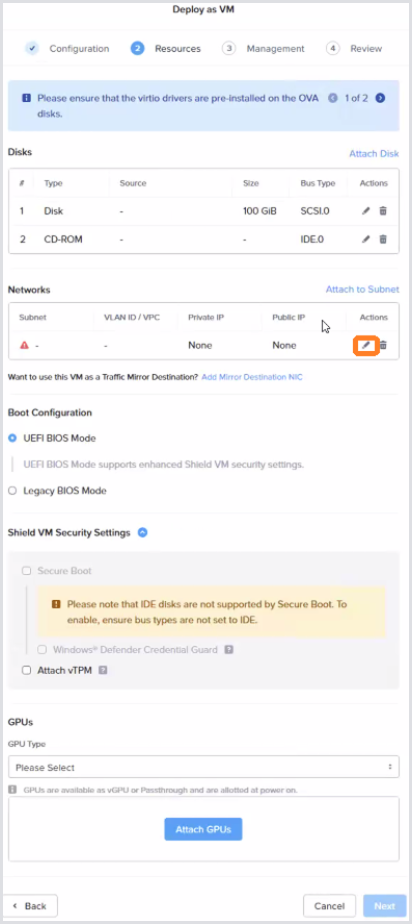
Configure Networking.
-
Under Resources, click the pencil icon next to Networks.
-
b. In Update NIC, choose the appropriate Subnet.
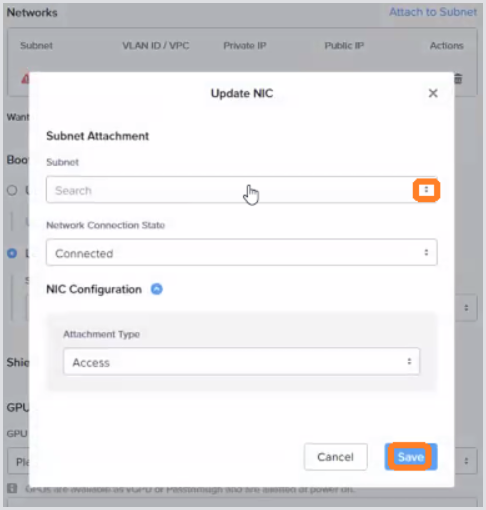
c. Click Save and then Next.
-
In Resources, under Boot Configuration, select Legacy BIOS Mode.
-
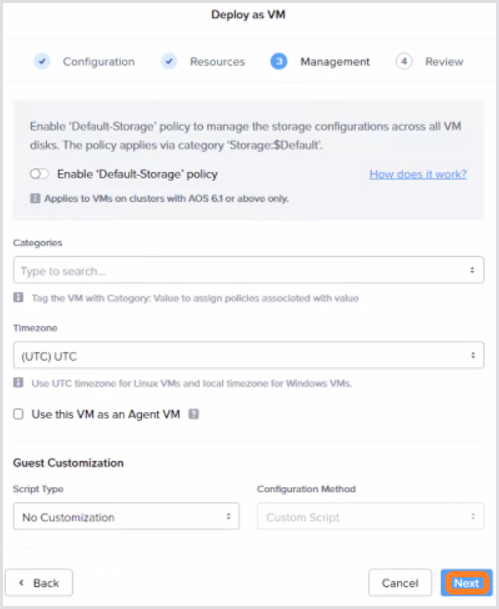
Finalize Management Settings.
-
Review any management options; leave defaults unless changes are required.
-
Click Next.
-
-
Review & Deploy.
-
On the Review page, confirm your settings.
-
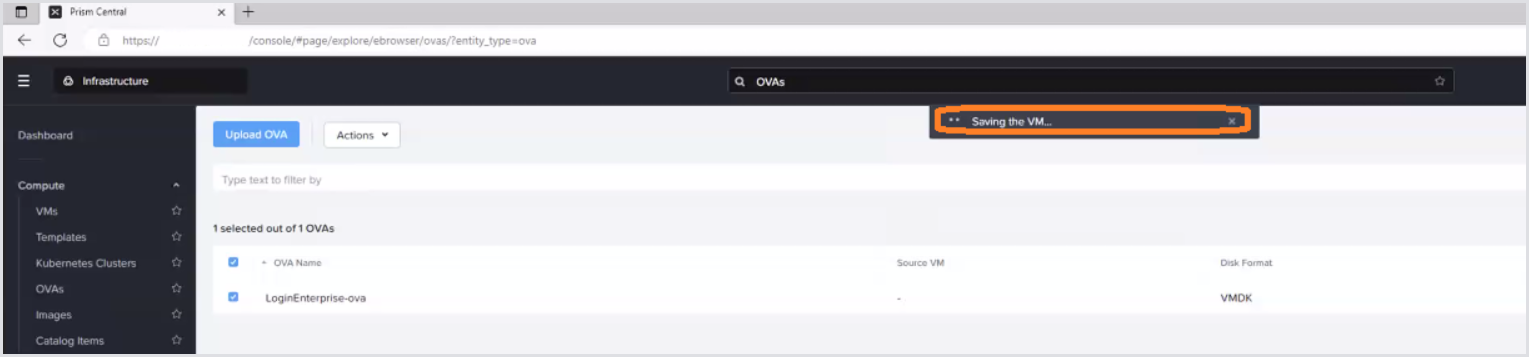
Click Finish.
-
Observe the Saving the VM… popup.
-
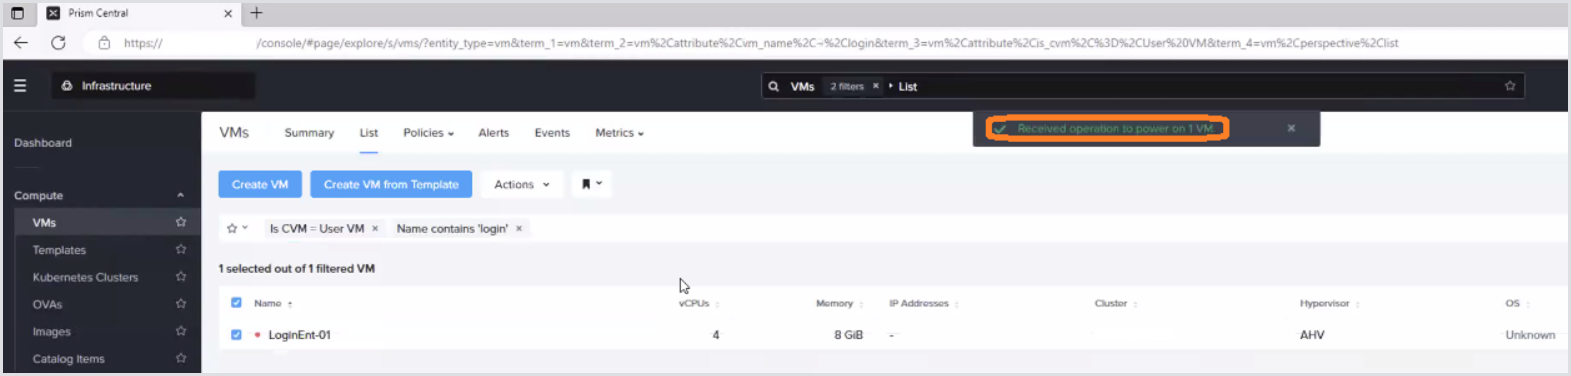
10. Power on the VM.
a. Go to VMs, select your new Login Enterprise VM.

b. Click Actions > Power On.
c. Wait for the “Received operation to power on 1 VM…” notification.
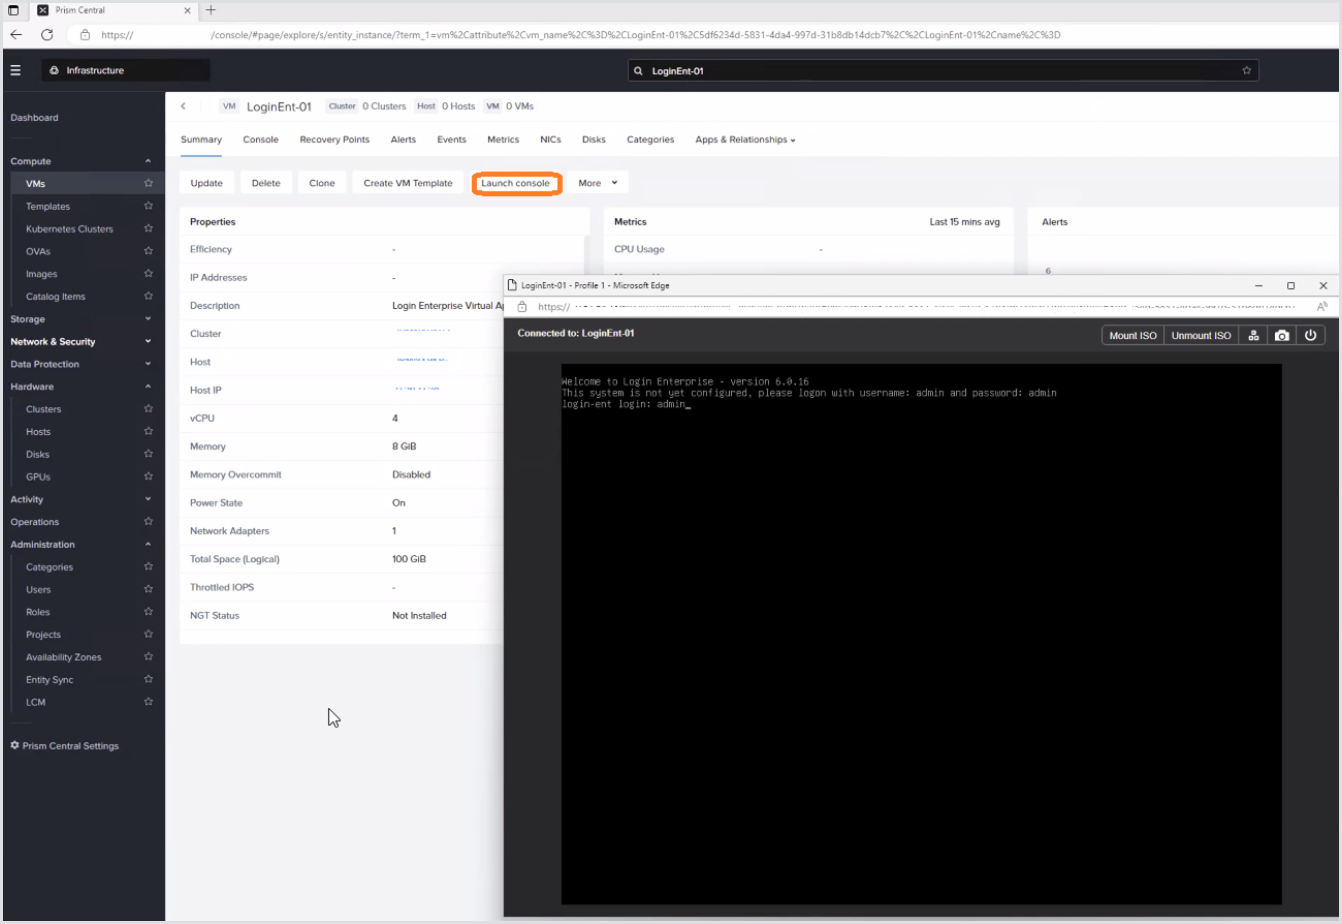
11. Access the Console.
a. Select the VM, click Launch Console.
b. Verify that the Login Enterprise setup interface appears.
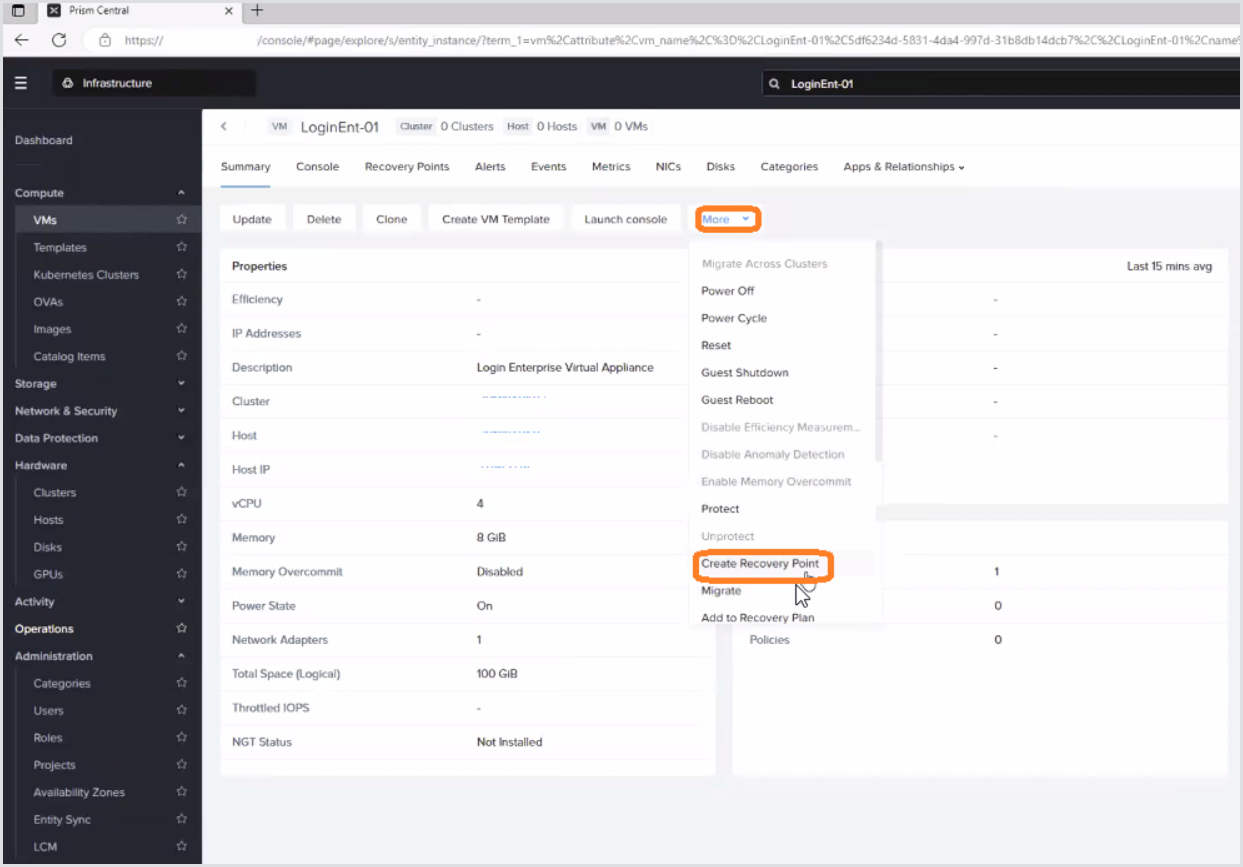
12. (Best Practice). After initial setup, and before/after any Login Enterprise upgrades or maintenance, create a Nutanix recovery point via the VMs > [Your VM] > More > Create Recovery Point.
Conclusion
Once the Appliance is running, you can begin configuring Login Enterprise tests directly within your Nutanix-hosted VM, leveraging both platforms for seamless performance monitoring and automation.
For next steps, see the Initial Appliance Configuration.