Overview
-
Users must be created in the Active Directory by an AD administrator. Login Enterprise does not create users automatically.
-
You need Account Groups for all types of Tests (Continuous, Load, and Application Test environments). See below for instructions on creating Account Groups.
-
All the Login Enterprise users need to exist in Active Directory (AD) before configuring Virtual Users in Login Enterprise. We recommend creating users with a name followed by four digits, such as:
-
LoginEnt0001
-
LoginEnt0002
-
LoginEnt0003
-
LoginEnt0004
-
etc.
-
Users should be created using the principle of least privilege. Test accounts should be given the minimum access and permissions required to perform their tasks.
Creating an Account
-
In the Login Enterprise sidebar, navigate to Configuration > Accounts.
-
In Accounts, click the green "+" on the top right to add a new account.

-
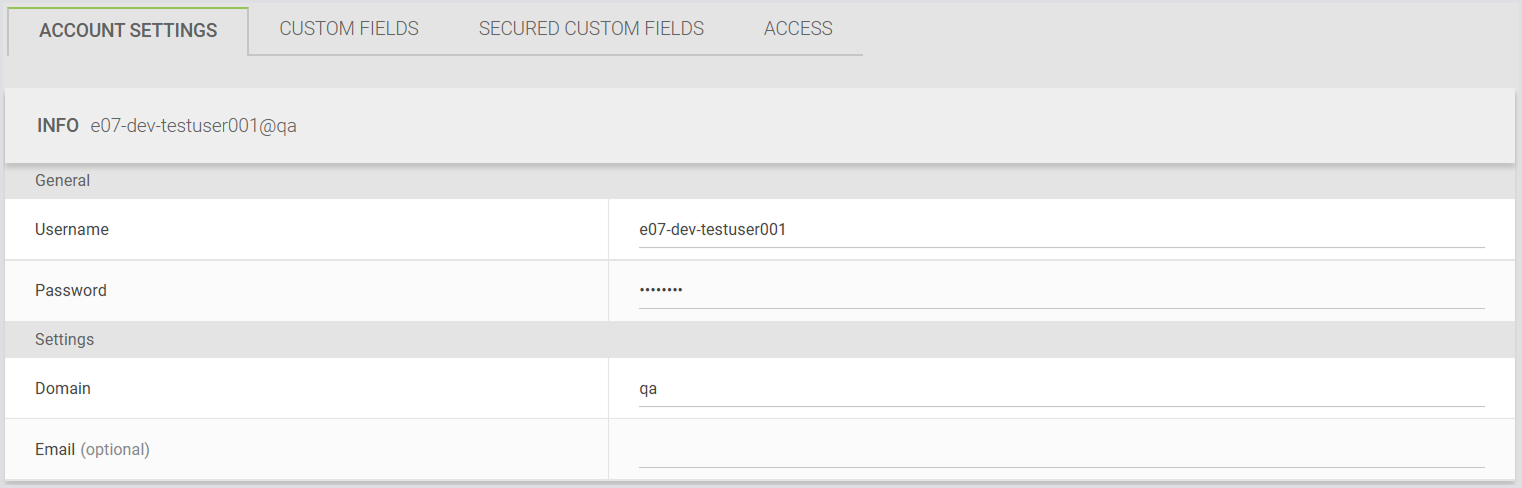
In Username, enter the username of your choice.
-
In Password, provide the password of your choice.
-
In Domain, specify the domain of the user account.
-
In Email (optional), enter the email address of the user account. For more information, see the Email field.
-
In Type, select the way you’d like to create your account: Single or Bulk (multiple accounts). For details on creating multiple accounts, see Creating Multiple Accounts.
-
In Roles, select the roles you’d like to assign to this account. For details, see Managing Access to Accounts and Accounts Groups.

Email field
You can save email addresses related to your accounts and use them later with custom connectors.
When filling out individual account information in the account configuration form, you can enter the email address in a dedicated additional field. This field is optional, so you can choose to leave it empty.
You can view and edit email information directly in the Accounts table:
Syntax
The following are valid examples of email entries:
The following are invalid examples of email entries:
-
example
-
@email
Usage with Custom Connectors
You can add an email as an argument that will be passed when starting a new custom connector process during a Test. The email placeholder in the script will be replaced with the actual email value from the accounts added to the Accounts Group used in the Test.
For example:
CustomConnector.exe --email "{email}"
The email value can also be used in place of the username:
CustomConnector.exe --username "{email}"
You can also add email addresses when creating accounts in Swagger. Since this is optional, you can choose to omit the property.
To learn more about types of Connectors and connection options, see Configuring Connectors and Connections.
Creating Multiple Accounts
You can create multiple accounts at once using the "Bulk Accounts" option. Here's how:
-
Number of digits: Specify the incremental number format (e.g., 01, 001).
-
Number of accounts: Indicate how many accounts you want to create.
When using this option, an example username and, if specified, an email will be generated based on your input. You can preview this information in the bottom left corner of the configuration screen.
The "Email" field is optional. If left empty, all generated accounts will have no email associated.
-
We do not verify the existence or accessibility of email templates or generated emails.
-
The system does not attempt to create actual emails in any form.
-
Email uniqueness is not enforced, so multiple accounts can have the same email address associated.
You can bulk-generate accounts with auto-generated emails using a specific email template. This template must be provided in the Email field on the Create Bulk Accounts screen.
Email template format
Each account will be created with an email based on the specified template. The logic mirrors username generation, where a number is added to the local part. An example email appears in the bottom-left corner of the screen next to the example username.
The Email field is optional for bulk account creation. If you leave it empty, all generated accounts will have no associated email.
Important notes
-
We do not verify the existence or accessibility of email templates or generated emails.
-
We do not create actual emails and do not enforce email uniqueness. Therefore, two accounts can share the same email address.
-
These actions are outside the system’s scope.
Custom Fields (Optional)
Custom fields can enhance account configuration and are used with custom connectors, similar to email, username, domain, and password fields. Here are key points to consider:
-
You can add up to five custom fields with editable values during account creation. These fields have immutable names.
-
Once added, custom fields cannot be edited directly in the table view. Instead, click the "pencil" icon in each row to open the account editing form with pre-populated fields, including any existing custom fields.
-
Custom fields can store various types of information, such as single digits, random text, or authentication tokens, but they are limited to 256 characters.
For more information on using custom fields with custom connectors, see Custom Fields.
Secure Custom Fields (Optional)
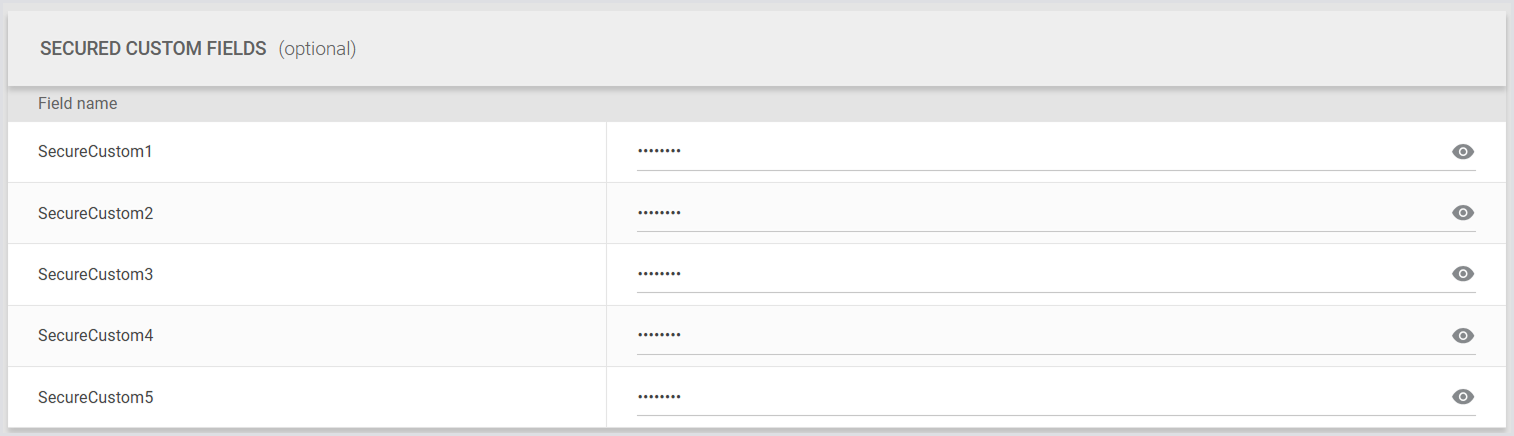
Secured custom fields are used to store sensitive values in your Virtual User accounts. You can add up to five secured custom fields:
-
SecureCustom1
-
SecureCustom2
-
SecureCustom3
-
SecureCustom4
-
SecureCustom5
Each field accepts a string value of up to 255 characters. Leading and trailing spaces are trimmed on save.
Create flow
-
When you enter a value, the field masks the text with dots.
-
You can select the eye icon to reveal the text you’re typing before saving.

Edit flow
-
Previously saved values appear as dots.
-
When you start typing in a field, the placeholder text Enter new password appears.

-
The eye icon only applies to the new text you enter before saving.
Behavior and security
-
Values are masked in the UI and can’t be retrieved through the UI or API after they’re saved.
-
Values are encrypted at rest using the same mechanism as the password field.
-
Trimming on save (no leading/trailing spaces are kept).
-
No role, including admin, can view saved values.
Handling Account Credentials on the Launcher
For details, see the section of the same name in Launchers Overview and Best Practices.
Creating Account Groups
Account Groups allow you to grant specific users access to particular environments. To create an Account Group:
-
In Accounts > Groups, click the green "+" on the top right to add a new group.

-
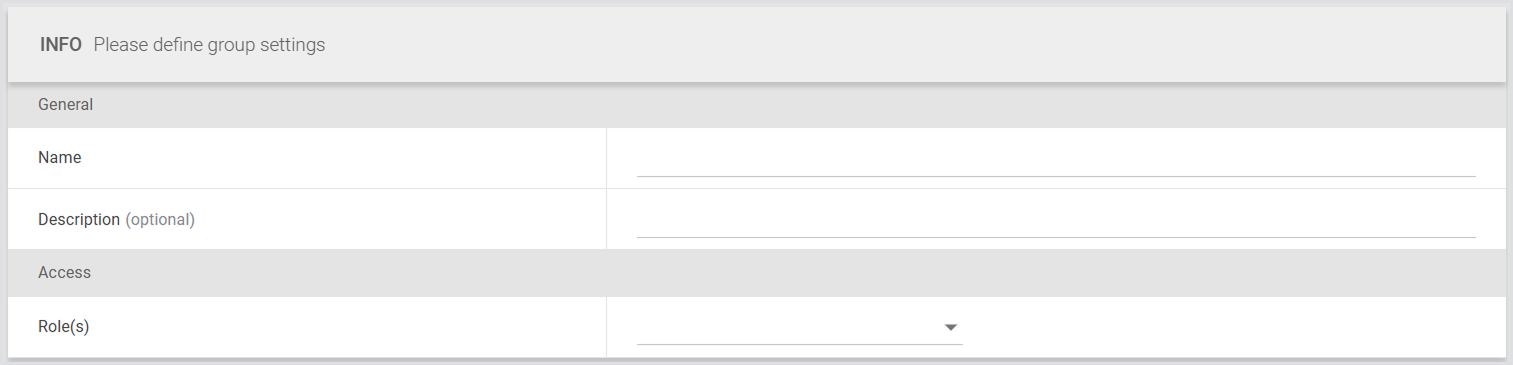
In Name, enter a group name of your choice.
-
In Description, enter an optional description.
-
In Roles, select the roles you’d like to assign to this Account Group. For details, see Managing Access to Accounts and Accounts Groups.
-
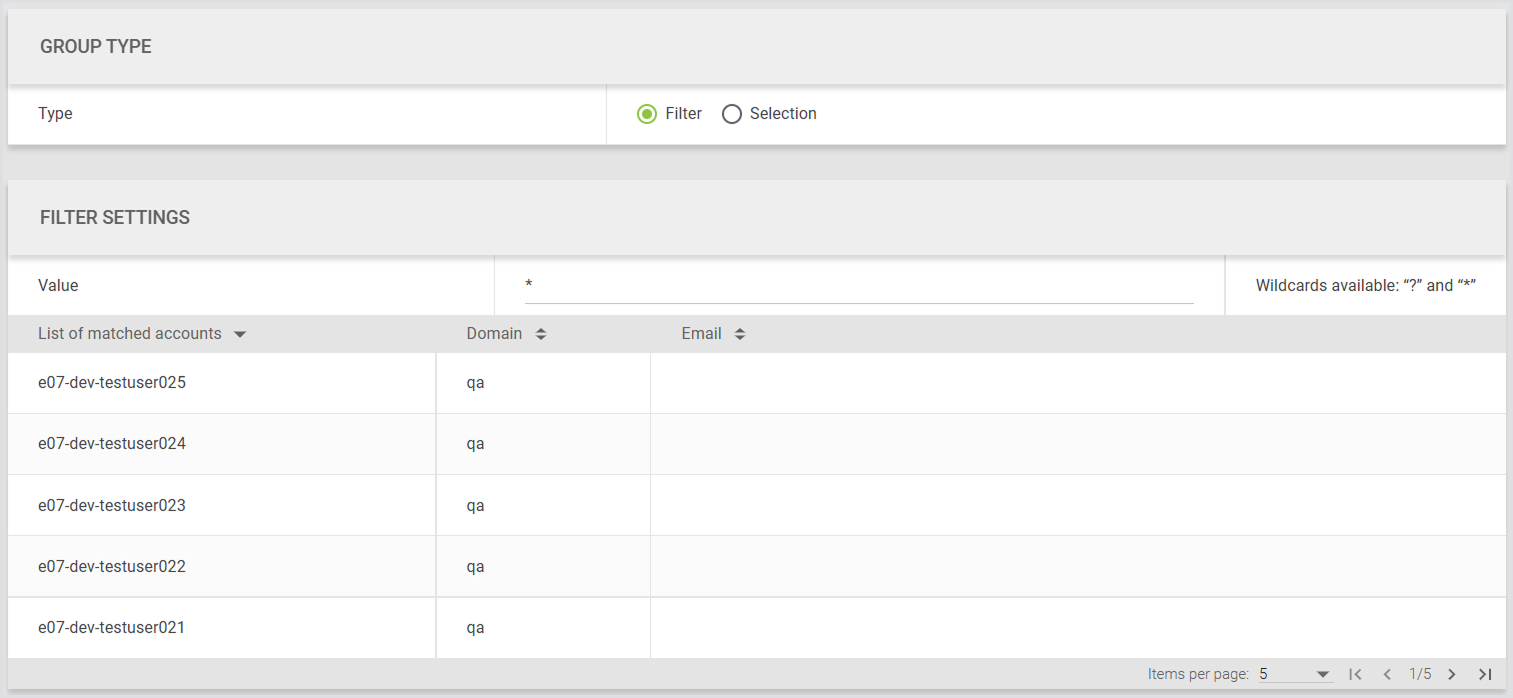
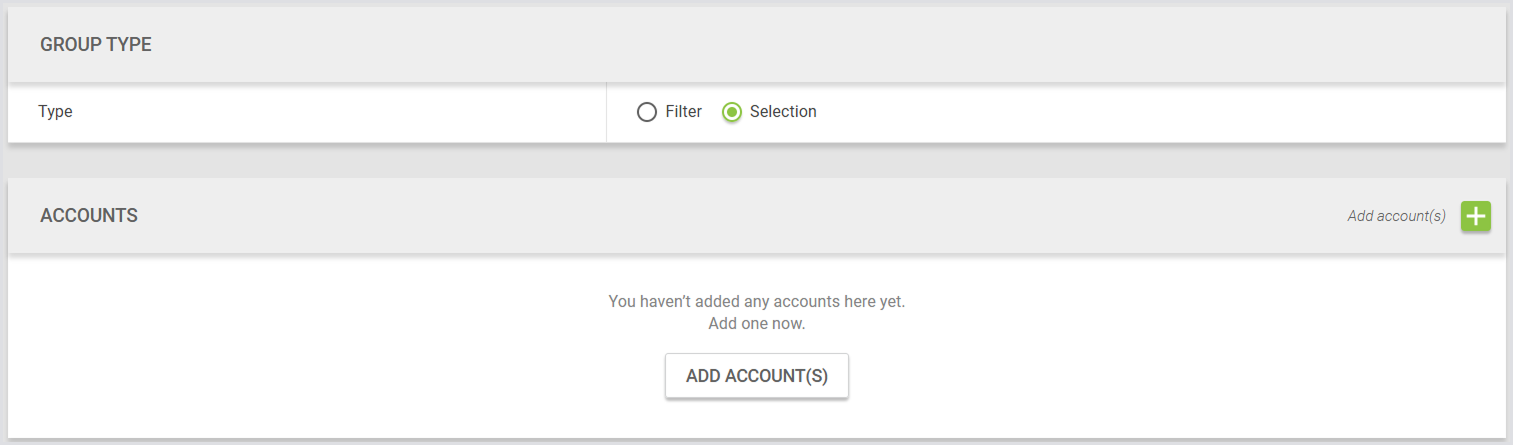
In Group Type, select Filter or Selection.
-
Filter: Automatically include all accounts that match specific criteria. Here, you can use two wildcards.
-
? (Question mark): Represents a single-character wildcard.
-
* (Asterisk): Represents a multi-character wildcard.
-
-
Selection: Manually choose individual accounts to include in the group.
-
Click Save to apply the changes.
Adding a Group to an Environment
-
In the Login Enterprise sidebar, navigate to Configuration > Environments.
-
In Environments, edit the environment where you want to attach the user group.
-
Click on "Account" to view the groups you've created.
-
Select the desired group.
-
Click Save.
Logon Components
The Logon Components are crucial to the functionality of Login Enterprise. This part makes sure the software starts as soon as the user logs in.
To learn more about the logon components, see Configuring Logon Components.
Account Status
By default, Login Enterprise accounts are enabled. If an account experiences three consecutive errors, it will be automatically disabled.
You can manage account statuses in bulk starting from the accounts table. Follow these steps:
-
Select multiple accounts by ticking their checkboxes.
-
At the top of the table, the action panel will appear.
-
Use the buttons in the action panel to enable or disable the selected accounts.
-
Enable will be disabled (grayed out) if all selected accounts are already enabled.
-
Disable will be disabled if all selected accounts are already disabled.
-
You can also enable/disable accounts via the API. To learn how to access the Public API in the Login Enterprise, see Accessing the Public API.