Overview
Application Tests verify that your user software functions correctly and remains within established operational parameters. Similar to Load Tests, these are one-time, on-demand tests that return data and events specific to the current test. They are not scheduled to run periodically.
How It Works, Capabilities, Methodology
An Application Test launches a single session. It only requires one session because it does not gather long-term tracking data, unlike Continuous Tests, and it does not measure aggregate performance, unlike load tests. Its sole purpose is to select a single virtual desktop infrastructure (VDI) and run a set of Application scripts to verify that your software is functional. EUX testing cannot be enabled for these tests.
Application scripts for Application Tests focus on functional areas rather than metrics. While a Continuous Test might benefit from timing every operation with measurable durations, an Application Test aims to verify that each part of the program functions correctly. The scripts should check various aspects of the program, aborting if any errors occur. If timers are used, they are intended to identify significant issues, such as tasks that never complete, rather than small speed changes.
Unlike Load Tests, Application Tests can trigger alert emails for threshold violations.
Handling Script Failures and Achieving Granularity
Since script failure is an all-or-nothing option, using a single test to assess multiple functions can be challenging. If any function fails, the entire script fails. However, if you need more granular results and want to continue checking for issues even after the first failure, you can use events and timers. One option is to use CreateEvent in your script to log an event in the Login Enterprise events for the test run, indicating that a subtask failed, and then proceed to the next subtask. Another approach is to use timers to reflect your functional results. Instead of using StartTimer and StopTimer to measure an interval, use SetTimer to report a single value. Define success as a specific number, e.g., 1000, corresponding to 1 second, and failure as a higher number, like 2000. (Ensure the failure value is higher than the success value because alerts are triggered for numbers exceeding the threshold.) Then, set an alert for any timer that exceeds 1500. While you could use SetTimer to report 1 or 2 and alert on 2, it is generally better to use more noticeable values in your code.
Note that EUX and VSImax, designed as aggregate statistical measures, are unavailable in Application Tests. However, as Application Tests utilize only one session, the Desktop Connector remains accessible. For more information, see Desktop Connection.
Creating an Application Test
-
In the Sidebar menu, navigate to Configuration > Manage Tests, and select Application Tests.
-
In Application Tests, click “+“ on the top right.

-
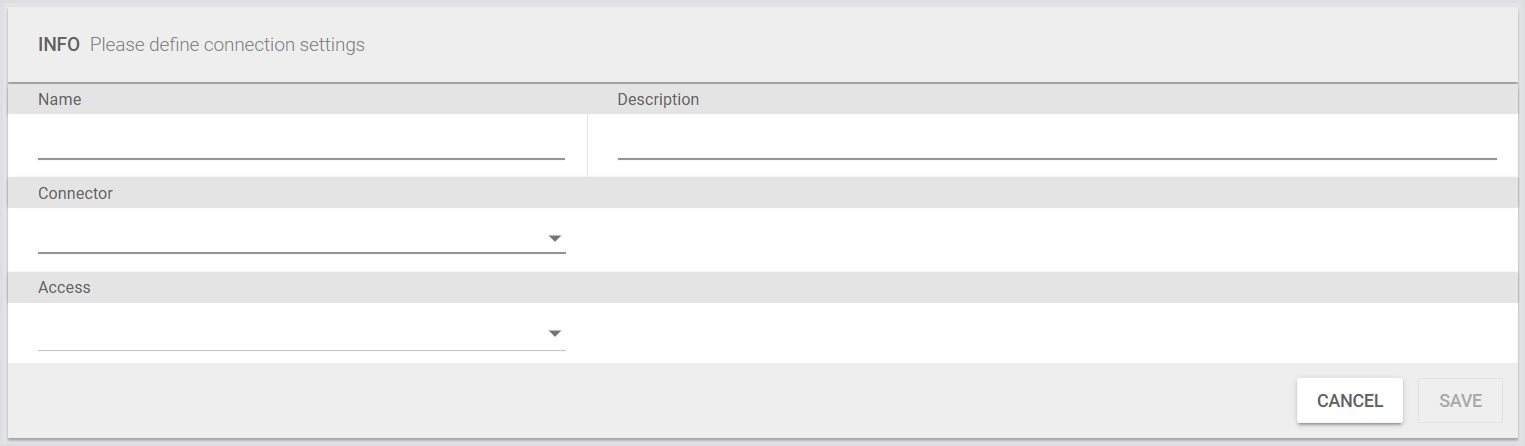
In the Info window, provide the following:
-
Name: Specify the display name for the Application Test.
-
Description: Optionally, provide an informative description of the Application Test.
-
Connector: Choose the type of Connector to be utilized by the Launcher.
-
Access: Select roles to control access to Test configurations and results.
Each Connector has its own settings. Once you define your Connector, specify the necessary information in the Settings section. Here’s an example of the Citrix StoreFront Connector configurations.
-
Click Save to apply the changes.
-
For more information on connectors and connection options, see Configuring Connectors and Connections.
-
For more information on the accounts, see Managing Virtual User Accounts.
-
For the Launchers overview and best practices, see Launchers Overview and Best Practices.
-
To learn about the Login Enterprise Windows Launcher setup, configuration, maintenance, and more, see Configuring the Windows Launcher.
Configuring Application Test Settings
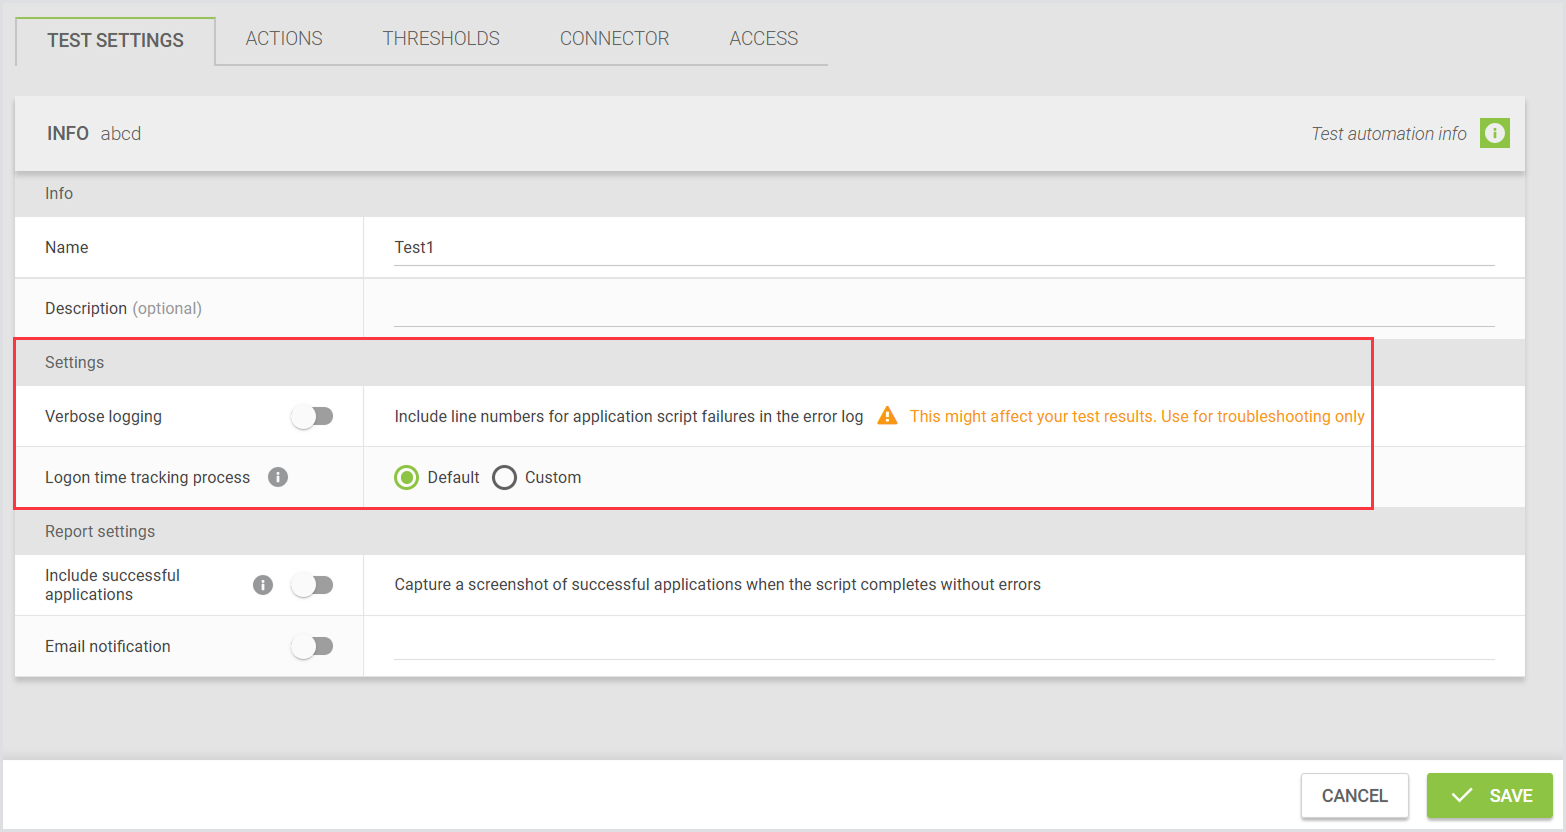
Once you’ve created an Application Test, you need to configure the Test settings, such as:
-
Verbose logging - Display the command line number that triggered an error during Application execution failures. This may affect test results as the line number is returned during execution.
-
Logon time tracking process - Track the complete duration from when the Connector initiates the login process for the user session until the final user-session executable (usually Windows Explorer) is up and running. You can also overwrite the default process of time tracking with a process of your choice. For more information, see Measuring Total Login Time.
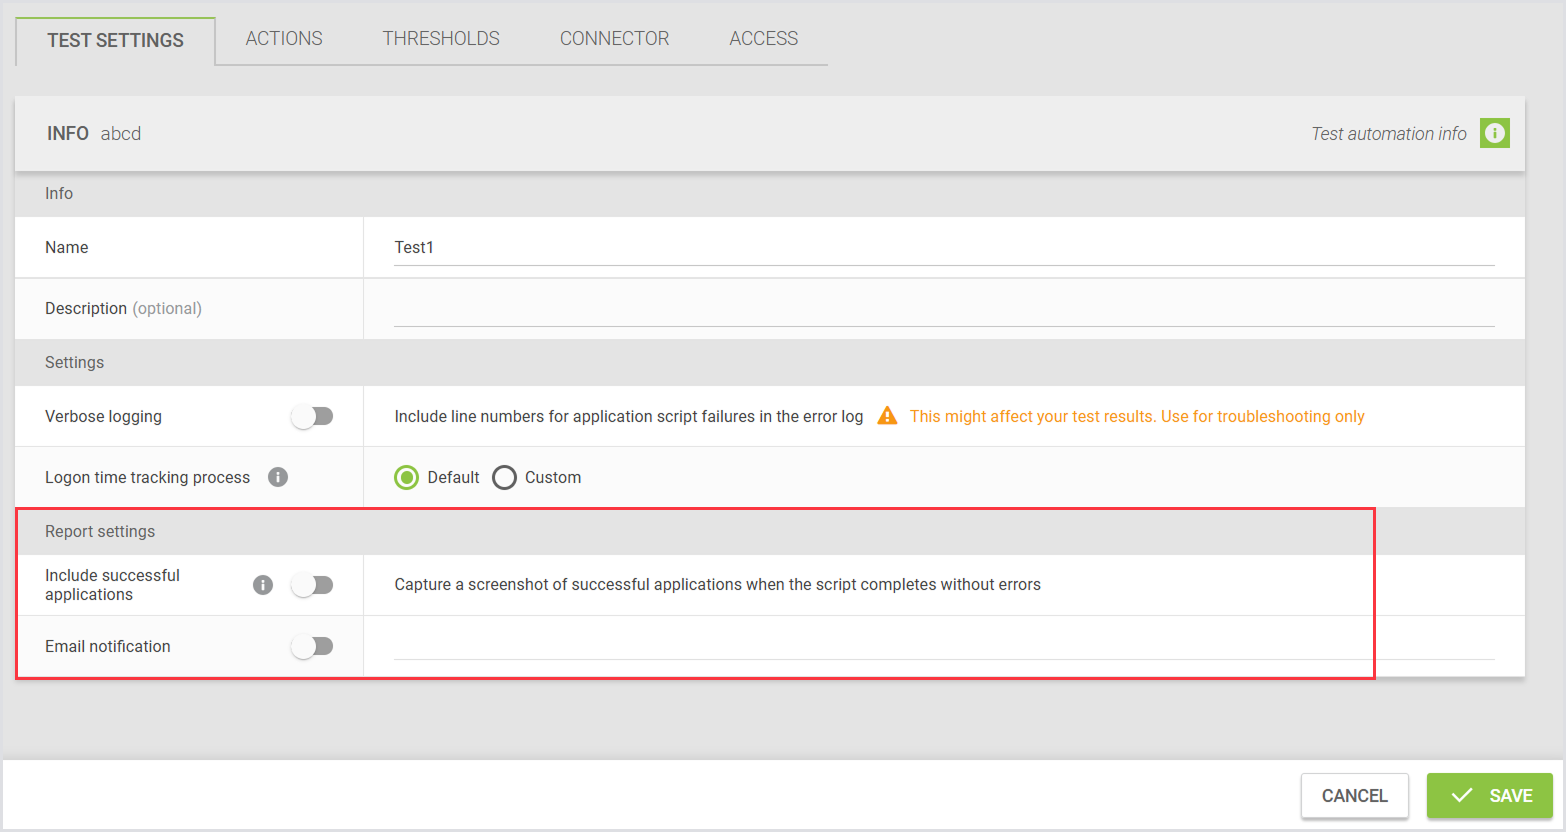
Report Settings
-
Include successful applications: You can choose to capture a screenshot of successful applications when the script starts the program without errors. Disabling this option skips the screenshot, but the results of the successful applications (such as measurements) will still be included in the report. This option only produces screenshots if your script uses the built-in START() command to start your program. Otherwise, you can use the TakeScreenshot() command in your script after you start the program.
-
Email notification: You can choose to be notified when Applications pass or fail. If you do not enable notifications, the report will only indicate failures, which is usually the most relevant information.
You can also configure the system to send an email once the Application Test is complete. If the email notification switch is enabled but no email address is specified, the default email address from the email configuration will be used. You can enter multiple email addresses in the Email Notification field, separated by commas. For more information on setting up email notifications, see Managing Notifications.
Additionally, you can personalize the report by adding your company logo.
There is no strict limit on the number of screenshots in a generated PDF report. However, note that including a large number of screenshots (for example, up to 1,000 screenshots) may cause browser downtime and increase the PDF file size.
For optimal performance and compatibility, we recommend keeping the number of screenshots below 250. At around 250 screenshots, the PDF size is typically under 20 MB, which aligns with email systems that limit attachments to 20 MB.
Adding Applications to an Application Test
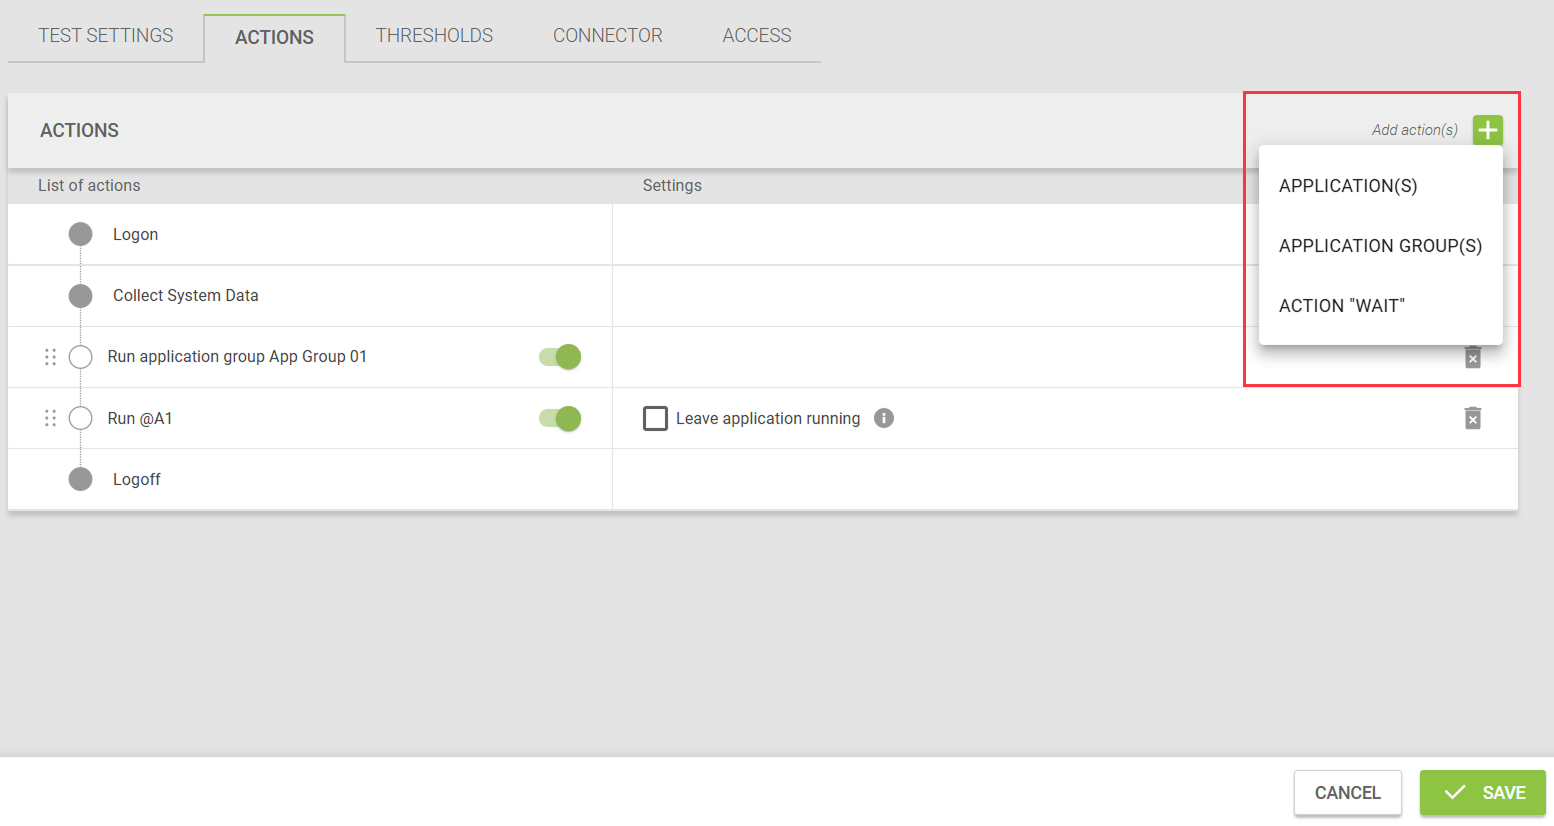
You can add the preferred Applications for the Virtual User to test. You can also add Application groups and an option “to wait”. To do this:
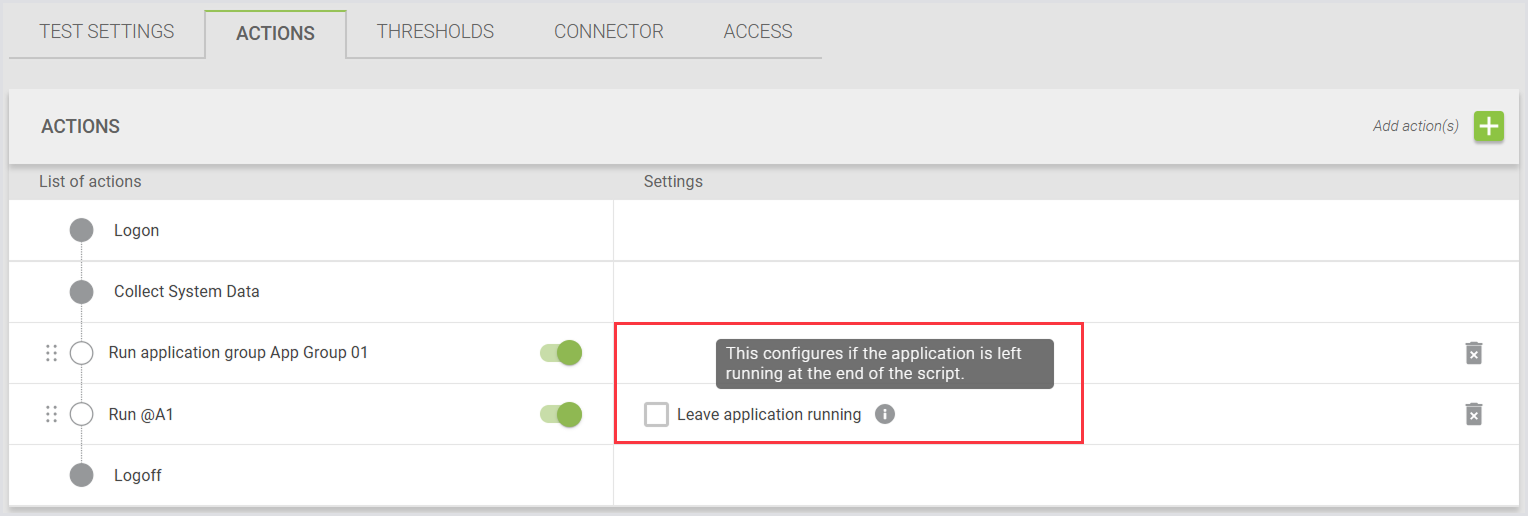
In Actions, click the green “+“ to add a new action, and select what you’re going to add in the pop-up window.
After you've defined your workload, you can choose to have the Virtual User repeat the defined tasks before logging off. You can specify how many times the workload should be repeated using the 'Repeat all steps above' setting. To enable workload repetition, simply toggle the switch to turn it on, and then specify the number of iterations you'd like to execute before logging off.
You also have the option to set Applications to Leave Application running. When you toggle the 'Leave Application running' switch, the Application will remain open even after the workflow script is completed. Keep in mind that closing the Application later will require additional steps.
This feature does not apply to web scripts.
For details on Applications and Application configurations, see Configuring Applications for Testing.
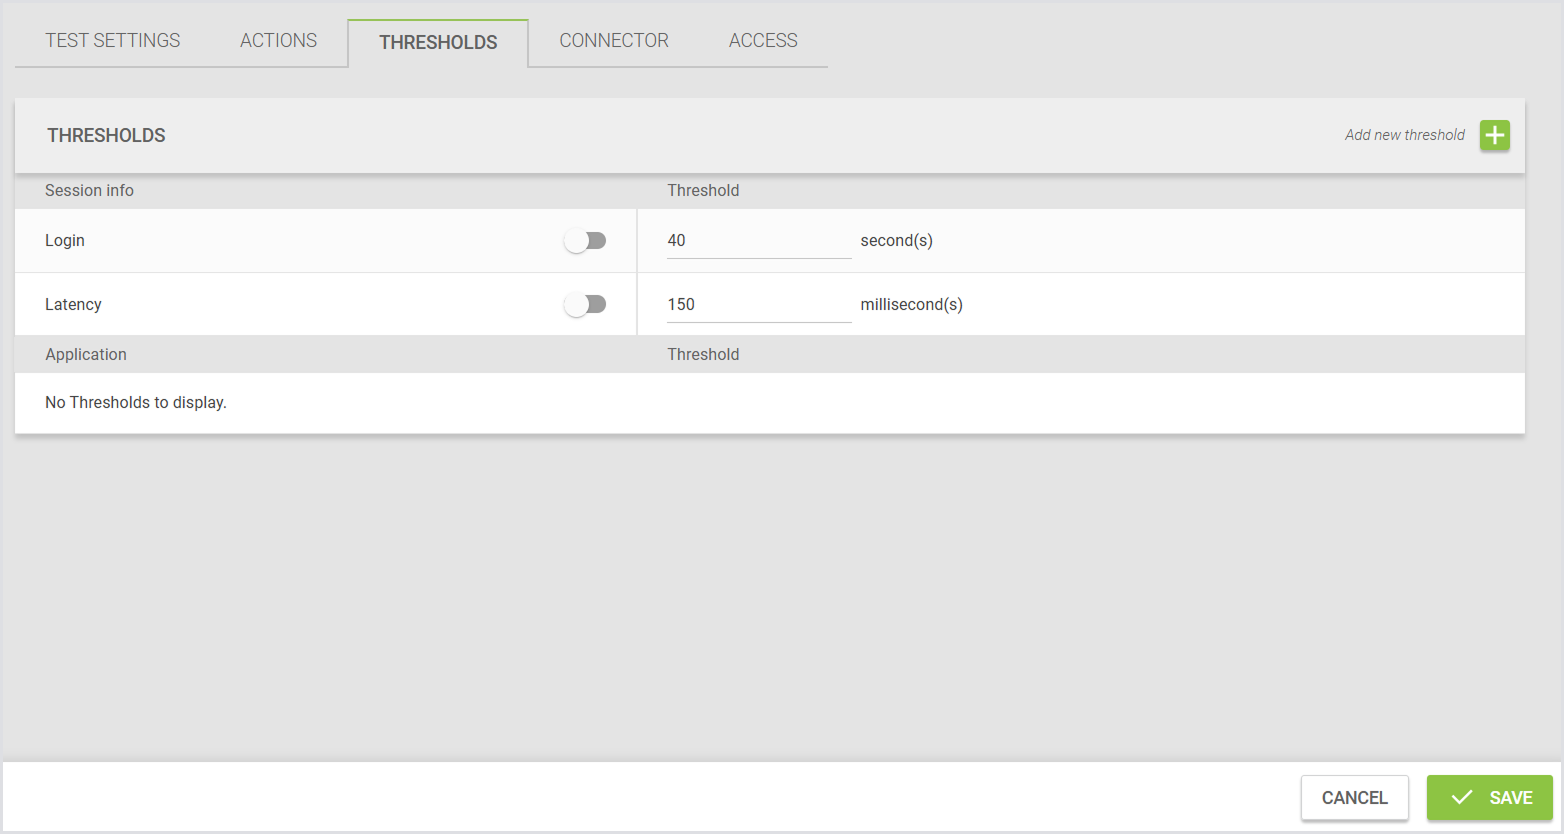
Defining Thresholds
You can also define thresholds for all actions, similar to the Continuous Testing setup. These thresholds ensure that the Application not only functions correctly but also maintains its performance across different configurations. If performance thresholds are not met, you will be notified in the Application Testing report.
Access Control Settings
You can assign roles to Tests to control access to the Test configuration and results. By assigning roles, only users with the designated roles will be able to view or modify the Test configuration and results, depending on their permissions.
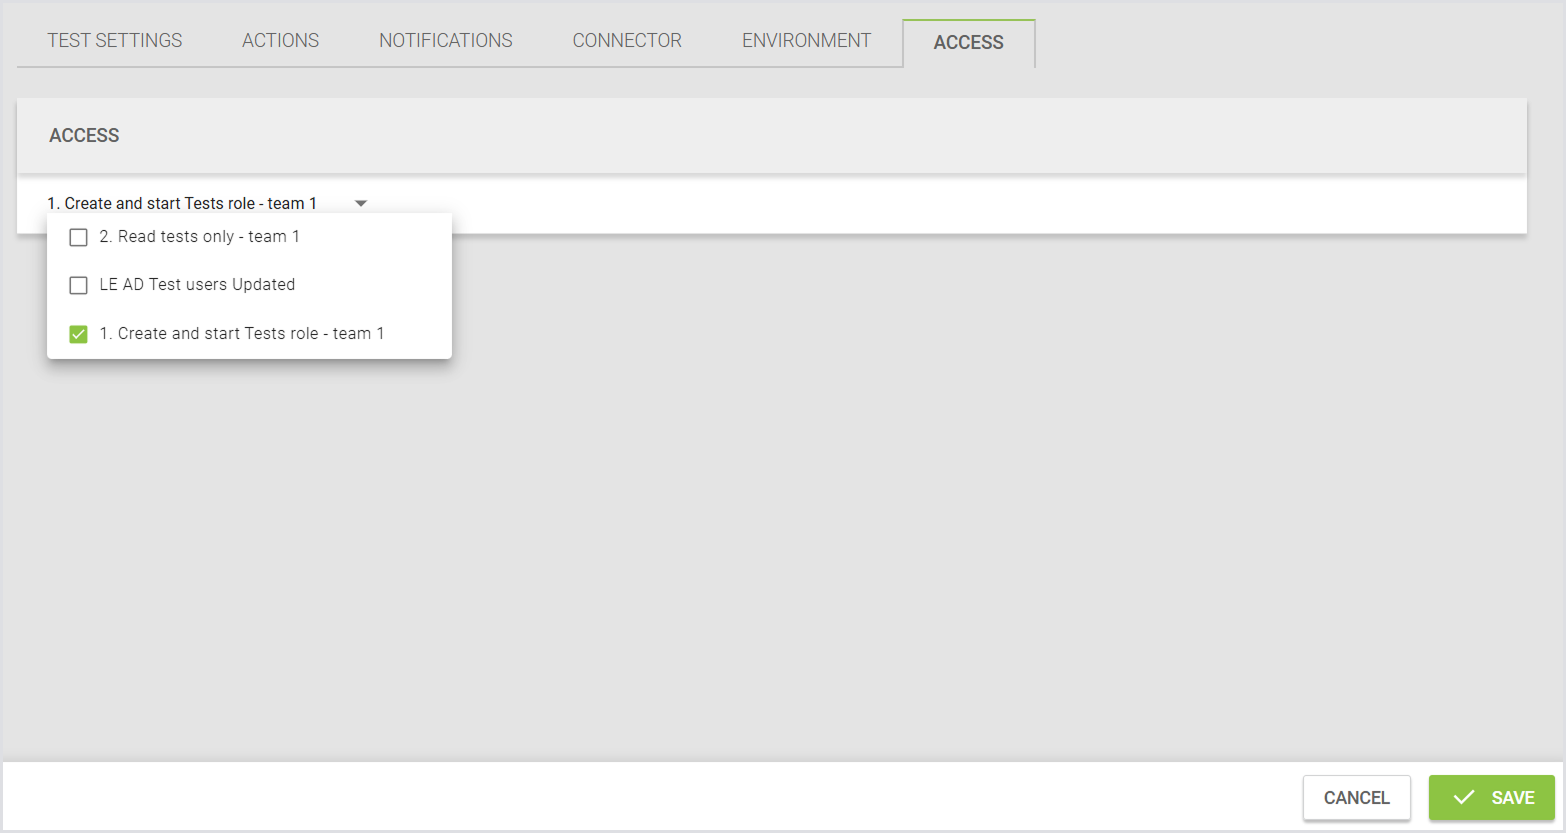
For detailed instructions on creating and managing roles, permissions, and dependencies, see the Role-Based Access Control (RBAC).
Adjusting the Engine Start Timeout
The setting for configuring the timeout for engine start is not available through the Login Enterprise web interface. To adjust this setting, you need to use the API.
The timeout for the Engine-start setting controls how long the Virtual Appliance will wait for the Engine on the Target to come online after a session is launched, and before the connection is considered a failure (login failure). Since we cannot see what is happening during the login phase, all we can do is wait for the Engine to communicate with the Appliance. Or give up and abort the session.
The default timeout is 300 seconds (5 minutes).
You can modify this timeout on an individual Test by using the Public API to reconfigure the Test. A PowerShell script is available to make this process easier. For specific directions on setting the appropriate parameter for an individual Test, see Setting the Engine Start Timeout on a Test.
Key considerations:
-
Default timeout: If no value is specified, or the value is set to 0, the timeout defaults to 300 seconds (5 minutes).
-
Web interface limitation: This option is not available through the Appliance web interface. If you create a Test via the web interface, the timeout will be left empty and default to 300 seconds.
-
Update via API: To modify the timeout, first create a Test, then use the update endpoint to set the timeout. The timeout cannot be set during Test creation.
Starting an Application Test
-
In the Sidebar menu, navigate to Configuration > Manage Tests, and select Application Tests.
-
In the Application Tests, click Start next to the test you’d like to start.

Even if you configured a user group that contains multiple users, the Application Test scenario only uses one user.
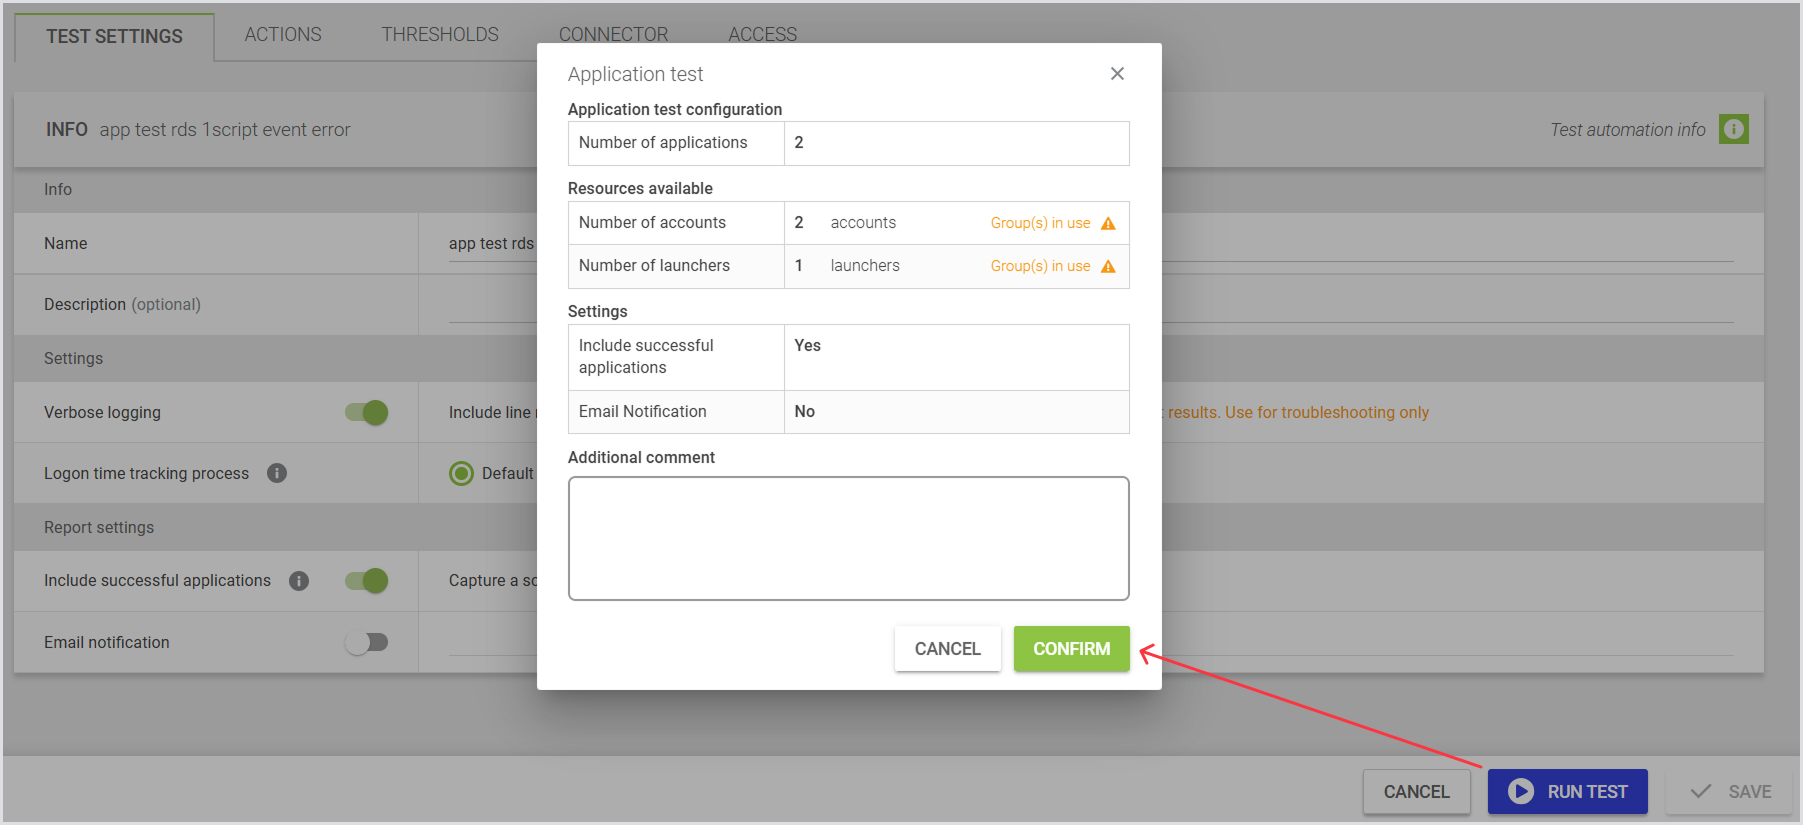
After you click Start, a confirmation dialog window will appear, displaying the current Application configuration. If the configuration is correct, click Confirm to begin the test.
Once you start a test, you will be redirected to the Login Enterprise Dashboard. Here, you can view the current status of your recently started Application Test. The dashboard displays how many Applications have started and if any have failed. Performance measurements are also shown.
Starting the Application Test from the Test Config Page
You can start an Application Test directly from the Test configuration page. This allows you to run the Test immediately after reviewing or editing its settings, without returning to the Overview page.
Unlike Load Tests, multiple Application Tests can run at the same time. The Start button remains available even if other Application Tests are currently running.
If there are unsaved changes, clicking Start will trigger a confirmation popup:
-
Click Save and Run to save your changes and start the Test.
-
Click Cancel to return to the page without starting the Test or saving your changes.
For Desktop Connector Tests, clicking Start opens the same pop-up used on the Overview page.
Application Test Results
For information on the Application Test results, see Viewing Application Testing Results.