Overview
In the Test configuration JSON you get from the API, there is a block of timeouts:
"timeouts": {
  "connectionRequested": null,
  "connectionAttempted": null,
  "sessionStarted": null,
  "sessionEnded": null,
  "sessionAborted": null,
  "abortConfirmed": null
}
The connectionAttempted parameter governs how long the Appliance will wait for the Engine to start on a new session before declaring a login failure. This is useful when you have especially slow logins that take close to, or more than, 5 minutes.
You can edit this timeout by accessing the /publicApi/v8-preview/tests/{testId} endpoint and specifying the “timeouts.connectionAttempted” parameter.
Tip: To automate the process, use a PowerShell script in Additional Resources. This way, you don’t need to perform actions in the APIs.
Using the PowerShell Script
To use this script, download it, unblock it, and then get an API key from the Appliance web UI. To create a Configuration access token, see Adding a System Access Token.
Run the command “get-help .\engine-start-timeout.ps1 -detailed” for specific guidance on running this script. Examples:
List all available Tests:
PS> .\engine-start-timeout.ps1 -server FQDN -key KEY -action list
Get the currently configured timeout for a specific Test.
PS> .\engine-start-timeout.ps1 -server FQDN -key KEY -action get -testguid XXX
Set the timeout on the specific Test to 300 seconds.
PS> .\engine-start-timeout.ps1 -server FQDN -key KEY -action set -testguid XXX -value 300
Using the Public API
If you cannot use the PowerShell script, you can use our Swagger interface to access the API. For details on accessing the Public API in Login Enterprise, see Accessing the Public API.
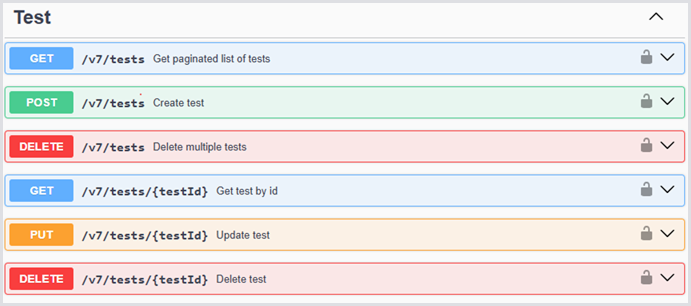
Once you have accessed the 8.0-preview API Console (Swagger) link, scroll down to the Test API section:
-
To modify a Test, you must first use the GET method with {testId} to get the current configuration, and then use the PUT method with {testId} to update it. To get your Test ID, modify your Test in the Login Enterprise UI. For this:
-
In the Login Enterprise sidebar menu > Configuration > Manage tests, select the type of Test, and click on your specific Test to modify it.
-
Then, look at your location bar at the top of the browser. Your URL will look like this: https://login-ent.loginvsi.com/configuration/tests/f69f0a19-b2fb-4e5d-9f85-4bbe69493d93/settings
-
The GUID in that URL is the ID of your Test. Copy it into your clipboard.
-
-
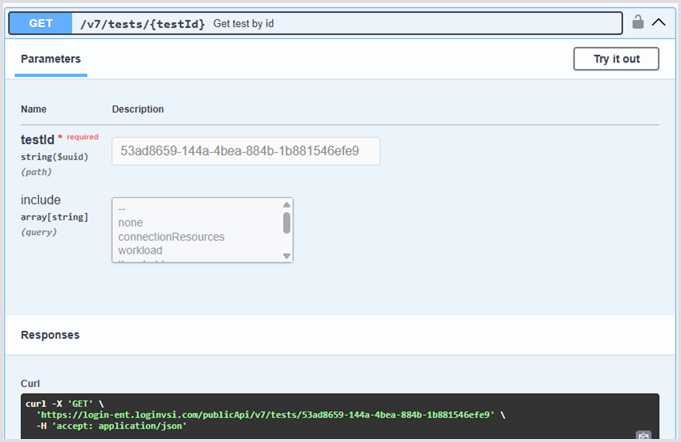
Click on the second GET method, the one that includes testId, and open it as follows:
-
Click Try it out to enable the fields.
-
In the testId field, paste your test ID.
-
Leave the include options untouched.
-
Scroll down and click Execute.
-
In the Server response block, you should have a return code of 200 and the JSON body of your Test configuration:
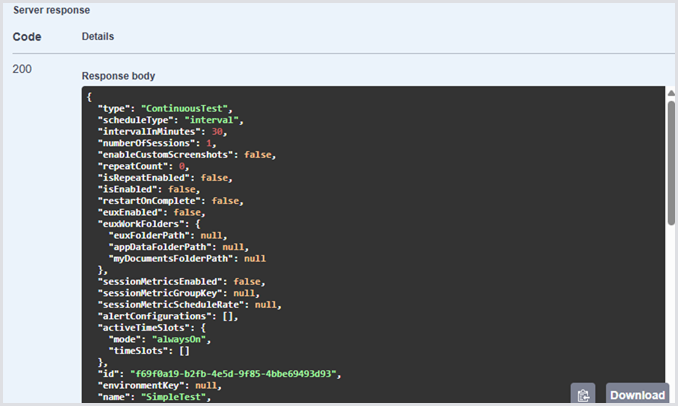
Note the Copy button to copy the entire JSON output into your clipboard. Don’t do that yet.
Be careful not to scroll too far down to the Responses section. That section lists possible response examples, and not your actual Test configuration.
-
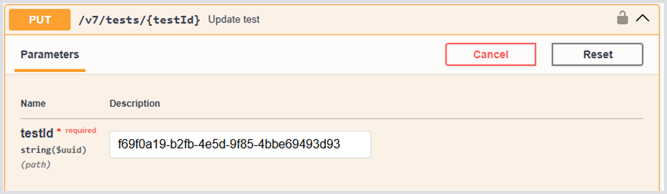
Click on the PUT method with {testId} to open it up, and then click Try it out.
-
In the testId field, paste your testId.
-
Go back to the results of your GET and use the Copy button to copy the JSON into your clipboard.
-
Return to the PUT method and paste it into the Request Body, replacing the data that is there.
-
Scroll down to the bottom of the JSON you just pasted and look for the “timeouts” entry. If this Test has never had connectionAttempted set, “timeouts” will be null:
.png?cb=f6890468bba8583b6b21a03179e7bed6)
Otherwise, it will list a set of timeouts as follows:

-
If your “timeout” block is null, change it to include just your new timeout as follows:
"timeouts": {
  "connectionAttempted": 0
}
-
If the block already exists, update the value you want. Ignore the other settings.
If you are modifying a Load Test or a Continuous Test, you must make one other modification.
-
Look for the following setting:
"sessionMetricDefinitionGroupId": "...GUID...",
-
If the setting exists and is not “null”, you must change the field name to sessionMetricGroupId:
"sessionMetricGroupId" ": "...GUID...",
-
Click Execute. You should see a “200” response.
-
Scroll back up to the GET with {testId} section and click Execute again. You should see your updated value there. The next Test execution will use this new timeout value.