Introduction
Images can be created and stored in an Azure Compute Gallery, or optionally created directly within a Resource Group, if the source machine is not “Trusted Launch” enabled.
Configuring Image Creation
-
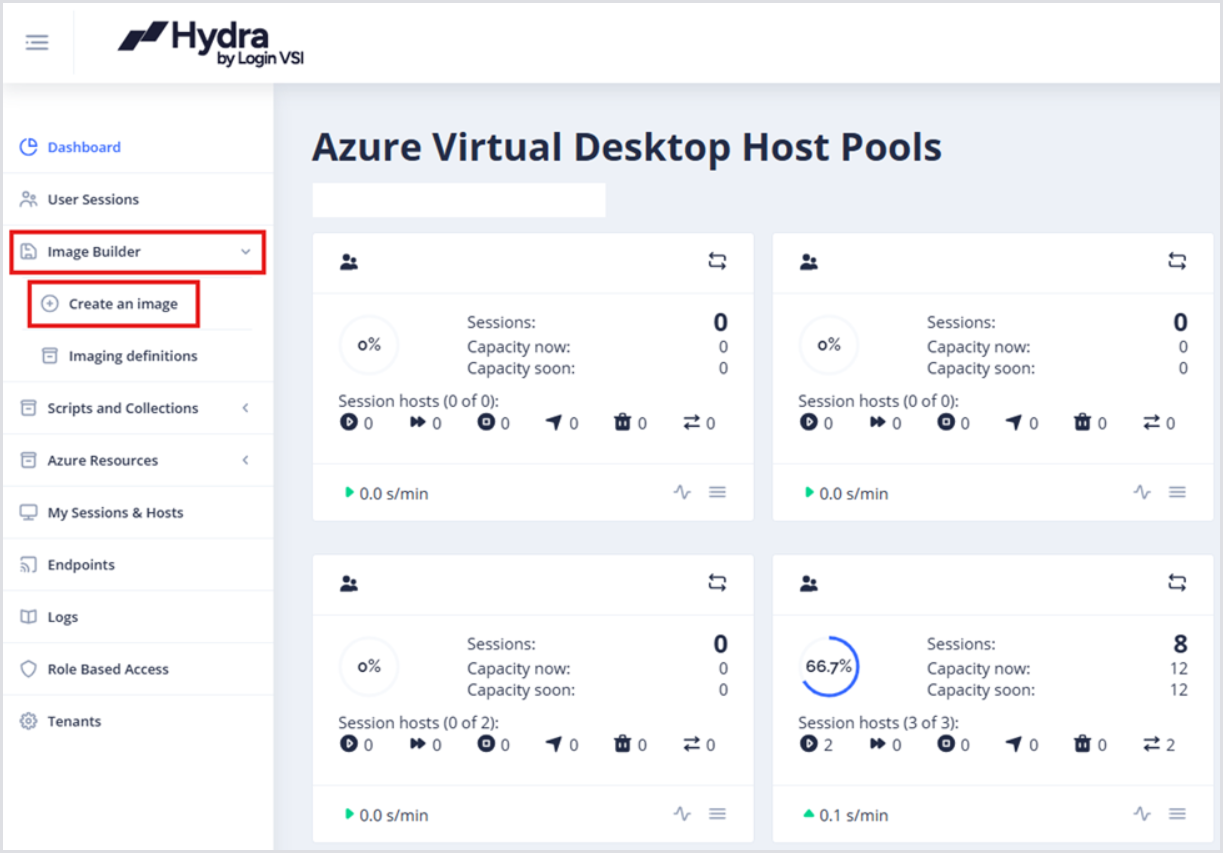
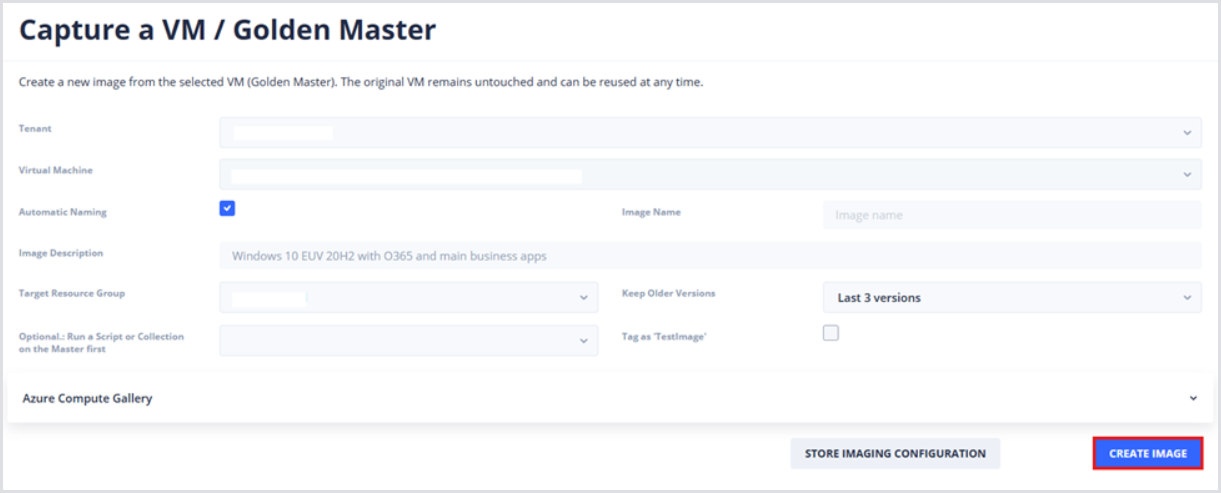
From the left-side menu, click Image Builder and then Create an Image.
-
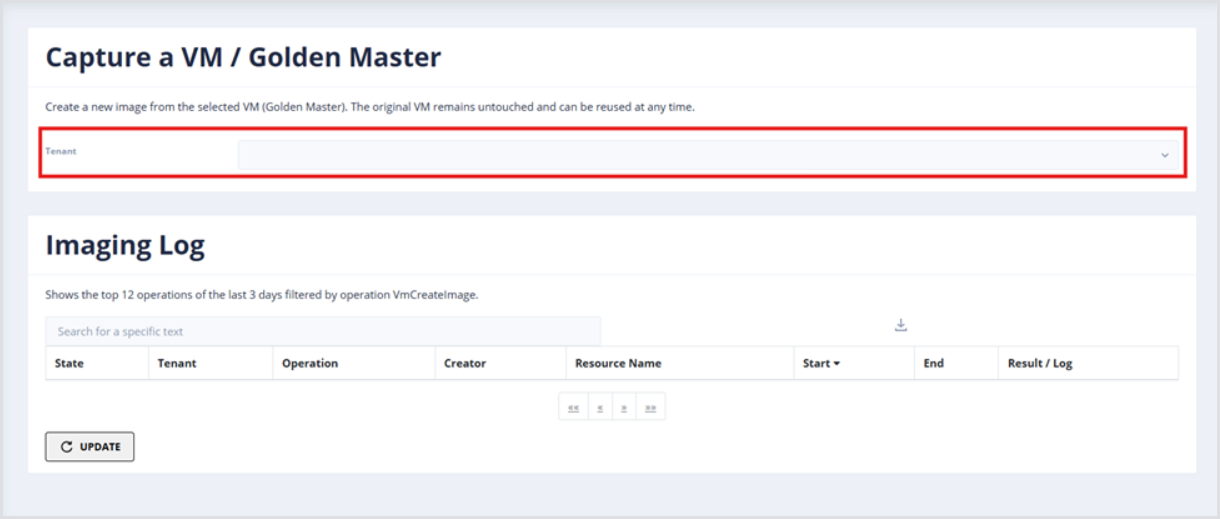
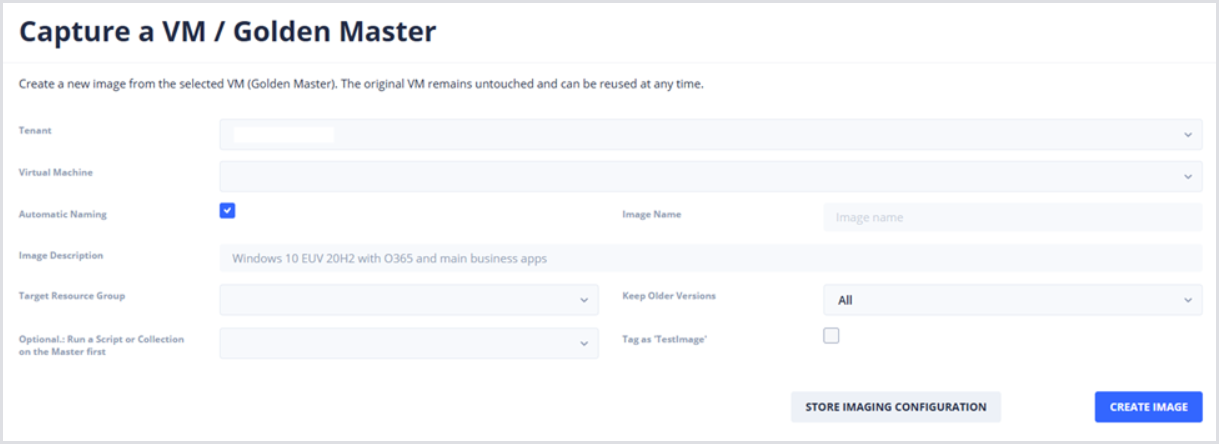
Select the Tenant where the Golden Master virtual machine exists. This will open additional configuration options.
-
In the Virtual Machine drop-down, select the Golden Master virtual machine.
-
Decide whether you want Hydra to apply Automatic Naming or whether a custom scheme is desired.
-
By default, Hydra will automatically name your image using the following format: <VM-Name>_<DateTime>. For example, Windows11Gold_2025-07-01_12-00-00
-
If a custom naming scheme is desired, enter it within the Image Name field
-
-
Optionally provide an Image Description of requirements or customizations.
-
Select the Target Resource Group where the image should be created.
-
Use the Keep Older Versions drop-down to select an appropriate number of backups to keep. For example, you can keep all image versions, just the latest one, or up to the last 20 versions.
Configuring Azure Compute Gallery Image Storage
Hydra does not create Azure Compute Gallery objects or VM Image Definitions. You must create these manually in the Azure Portal. For more information on creating an Azure Compute Gallery, image definitions, and image versions, see the Microsoft Documentation.

-
If an Azure Compute Gallery deployment is required, click the Azure Compute Gallery drop-down to display additional configuration menus. This will display all available VM Image Definitions in all available Azure Compute Galleries.
-
From the Locations drop-down, specify Azure regions where the Image should be available.
-
Use Remove Native Image after Copying to delete the native image after copying it to the gallery definition.
-
Use Shallow Replication for testing and development. This makes the image ready faster, but you can't deploy many hosts in parallel while the image is not copied, and the image is only available in the home region.
-
Use the Keep Older Versions drop-down to select an appropriate number of backups to keep. For example, you can keep all image versions, just the latest one, or up to the last 20 versions. Hydra will remove older versions to reduce costs.
-
If you select Advanced options, there are more options available:
-
Date Naming: Makes the version format year.month.day (UTC). This simplifies the image version view, but it removes an existing same-day version from the gallery definition, and existing hosts don’t recognize it as a new image. (e.g., 2026.04.20).
-
Version Name: Gives the image you are creating a unique version number (e.g., 100.25.215).
-
Replica Count: Creates a specified number of image copies.
-
Disk Type: Specifies the Storage type of the image you are creating (e.g., Premium SSD).
-
Building the Image
-
When finished with configuration, click Create Image to begin the process. Depending on the master image size, the number of installed applications, and the number of destination compute galleries, this can take from 6 to 45 minutes.
-
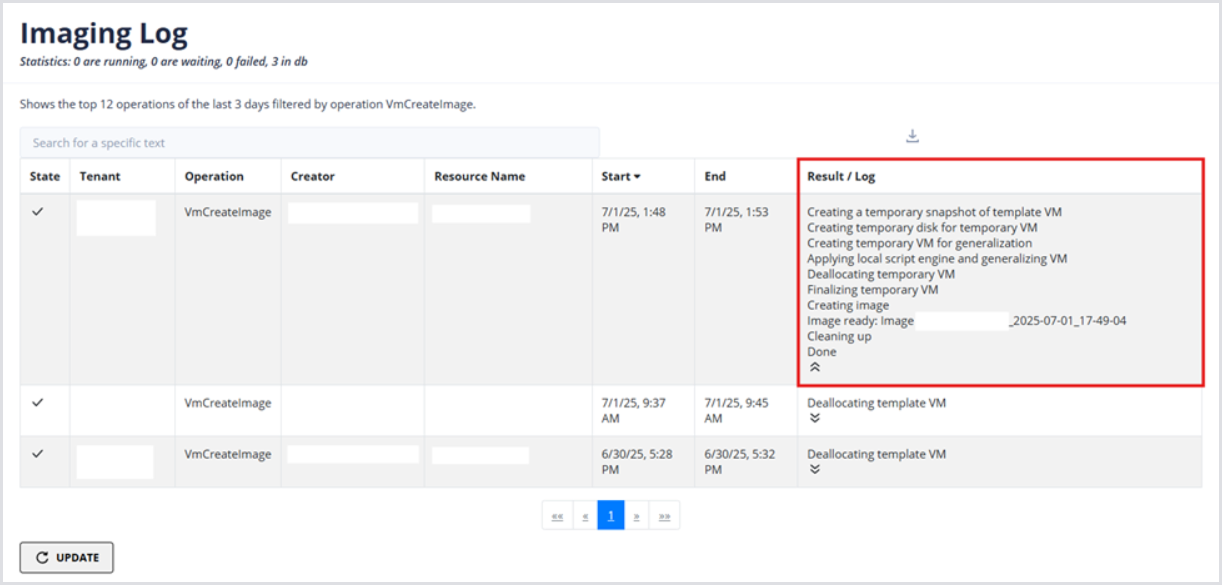
Use the Imaging Log table to track the progress of your images. The Results column displays each step of the process for straightforward tracking, including the image name.