Overview
To maintain the smooth operation of browser automation scripts on your Virtual Appliance, it's crucial to keep the Chrome, Edge, and Firefox drivers updated. Chrome, Edge, and Firefox browsers regularly release updates, and outdated drivers can lead to script failures in Applications like the Script Editor and X-Ray.
Automatic Updates (Preferred Method)
For most users, the preferred method is to configure your Virtual Appliance to perform automatic updates of the browser drivers. This ensures that your drivers are always up to date, providing compatibility and reliable performance across your automation environment. See the steps below for more information:
In Login Enterprise, you can update Selenium web automation drivers, ensuring you always have the latest driver versions for optimal performance.
This feature requires an internet connection. If you do not have internet access, you must update drivers manually.
Enabling Automatic Updates
-
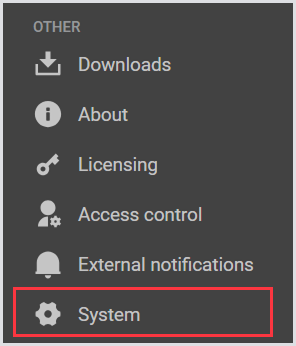
In the Login Enterprise sidebar menu, navigate to Other > System.
-
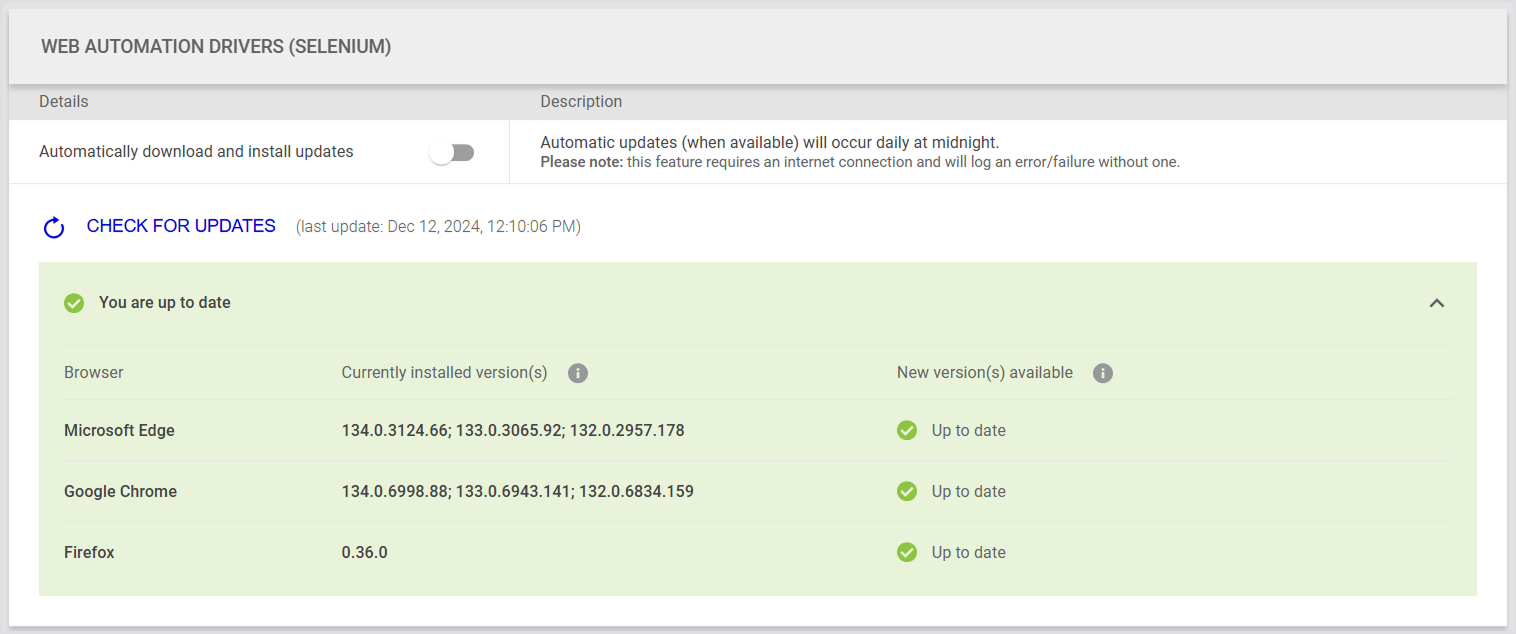
In System, look for Web Automation Drivers (Selenium).
-
In Automatically download and install updates, toggle the switch to green.

The Appliance will check for driver updates daily at midnight and download any new versions of available drivers.
Manually Checking for Updates
To check for newer drivers, click Check for updates. If no updated drivers are available, you will receive an “up to date” notification, listing each major browser (Chrome, Edge, Firefox) along with their respective web automation driver (Selenium) versions.
Updating Drivers
When updates are available, you will see a “New update is available” message, indicating which drivers need to be updated. Click Update Now to perform the update. A loading spinner will appear while the download and update are in progress.
Notes and Considerations
-
By default, automatic downloads are disabled.
-
Driver updates are only available if the Appliance is connected to the internet.
-
For Chrome and Edge, updates for minor versions are performed across the latest 3 major versions.
-
Updating to a newer minor version overwrites the previous minor version, ensuring only 1 minor version is stored per major version.
-
-
For Firefox, only the latest ESR version is supported.
-
A maximum of 1 minor version of the latest major version is stored.
-
-
Updating to a new major version will not delete previous major versions, but the UI will only list the latest 3 installed versions.
Manual Update Method (Fallback)
These are step-by-step instructions on how to manually update the drivers for Chrome, Edge, and Firefox. This method is intended as a fallback option if you deliberately do not have the Appliance connected to the internet. Use this method only if automatic updates are not possible in your environment.
Determining the Current Browser Version
Before proceeding with driver updates, it's essential to verify the current version of your browser on the target machine. Follow these steps to check:
-
Open a connection to the target machine (where the Login Enterprise will run or where you are creating your script).
-
Check the version of your browser using the following links:
Downloading the Edge Driver
-
Open the Edge Driver download link.
-
Scroll down to see the latest drivers.
-
Click the x64 download link next to the version you are running internally.
Downloading the Chrome Driver
-
Open the ChromeDriver download link.
-
You will see a folder overview. Locate the version you are using from the list and open that link.
-
Download the file named chromedriver_win32.zip.
Downloading the Firefox Driver
-
Open the FirefoxDriver download link from GitHub.
-
Scroll down to find the Assets section. You might need to click Show All Assets to find the file you need.
-
Download the file ending with win64.zip.
Importing the Driver
You need to update the following items with the newly downloaded driver:
Updating the Login Enterprise Appliance
Opening the Console Session
-
Open a console session to the Login Enterprise Appliance.
-
Navigate to Troubleshooting > Open Bash Shell.
-
Execute the following command to allow writing to the folder (use lowercase letters):
chmod 707 /loginvsi/content/selenium
Uploading the Driver
-
Connect with WinSCP:
-
Download and install WinSCP.
-
Open WinSCP and set up an SFTP connection to the Login Enterprise Appliance.
-
Use the admin password for the connection.
-
Upload the Driver:
-
Browse to the
./loginvsi/content/selenium directory. -
Upload the newly created driver folder, e.g.,
Chrome91,EdgeChromium91, or Gecko34to this location.
Example folder structure:
/loginvsi/content/selenium/Chrome91/chromedriver.exe
/loginvsi/content/selenium/EdgeChromium91/msedgedriver.exe
/loginvsi/content/selenium/Gecko34/geckodriver.exe
Updating Script Editor and X-Ray on the Appliance
The following steps will guide you through updating the ScriptEditor and ScriptingToolset on the Login Enterprise Appliance, ensuring any subsequent downloads from the Appliance include the updated browser drivers.
-
Connect to the Appliance: Use a tool like WinSCP on MyHost to establish a connection with the virtual Appliance. This opens a file browser interface for accessing the Appliance's file system.
-
Download ScriptEditor.zip:
-
Navigate within WinSCP to the Appliance path:
/loginvsi/content/zip/. -
Download the
ScriptEditor.zipfile from the Appliance to MyHost.
-
Update Browser Driver:
-
On MyHost, extract the
ScriptEditor.zipfile. -
Locate the
Driverssubdirectory within the extractedScriptEditorfolder.
-
Add new Driver: Insert or replace the outdated browser driver files (
chromedriver.exe,msedgedriver.exe, orgeckodriver.exewith the new driver files into theDriverssubdirectory. -
Replace
ScriptEditor.zipon the Appliance: Upload the updatedScriptEditor.zipfrom MyHost back to/loginvsi/content/zip/on the Appliance, replacing the existingScriptEditor.zip. -
Verify updates: Confirm that downloads of
ScriptEditor.zipandScriptingToolset.zipthrough the Login Enterprise web interface now include the updated browser driver.
By following these instructions, you should be able to successfully update the Chrome and Edge drivers on your Virtual Appliance.
Version File
The version file is used solely to verify if Login Enterprise is using the latest version of drivers. If you do not manually add the version file during the update process, the Currently installed version(s) column in the Login Enterprise sidebar menu > System > General might not display the manually updated driver. So, when you check for updates, you might see available updates even if you already have the latest drivers installed.
Login Enterprise automatically utilizes the latest drivers regardless of the version file. If you want the Login Enterprise UI to display the driver that was manually uploaded, add a version file in the same folder as the driver.
Tip: For the version file, ensure there is a file named "version" (without any extension) located in the same folder as each driver, e.g., Edge Driver, Chrome Driver. This "version" file is essential for the system to verify the latest driver version.
You can download the version file example from Additional Resources.
Updating Application Script Editor and X-Ray Locally
For existing Script Editor installations on other hosts where scripting occurs, follow the steps below to manually update the drivers if necessary.
Application X-Ray and Script Editor both use the exact same folder to access drivers. Therefore, updating the drivers in this folder will apply to both applications.
-
Unzip the Driver:
-
Unzip the downloaded driver file. You will get either
chromedriver.exe , msedgedriver.exe, or geckodriver.exe.
-
Create a New Folder:
-
Navigate to the
ScriptEditor\Driversdirectory. -
Create a new folder named
Chrome(your.chrome.version),EdgeChromium(your.edge.version), or Gecko(your.firefox.version). -
Example:
-
For Chrome version 91, create
Chrome91. -
For Edge version 91, create
EdgeChromium91. -
For Firefox version 0.34.0, create
Gecko34.
-
-
Move the Driver:
Copy the unzipped chromedriver.exe, msedgedriver.exe, or geckodriver.exe to the newly created folder.
Example folder structure:
ScriptEditor\Drivers\Chrome91\chromedriver.exe
ScriptEditor\Drivers\EdgeChromium91\msedgedriver.exe
ScriptEditor\Drivers\Gecko34\msedgedriver.exe