Overview
The Login Enterprise Launcher for IGEL UMS (Universal Management Suite) enables seamless deployment and management of virtual appliances on IGEL devices. This article walks you through setting it up and ensuring that all necessary certificates and packages are correctly installed and configured.
In the following sections, you will learn how to:
-
Install and configure the required certificates on both the IGEL UMS and IGEL devices.
-
Import the necessary SDK certificates to ensure secure communication.
-
Deploy the Login Enterprise Launcher package to the IGEL UMS web interface and the IGEL device.
-
Run the Login Enterprise Launcher to manage virtual appliance instances effectively.
By the end of this section, you will have successfully deployed and configured the Login Enterprise Launcher in your IGEL UMS environment, enabling you to manage virtual appliance deployments across your IGEL devices.
Requirements
These steps assume the following has been done already:
-
Login Enterprise is configured. Contact Login VSI Sales if not configured.
-
IGEL UMS 12 Desktop and UMS 12 Web are installed. For details, see Installing / Upgrading to IGEL UMS 12.
-
The IGEL UMS is licensed. For details, see UMS Licenses.
-
The IGEL UMS is Registered to IGEL. For details, see Registering the UMS.
-
The IGEL UMS is configured as an Update proxy instead of the IGEL App Portal. For details, see Configuring Global Settings for the Update of IGEL OS Apps.
-
This enables the Login Enterprise launcher to be installed without the App Portal.
-
-
-
An IGEL 12 OS Device is already set up to be used as a Login Enterprise Launcher. For details, see the Installation Procedure.
-
The IGEL OS minimum version is 12.6 -- for the IGEL SDK certificates to work; certificates will be set up later in this article.
-
The IGEL OS is licensed. For details, see Deploying Licenses through the IGEL UMS.
-
The IGEL OS is registered to UMS. For details, see Registering IGEL OS Devices on the UMS Server.
-
Getting the Certificate into UMS and onto the Device
-
Download the Login Enterprise
CA.crtin a web browser by navigating tohttps://<FQDN Login Enterprise virtual appliance hostname>/contentDelivery/content/CA.crt -
Log in to the UMS web console.
-
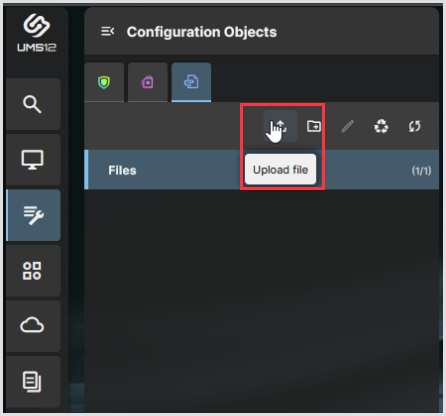
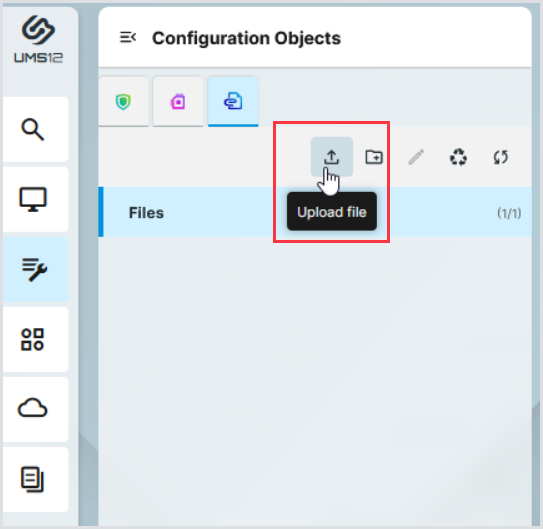
In the UMS sidebar menu, go to Configuration and click Files.
.png?cb=57d3765ded74832fece47e14e18d68a3)
-
In Files, click Upload File. Navigate to the downloaded
CA.crtand upload it.
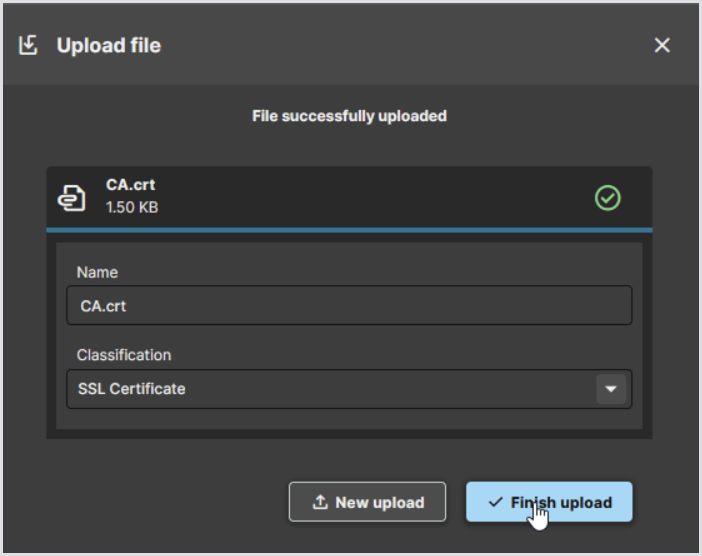
-
In Classification, select SSL Certificate.
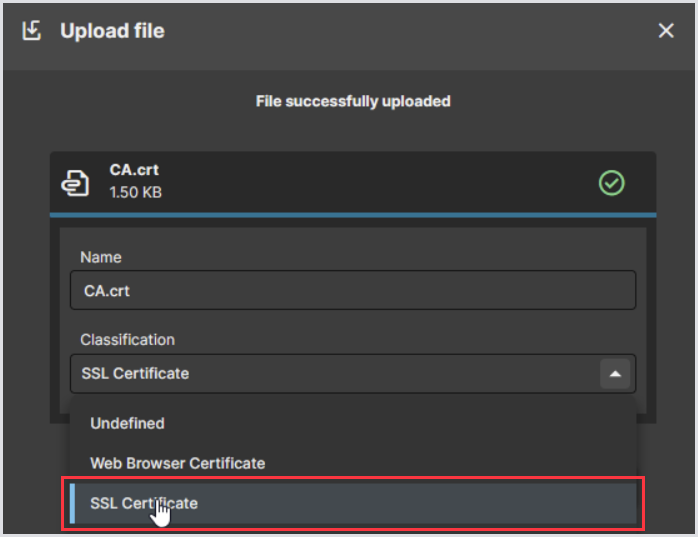
-
Click Finish upload.
-
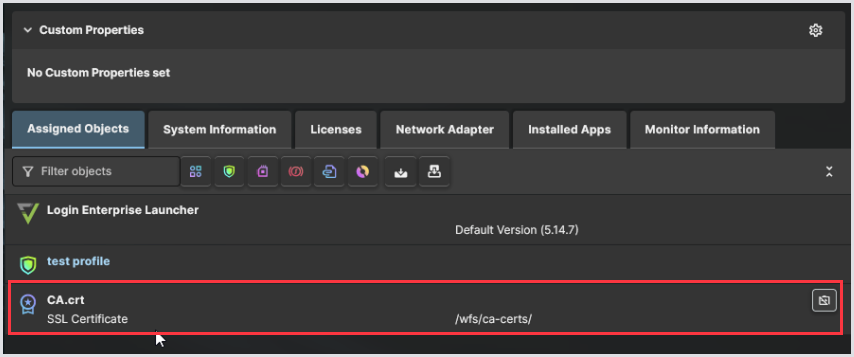
The
CA.crtis now visible in the UMS web console.

-
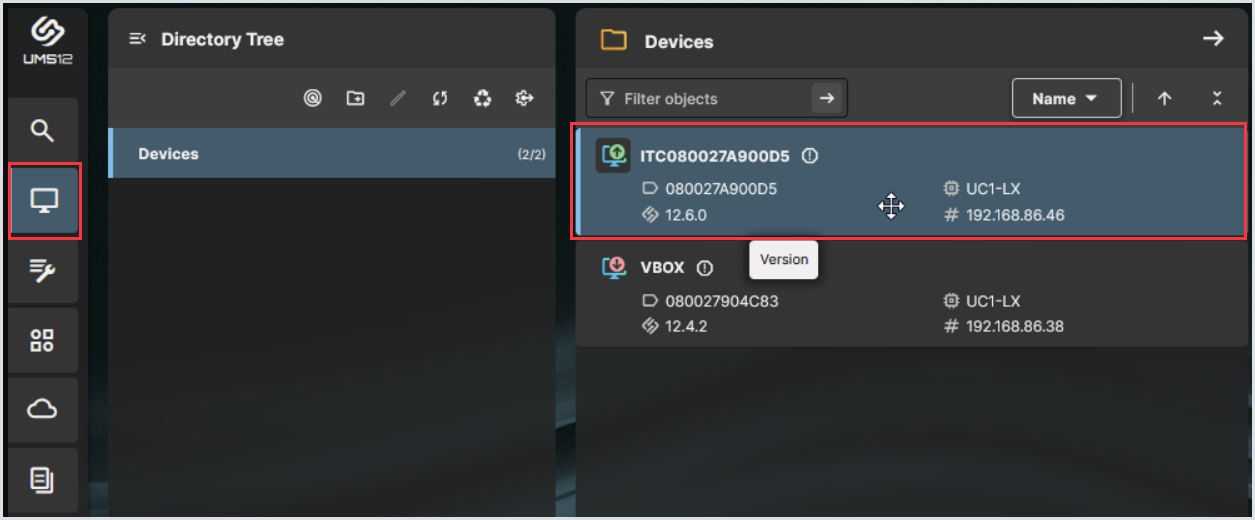
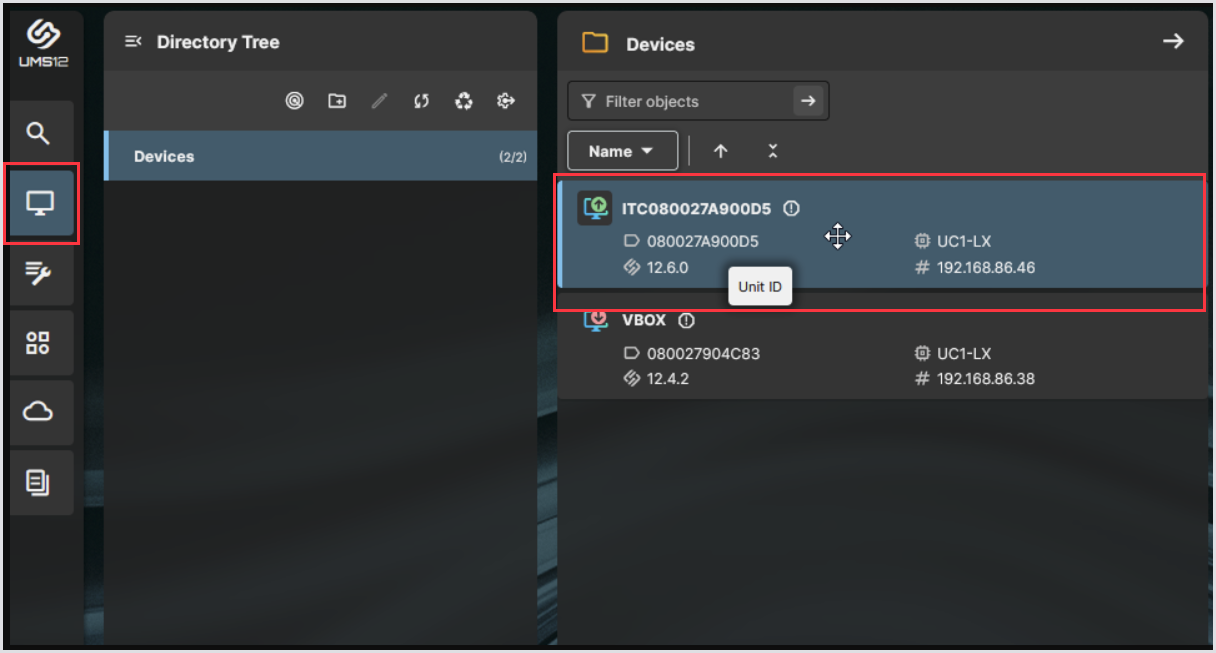
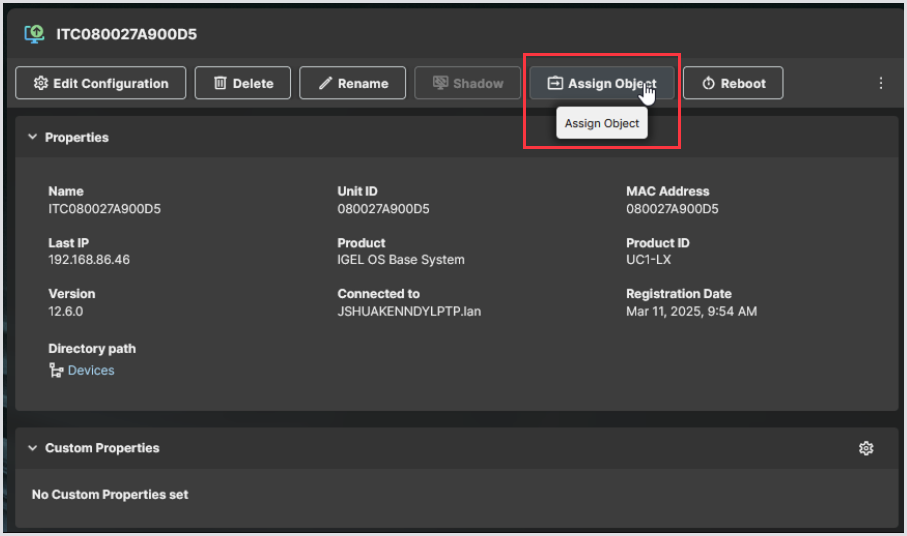
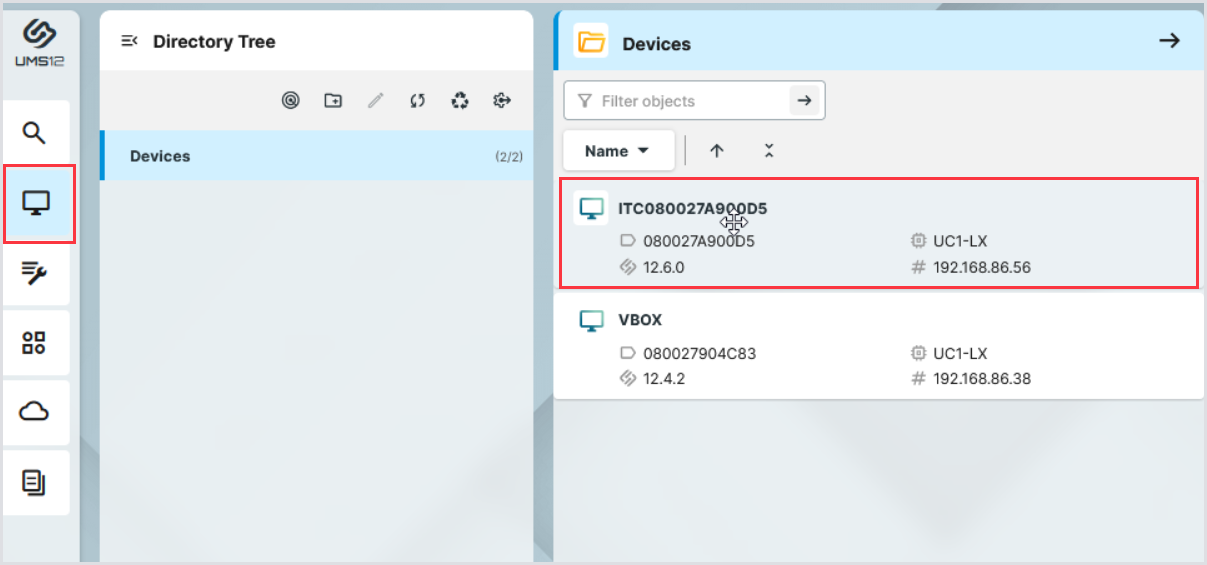
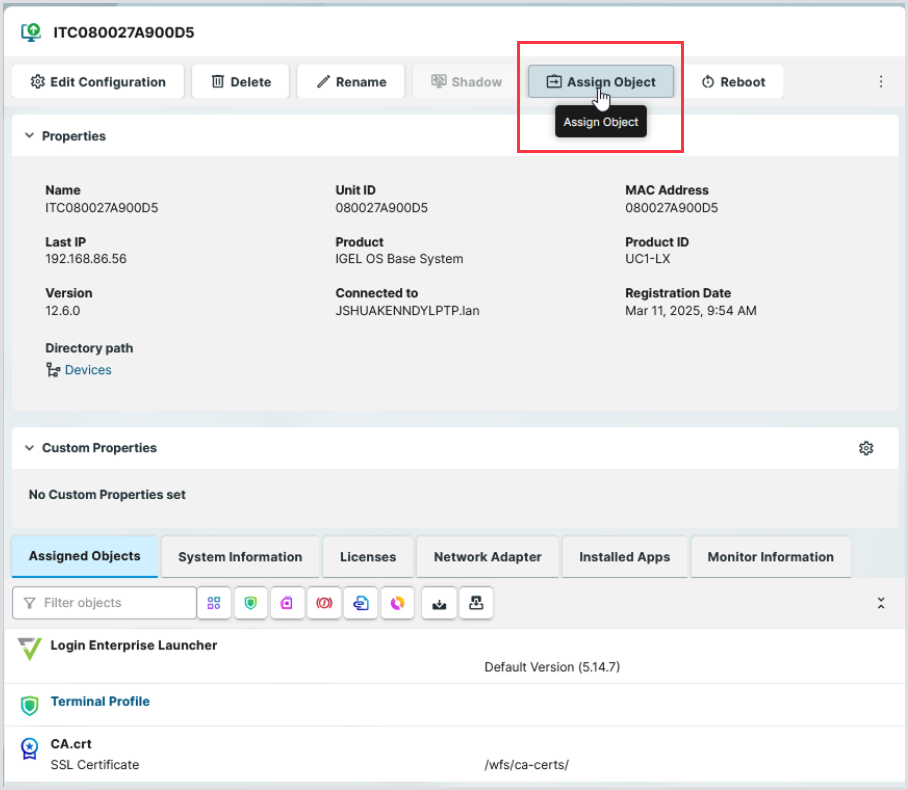
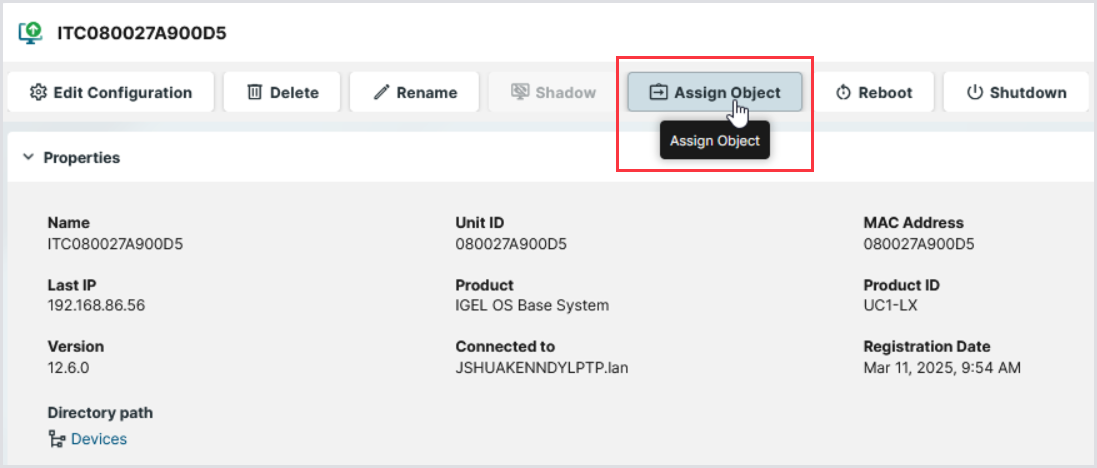
In the UMS sidebar menu, go to Devices, and select the IGEL device you want to be a Login Enterprise Launcher.
-
In the top bar menu, click Assign Object.
.png?cb=ab248c3142220c97c3fb5026396c3f76)
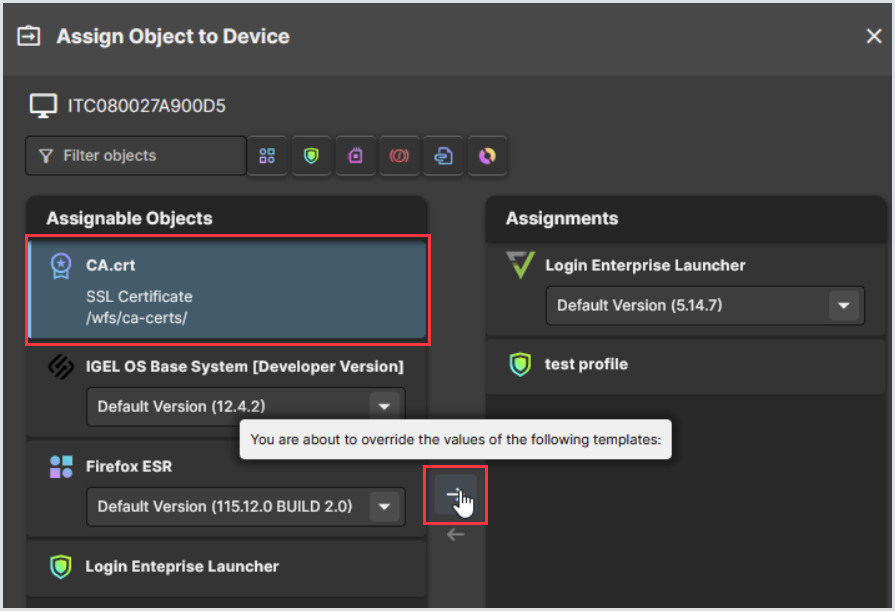
-
In Assign Object to Device > Assignable Objects, click on the
CA.crt, then click on the right arrow.
-
Ensure the
CA.crtis now in Assignments. Then, click Save and apply on reboot.
.png?cb=d86086fab7908babd4c6c8b01ce96f6d)
-
Click Reboot.
-
Once the device has rebooted, refresh the page to confirm that the license is now applied to the Device.
Confirming the Certificate is Applied to the Device (Optional)
To verify that the license is correctly applied to the device:
-
Console into the device.
-
Access the root shell by running the following command:
openssl x509 -in /wfs/ca-certs/CA.crt -text -noout -
Review the output in the terminal shell. You should see details about your Virtual Appliance certificate, such as the hostname.
For more information, see Terminals in IGEL OS.
Installing SDK Certificates on the IGEL Device
-
From Additional Resources, download the following files:
-
IGEL_OS_12_SDK-intermediate.crt -
IGEL_OS_12_SDK-leaf.crt
-
-
Copy or transfer these files to the IGEL device that will act as the Login Enterprise Launcher. You can use one of the following two methods to get the files onto the device:
-
Drive configuration for the IGEL Device. For details, see Windows Drive Configuration in IGEL OS 12.
-
Getting files into an IGEL Device through UMS Web. For details, see Upload and Assign Files in the IGEL UMS Web App.
-
-
Via a terminal in the IGEL Device, create the directories for the certs. Run these commands:
mkdir /wfs/cmty/im-certs
mkdir /wfs/cmty/certs/ -
Copy the
IGEL_OS_12_SDK-intermediate.crtinto/wfs/cmty/im-certs/.
For example, if you haveIGEL_OS_12_SDK-intermediate.crtin/tmp/you would run the following command:cp -r /tmp/IGEL_OS_12_SDK-intermediate.crt /wfs/cmty/im-certs/
Copy theiinto/wfs/cmty/certs/. For example,cp -r /tmp/IGEL_OS_12_SDK-leaf.crt /wfs/cmty/certs/ -
Reboot the IGEL device and log in again once it has fully restarted.
-
Open a terminal again and run the following commands:
cd /wfs/cmty/im-certs/
dir
If theIGEL_OS_12_SDK-intermediate.crtfile appears in the terminal console output, the IGEL device is successfully trusting the certificate. -
Run the following commands:
cd /wfs/cmty/certs/
dir
If theIGEL_OS_12_SDK-leaf.crtfile appears in the terminal console output, the IGEL Device is successfully trusting this certificate.
Now the IGEL Device is ready to have the Login Enterprise Launcher installed on it via the IGEL UMS.
Manually Downloading and Getting the Launcher Package on the IGEL UMS Web
-
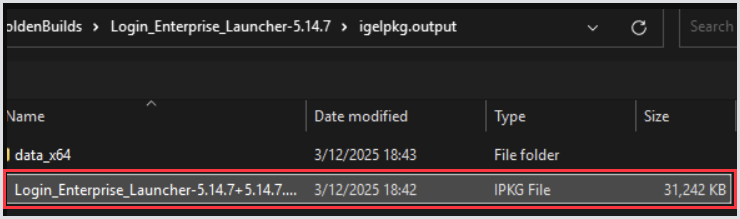
Download the latest Login Enterprise Launcher package for IGEL 12 from the Downloads page. Then, extract this file to get the
.ipkgfile inside. -
Open and log in to the IGEL UMS Web console.
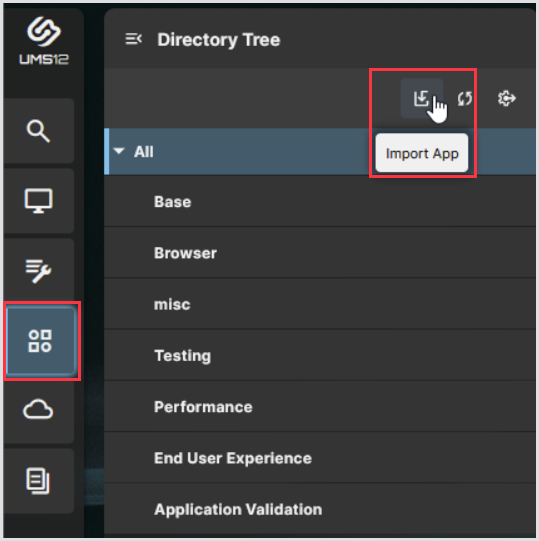
-
In the UMS sidebar menu, navigate to Apps and then click Import App.
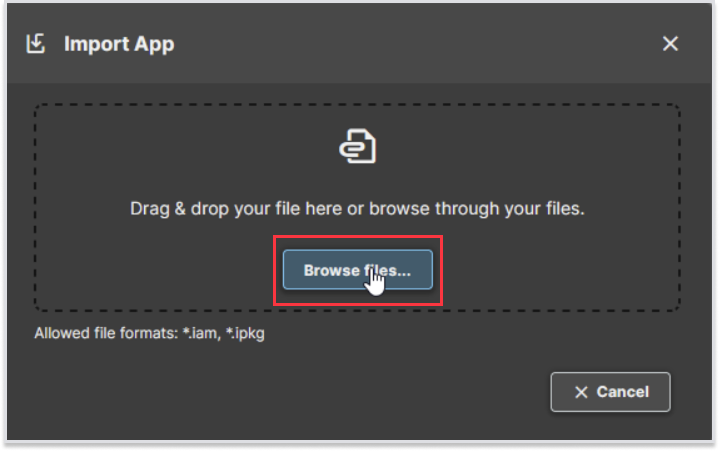
-
In Import App, click Browse files.
-
Browse and select the Login Enterprise Launcher
.ipkgfile.
-
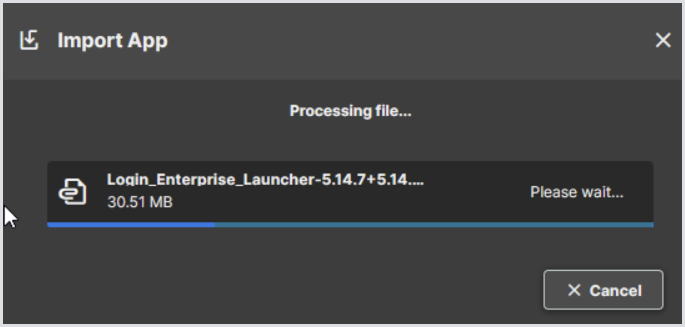
The Import App pop-up will show that the file is being uploaded.
-
After uploading, click Confirm.
.png?cb=e8088677233178fccfa2217a05335108)
-
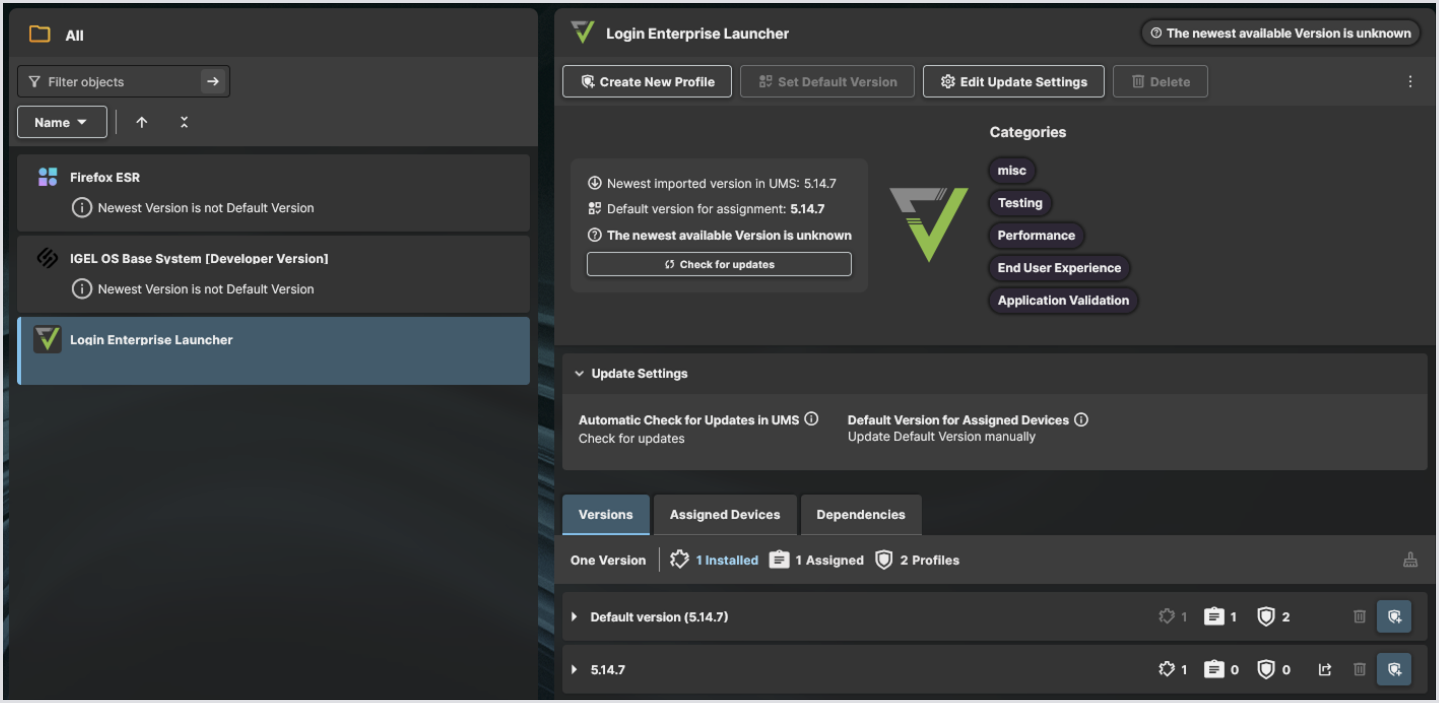
The Login Enterprise Launcher application should now be visible in the IGEL UMS Web interface.
Getting the Launcher onto IGEL Devices
Follow these steps regardless of whether you got the Login Enterprise Launcher into the UMS manually or via the App Portal.
-
In the UMS sidebar menu, go to Devices, and select the IGEL Device you want to be a Login Enterprise Launcher.
-
In the top bar menu, click Assign Object.
-
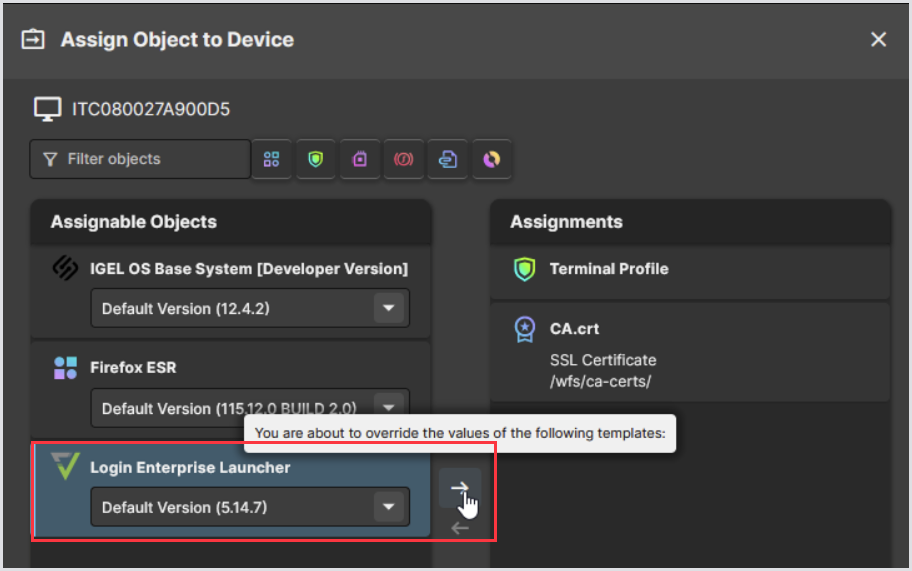
In Assign Object to Device > Assignable Objects, click on the Login Enterprise Launcher, and then click on the right arrow.
-
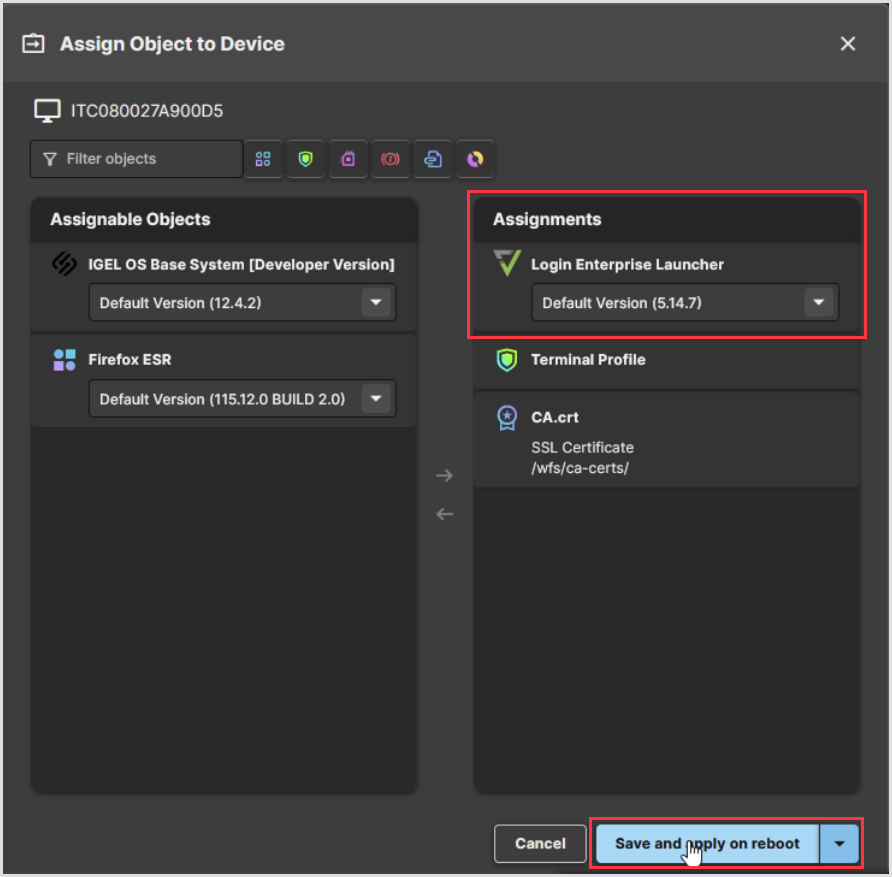
Ensure the Login Enterprise Launcher is in Assignments. Then, click Save and apply on reboot.
-
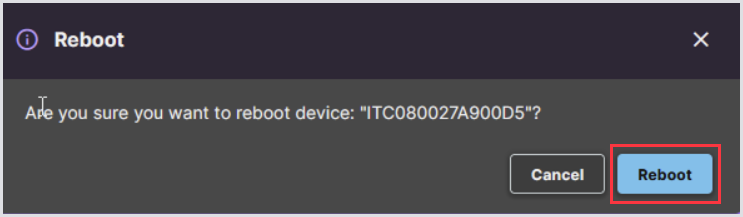
Click Reboot.
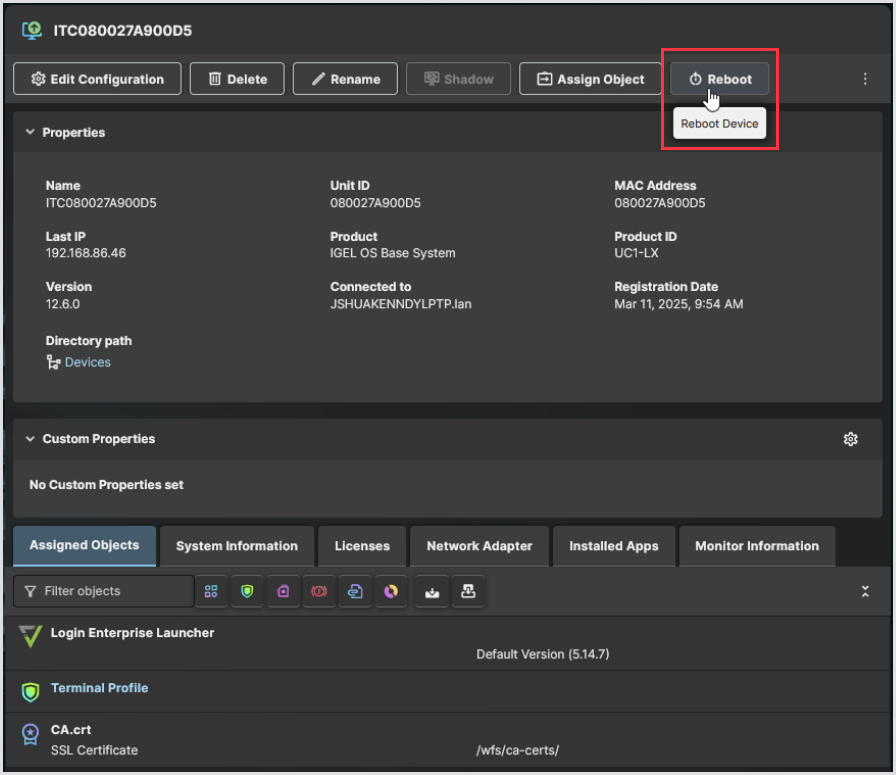
-
Confirm the Reboot action.
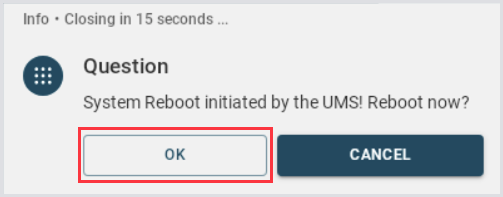
-
On the IGEL device where the Login Enterprise Launcher is being installed, click OK on the System Reboot pop-up initiated by UMS. This will speed up the installation process.
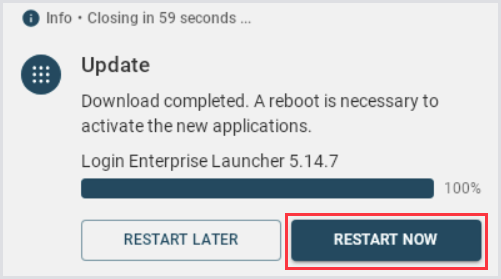
-
After the IGEL device reboots, a pop-up will appear, indicating that the download is complete. Click Restart Now to speed up the installation process.
-
After the IGEL device reboots, open a terminal and type the following command:
/services/Login_
Press the Tab on your keyboard to automatically complete the path.
If/services/Login_Enterprise_Launcher/appears in the terminal, the Login Enterprise Launcher has been installed.

-
From Additional Resources, download the
appsettings.jsonfile.
In a text editor, edit the appsettings.json file.
-
Find ServerUrl and enter the value for your Login Enterprise appliance’s web URL, such as https://myDomain.myAppliance.com – note without the slash at the end, like how it is here:
-
Find the ClientSecret and place it in the Launcher secret value. To copy the ClientSecret, in the Login Enterprise sidebar menu, navigate to Launchers > Downloads.
-
Below is how the ClientSecret will appear in the
appsettings.jsonfile once you’ve added your actual ClientSecret. The placeholder value is shown here:
-
Save the
appsettings.jsonfile. -
In the UMS Web Console, navigate to Configuration, and then click Files.
-
In Files, click Upload file.
-
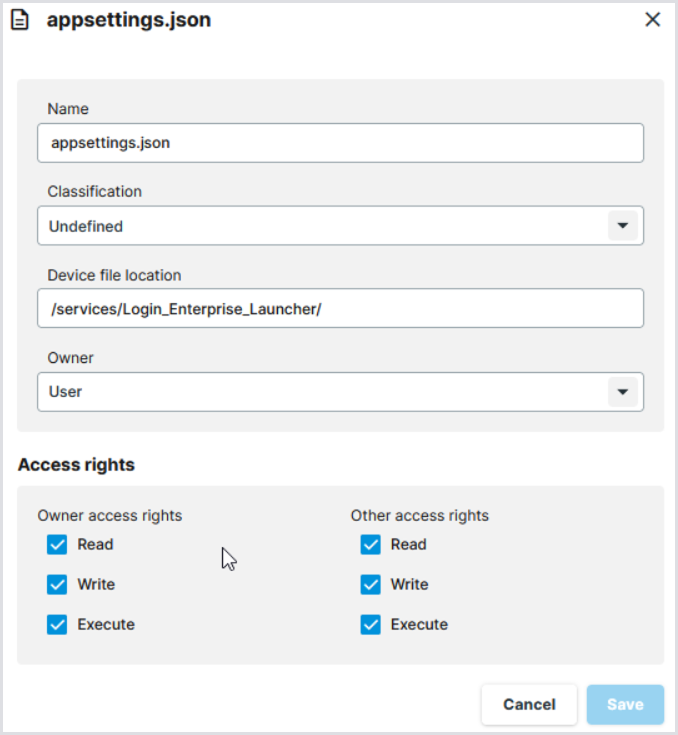
In the Upload File pop-up, the Name will remain as
appsettings.json. Set the Classification to Undefined, the Device File Location to /services/Login_Enterprise_Launcher, and the Owner to User. Ensure to enable all the Access rights via the checkboxes, then click Save.
-
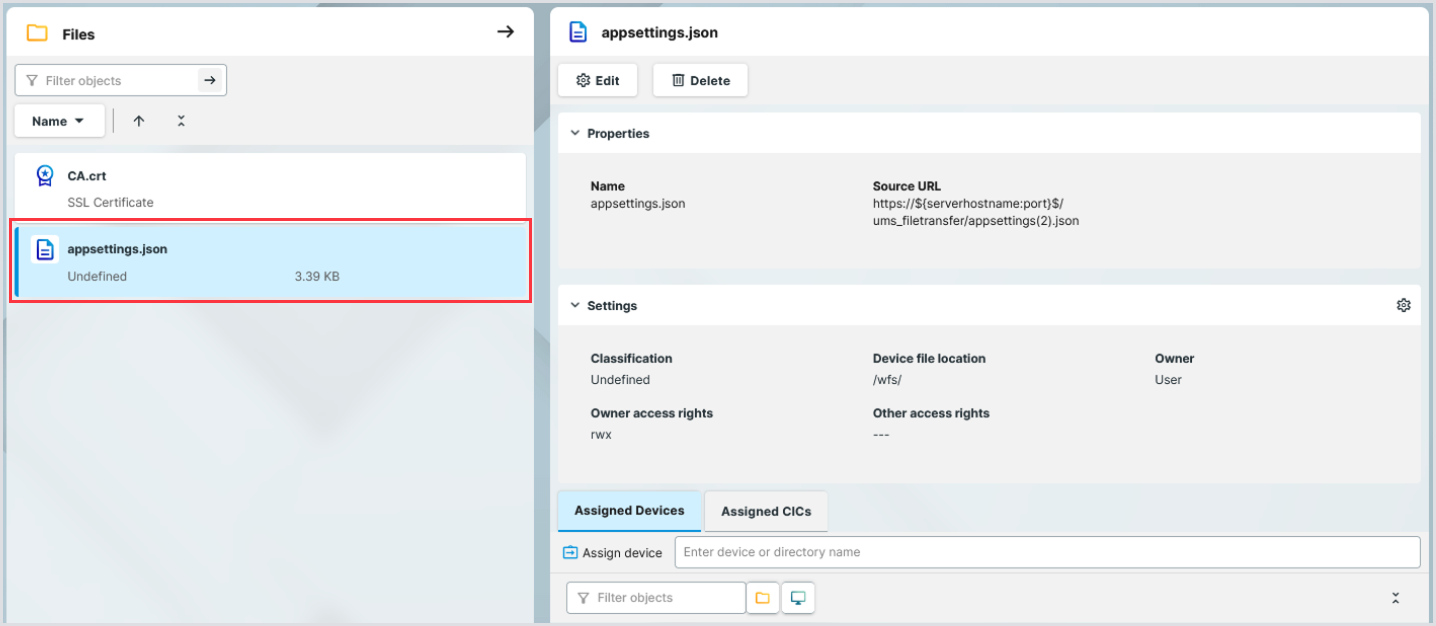
The
appsettings.jsonwill be visible now in the UMS Web interface.
-
In the UMS sidebar menu, go to Devices and select the IGEL device.
-
In the top bar menu, click Assign Object.
-
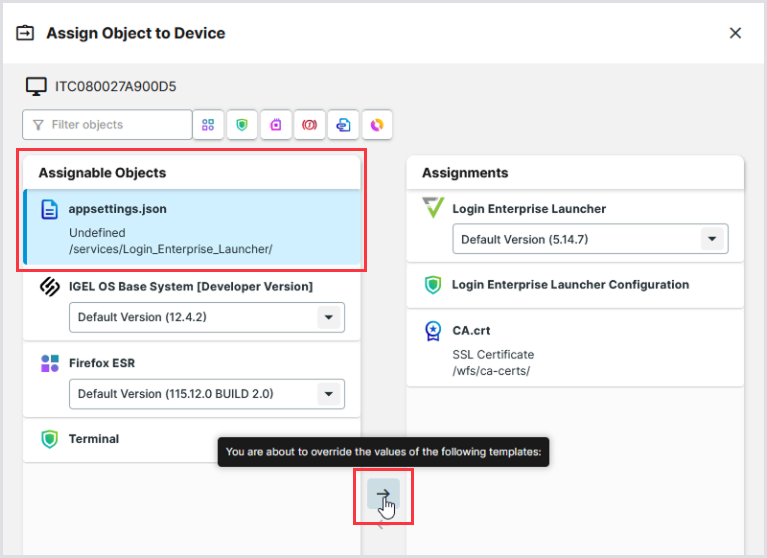
In Assign Object to Device > Assignable Objects, click on
appsettings.json, and then click the right arrow.
-
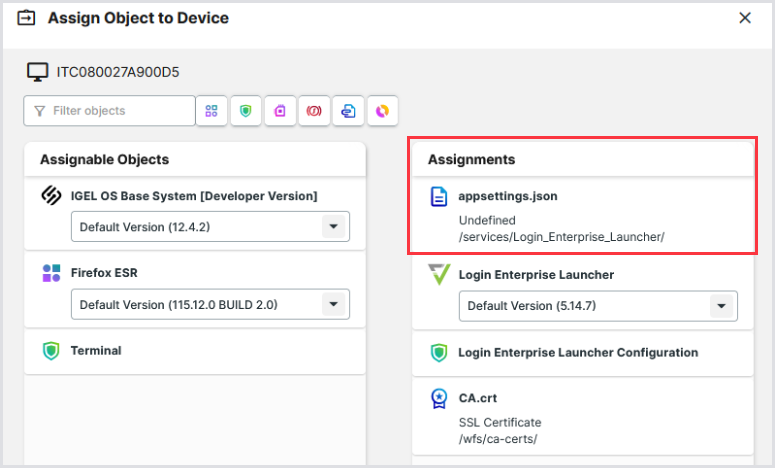
Ensure the
appsettings.jsonis in Assignments.
-
In the UMS sidebar menu, go to Configuration > Profiles.
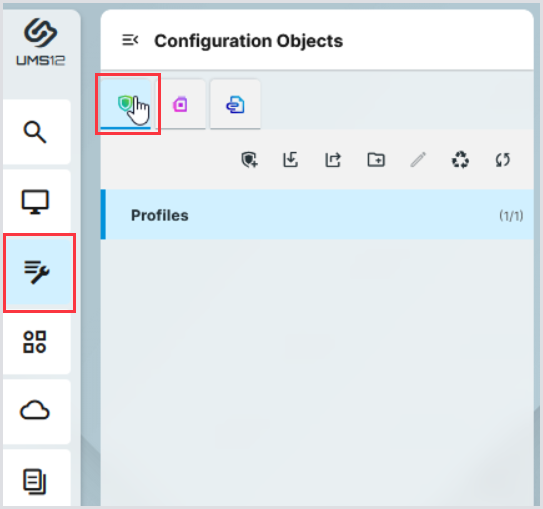
-
In Profiles, click Create new profile.
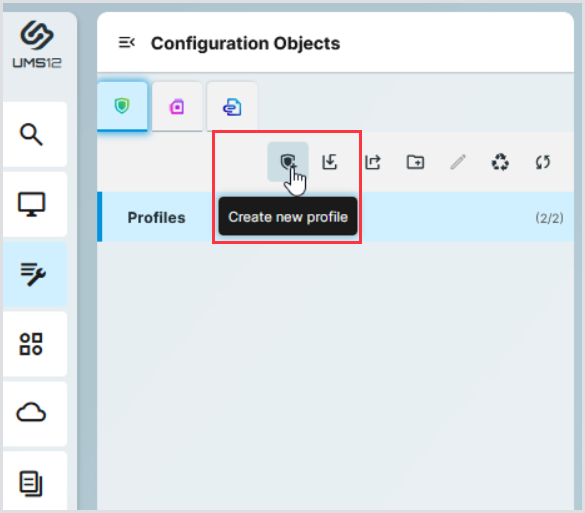
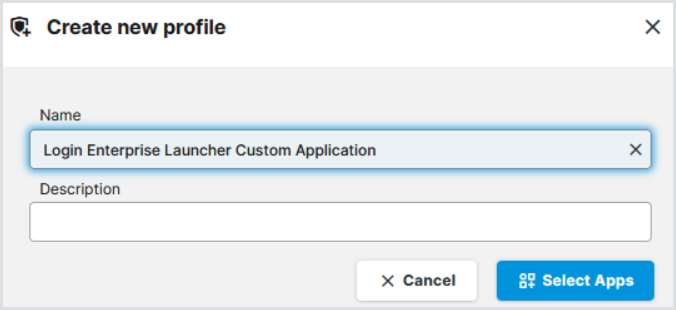
-
In Create New Profile, give the new profile the name Login Enterprise Launcher Custom Application, and then click Select Apps.
-
In the App Selector, click on IGEL OS Base System and then Save.
.png?cb=65bff94b39d64abdb4db9f32b6c9743b)
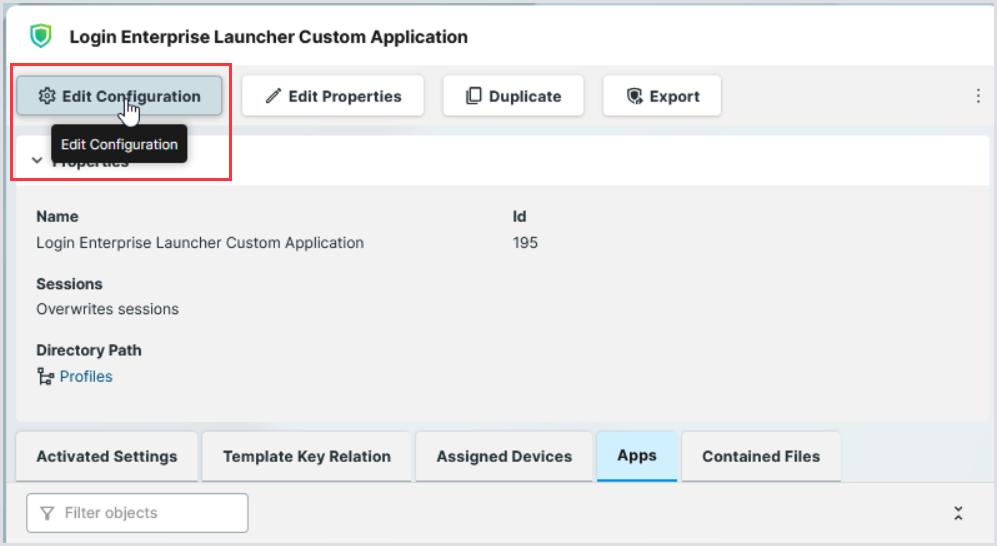
-
In Profiles, click Edit Configuration.
-
In Profile Configurator, click System.
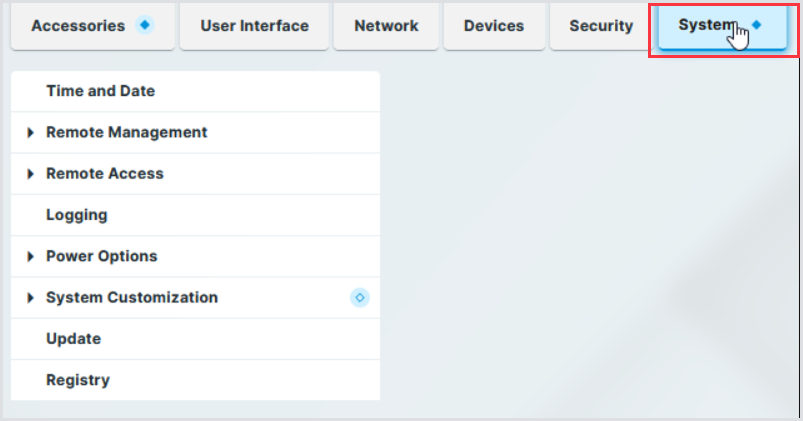
-
Expand System Customization and click on Custom Application

-
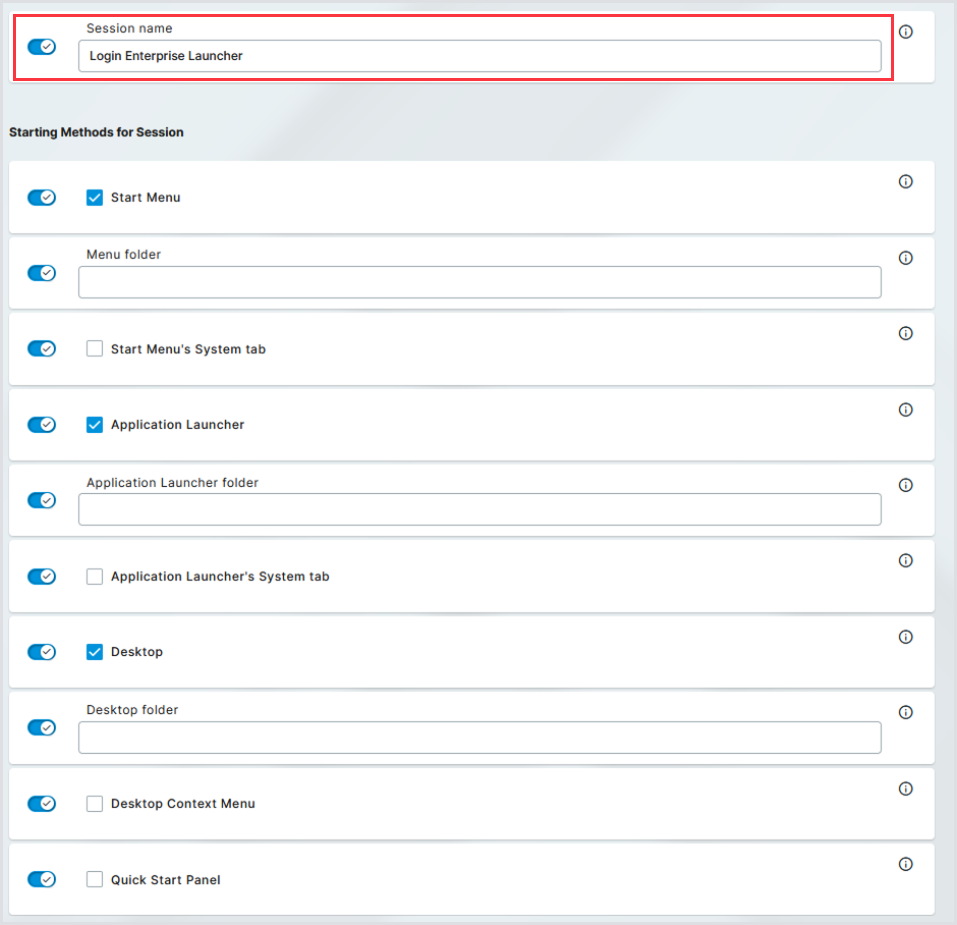
In Custom Applications, click Add Item.

-
In Session name, fill in the field with Login Enterprise Launcher.
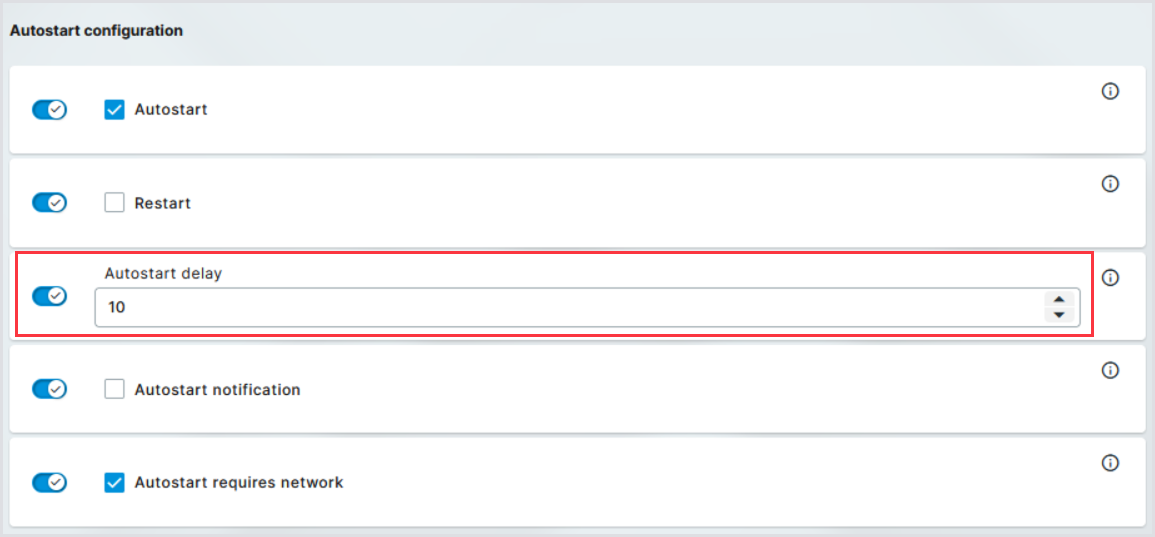
-
Scroll down to find the Autostart configuration. Enable Autostart to ensure the Login Enterprise Launcher starts automatically when the IGEL device boots. Set the Autostart delay to 10 seconds. This is the recommended configuration.
-
Expand the Login Enterprise Launcher in the left pane and click Settings.
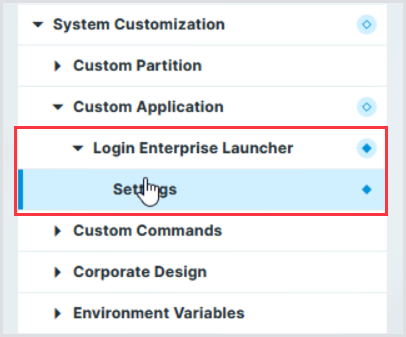
-
Ensure that Icon large and Command are both enabled.
-
In Icon large, input:
/services/Login_Enterprise_Launcher/login-enterprise.svg -
In Command, input:
xterm -e "/services/Login_Enterprise_Launcher/LoginPI.Launcher.Linux"
-

-
Click Save and Close.
-
In the UMS Web sidebar menu, navigate to Devices and select the IGEL Device.
-
In the top bar menu, click Assign Object.
-
In Assign Object to Device > Assignable Objects, click Login Enterprise Launcher Custom Application, and then click the right arrow.
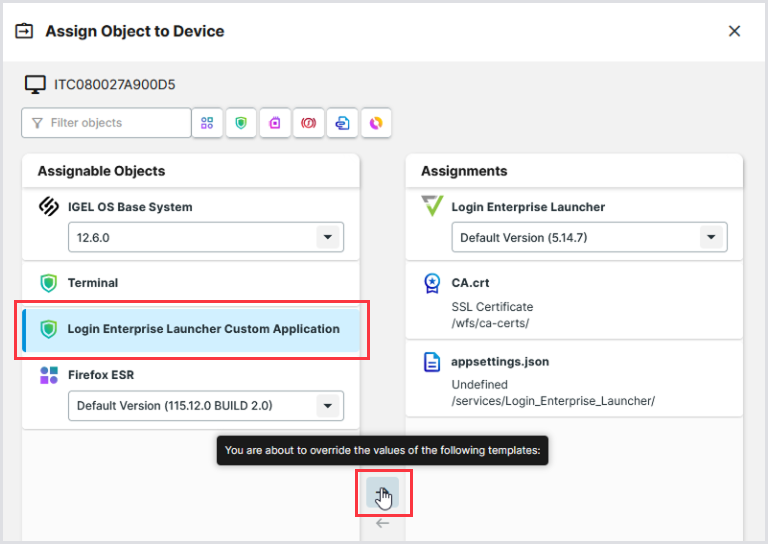
-
Ensure the Login Enterprise Launcher Custom Application is in the Assignments. Then, click Save and apply on reboot.
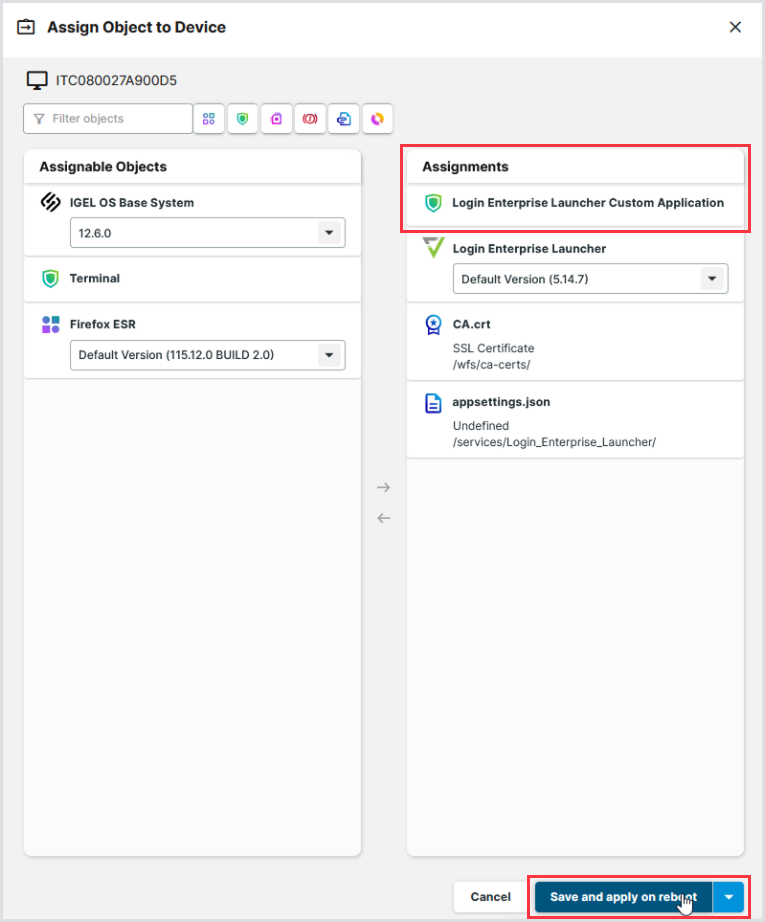
-
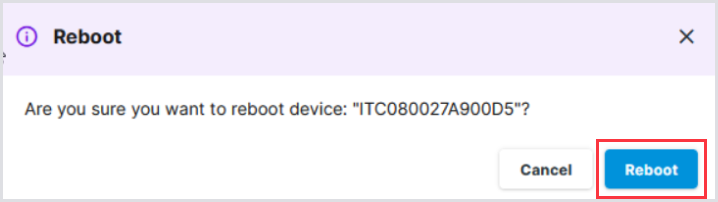
Click Reboot.

-
Confirm the reboot, then reboot the IGEL device as before to speed up the process.
After rebooting, the IGEL device may display a secondary reboot confirmation, indicating that the device has changed. If this happens, click Reboot.
Running the Launcher
-
If Autostart was configured in the previous steps, the Virtual Appliance Launcher can be invoked by logging into the IGEL device.
-
When the Login Enterprise Launcher runs and successfully connects to the Virtual Appliance, it will display a message indicating it’s waiting for a Test to run. You will see the status "Reading Configuration" and a log path being displayed.

-
Alternatively, you can start the Virtual Appliance Launcher by clicking the desktop icon or selecting it from the Application Launcher on the IGEL device.
-
To verify that the Login Enterprise Launcher is successfully connected to the Virtual Appliance, in the Login Enterprise sidebar menu, go to the Launchers, and check that the IGEL device's machine name is listed.

The Login Enterprise Launcher is now ready to be used as a Launcher for the Test!
Updating the Launcher
This is necessary when updating the Login Enterprise Virtual Appliance, for example, after updating Login Enterprise 5.14.7 to 6.0.14. If the Login Enterprise Launcher is version 5.14.7 and the Login Enterprise virtual appliance is version 6.0.14, the Login Enterprise Launcher won't launch Test sessions. There must be parity. Below are the steps to update the Login Enterprise Launcher.
-
Open in a text editor the appsettings.json file you set up in step #10 in the Getting the Launcher onto IGEL Devices section.
-
Update the LauncherVersion key to reflect the Login Enterprise version update and save the file. For example:
-
Before the update:
-
After the update:
-
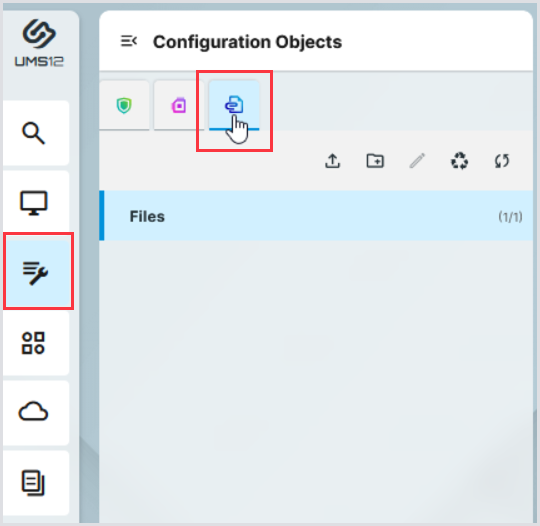
In the UMS Web interface, navigate to Configuration Objects > Files > Select the existing appsettings.json file, and click Delete.
-
Observe that the appsettings.json file is no longer in the Files pane, then click the Recycle Bin.
-
In the Recycle Bin, click on appsettings.json and then Delete Selected.
-
To upload the appsettings.json file modified with the new Login Enterprise version and add it to the IGEL OS device(s) using the Login Enterprise Launcher, perform the steps starting with step #12 in Getting the Launcher onto IGEL Devices.
-
When the updated appsettings.json file is re-uploaded, ensure in the UMS Web that the appsettings.json Source URL ends with plain appsettings.json, and not appsettings(1).json.
-
Download the Launcher package for IGEL according to your Virtual Appliance version.
-
In UMS Web, navigate to Apps, and then click Import App.
10. In Import App, click Browse files.
-
Select the newly downloaded package in the file browser.

-
In Import App, observe the package getting uploaded.
15. In the UMS Web interface for the Login Enterprise Launcher App, click Edit Update Settings.
16. In Update Settings, if not already selected, click Update Default Version Manually, then Save.
17. In the UMS Web interface for the Login Enterprise Launcher App, click Set Default Version.
18. In Set Default Version, select the new version of the Login Enterprise Launcher from the drop-down.
19. In Set Default Version, click Save and apply changes on reboot.
20. Initiate a reboot on the affected IGEL device(s) that have the Login Enterprise Launcher installed.
Once the reboot has completed, the Launcher can be used again for Login Enterprise testing.
Additional Resources
IGEL_OS_12_SDK-intermediate.crt