Overview
The Network Connections page provides an overview of all Windows 365 network connections across tenants where the feature is enabled. It allows administrators to search, filter, review key details for each connection, delete, and configure connection settings.
Search
Use the search field to locate a specific network connection by: Tenant, Name, Virtual network Status, etc.
Network Connections Table
The table lists all provisioning policies with the following columns:
|
Column |
Description |
|---|---|
|
Tenant |
The tenant where the network connection is applied. |
|
Name |
Name of the network connection. |
|
Virtual network |
The Azure virtual network associated with the network connection. |
|
Status |
The current status of the network connection. |
|
Created by |
The administrator who created the network connection. |
|
Join type |
The directory join type used by Cloud PCs that use the network connection |
|
Subscription |
The Azure subscription that contains the virtual network. |
|
Domain |
The domain associated with the network connection. |
|
Region |
The Azure region where the network connection is hosted. |
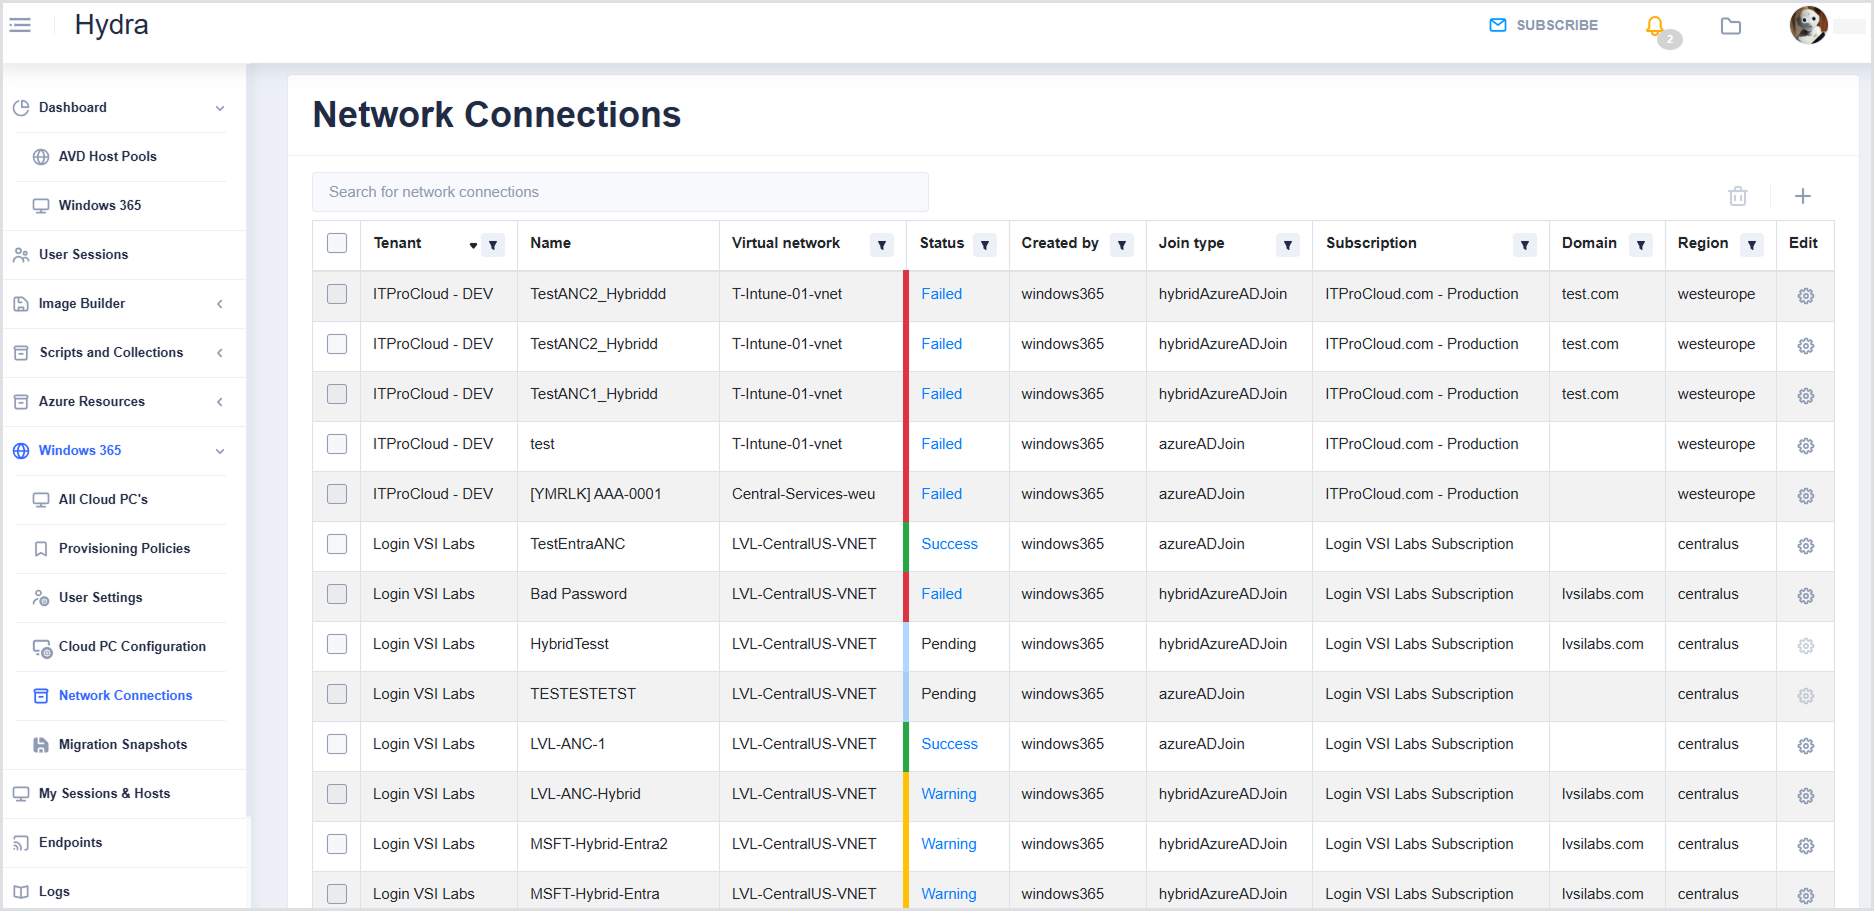
Each column has a Filter icon allowing you to search, select all, or select specific values relevant to that column.
Configuring Network Connection Settings
You can add, configure, or delete network connections from the Network connections page.
To add a network connection, select the + icon to the right of the connections table, and then choose one of the following options:
Each option opens a configuration dialog.
Adding a Microsoft Entra Join Connection
Use this option to create a network connection for Microsoft Entra joined devices in Microsoft Entra ID within Microsoft Azure.
-
Select the + icon.
-
Select Add Microsoft Entra join connection.

-
Complete the required settings in the dialog.
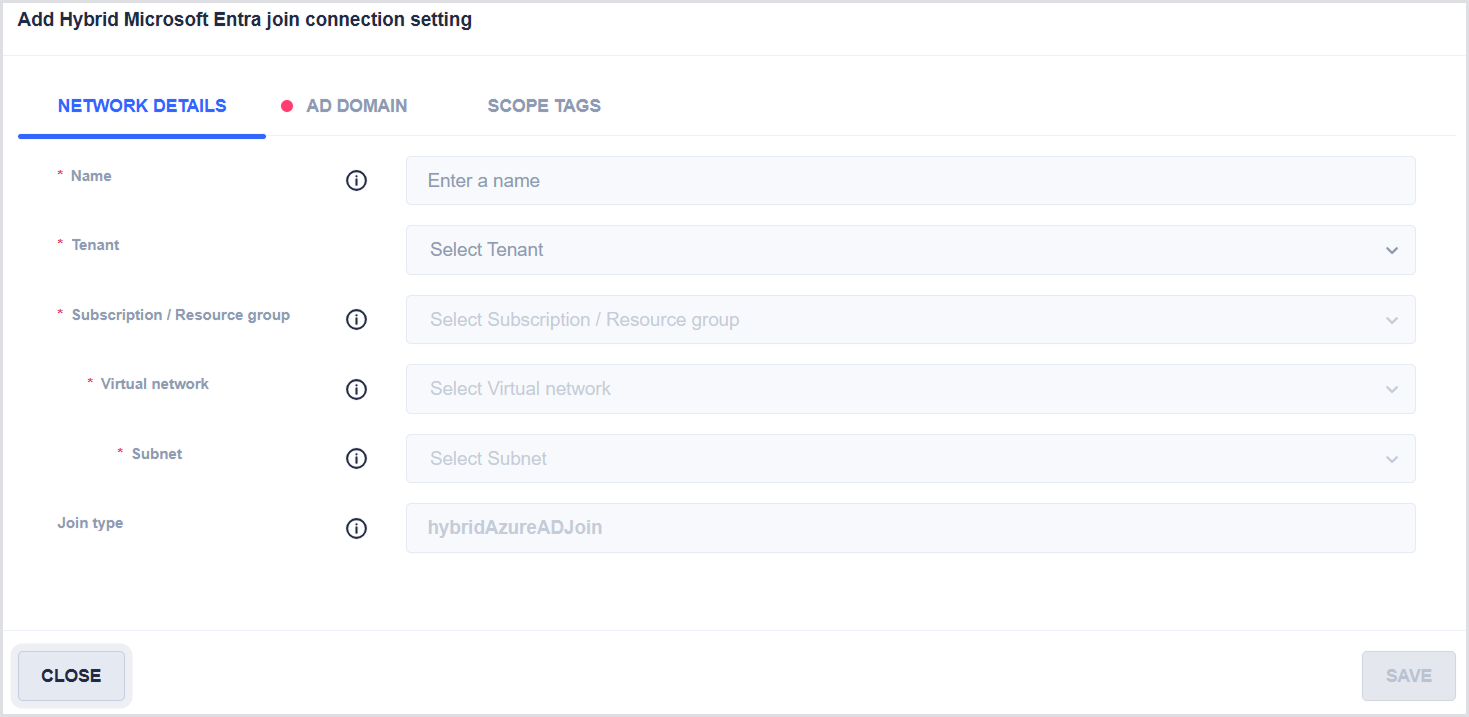
Network Details Tab
Provide the following information:
-
*Name: Enter a connection name that is easy to identify when provisioning Cloud PCs.
-
*Tenant: Select the Microsoft Entra tenant.
-
*Subscription / Resource group: Select the Azure resource group that will contain the network interface cards (NICs) created by the Windows 365 service.
-
*Virtual network: Select the virtual network to which the Cloud PCs will connect. For provisioning to succeed, the virtual network must be connected to a Microsoft Entra domain.
-
*Subnet: Select the subnet from which Cloud PCs will be assigned IP addresses. For provisioning to succeed, the subnet must be routed to a network that has access to a domain controller. For disaster recovery purposes, ensure that at least 50% of IP addresses remain available at all times.
-
-
Join type is automatically set based on the type of new connection you selected.

Scope Tags Tab
Use scope tags to control visibility and management access.
-
Select a tenant before selecting scope tags.
-
After a tenant is selected, choose the appropriate scope tags as needed.
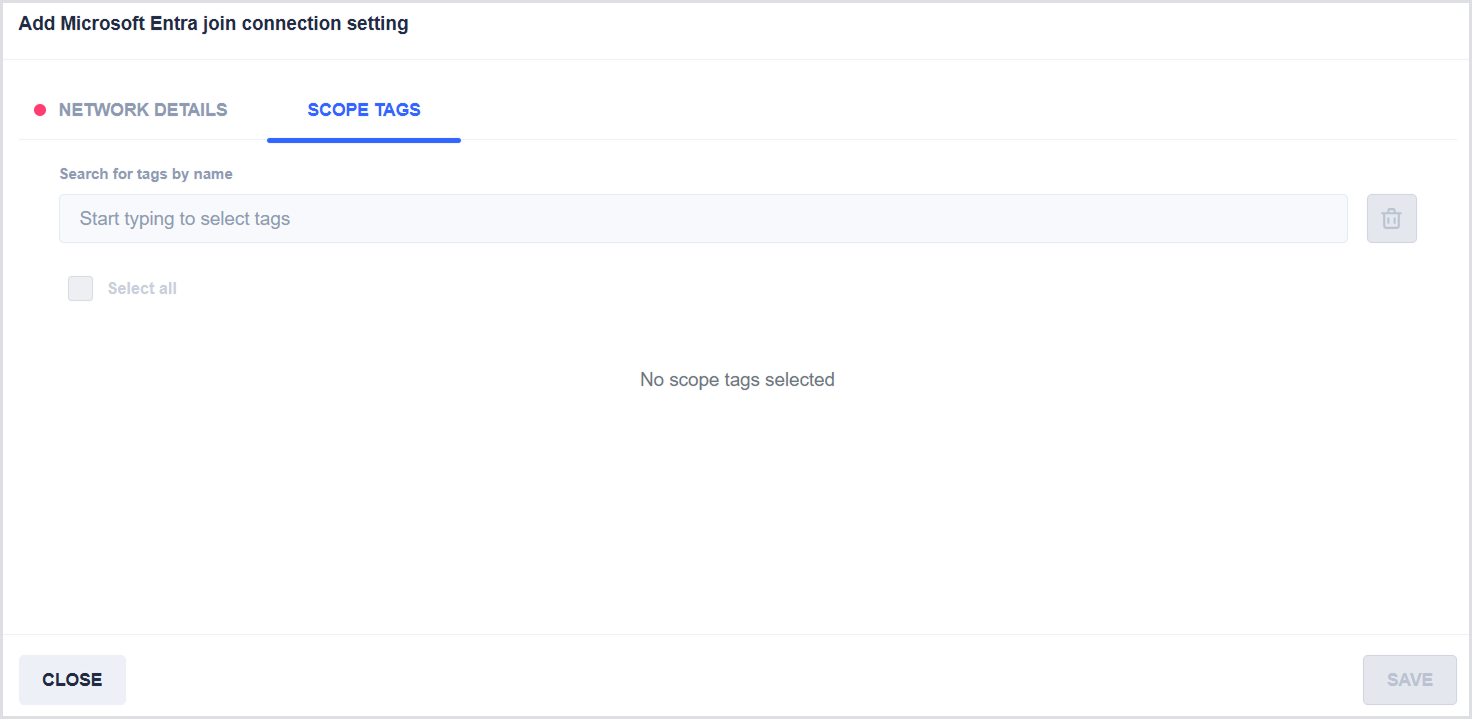
When you finish configuring the settings, save the connection.
Adding a Hybrid Microsoft Entra Join Connection
Use this option to create a network connection for hybrid Microsoft Entra joined devices. This configuration includes additional Active Directory settings.
-
Select the + icon.
-
Select Add Hybrid Microsoft Entra join connection setting

-
Complete the required settings in the dialog.
The dialog includes the following tabs:
Network Details Tab
Provide the same information described in the Network details section.
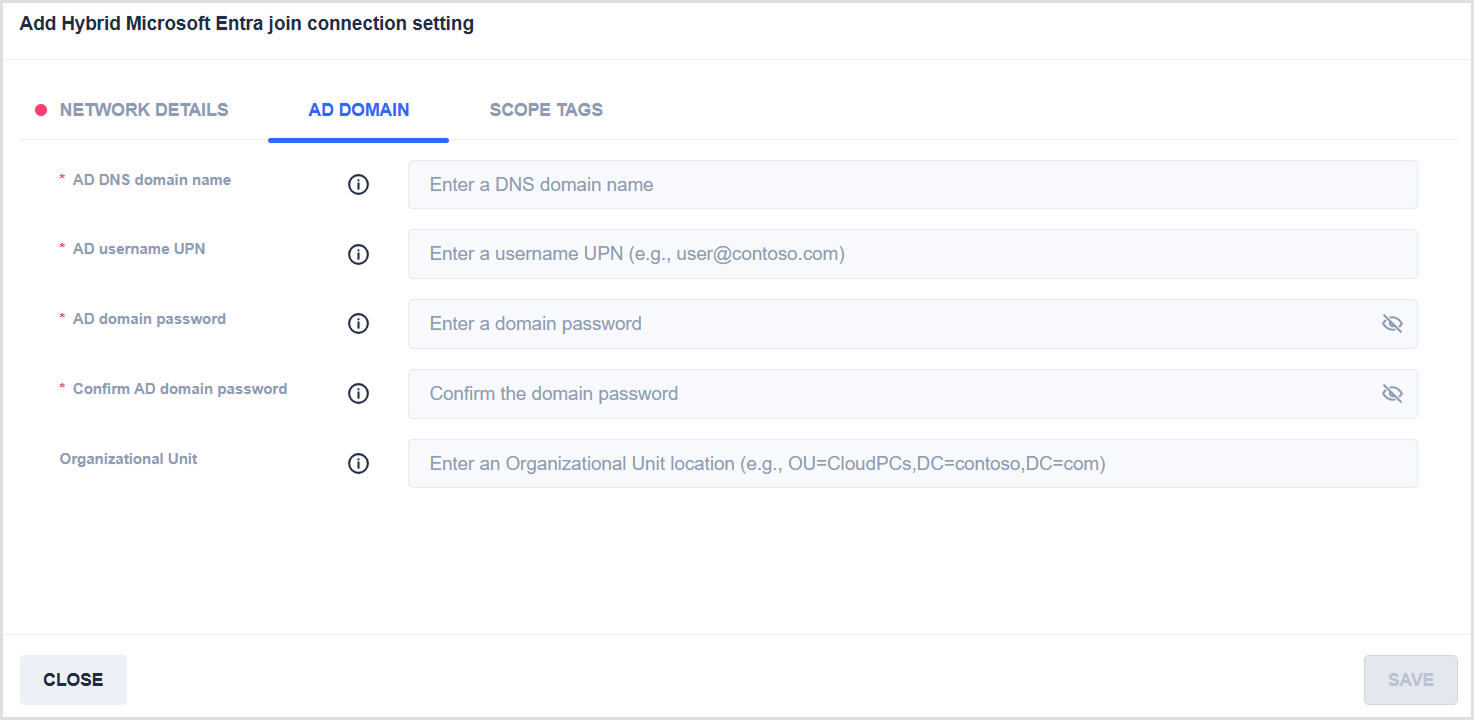
AD Domain Tab
Provide the following Active Directory details:
-
*AD DNS domain name: Enter the name of the domain that you want the Cloud PC to join. The name must be in a fully qualified domain name (FQDN) format (for example,
ad.contoso.com). The domain must be resolvable on the network specified in the Network details tab. -
*AD username UPN: Enter the user principal name (UPN) of an Active Directory user account that has sufficient permissions to perform a domain join (for example,
domainjoin@ad.contoso.com). -
*AD domain password: Enter the password for the specified Active Directory user account.
-
*Confirm AD domain password: Re-enter the password for the specified Active Directory user account.
-
Organizational Unit: Enter the organizational unit (OU) where Cloud PC objects will be created after provisioning succeeds. The OU must be specified in distinguished name (DN) format (for example,
OU=CloudPCs,DC=ad,DC=contoso,DC=com).
Scope Tags Tab
-
Select a tenant before selecting scope tags.
-
After a tenant is selected, choose the appropriate scope tags as needed.
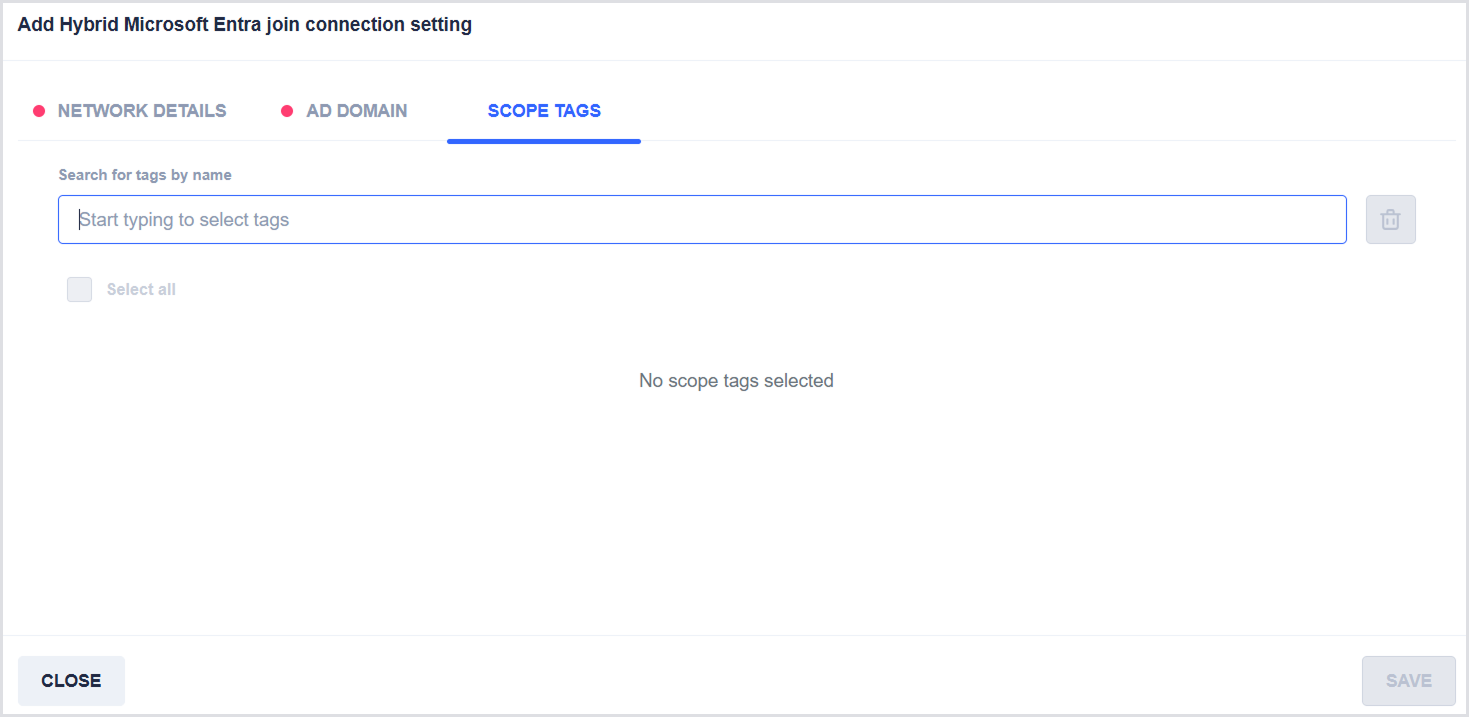
When you finish configuring the settings, save the connection.