Overview
Hydra can be configured to host more than one tenant by utilizing a Service Principal. Note that a Service Principal is also required in a single tenant scenario when the environment is larger than 2000 users or 100 hosts. You can optionally use the Managed Service Identity (MSI) that comes with Hydra, if smaller than that within a single tenant.
Creating the Service Principal in the Target Tenant
-
Within Azure, go to Entra ID.
-
Navigate to Manage > App registrations.
-
Click New Registration.
-
Give the app registration a name, such as svc-hydra or sp-hydra, and click Register.
-
In the Overview pane, take note of the Application (client) ID and the Directory (tenant) ID. These will be needed later.
-
Go to Manage > Certificates & secrets on the left.
-
Go to Client secrets > New client secret.
-
Give it a description and make a note of the expiration. When it expires, Hydra will lose access to the AVD resources. Record the secret value – once you navigate away from this page, it is unable to be retrieved again.
-
Go to the subscription or resource group where the AVD resources reside. Under Access Control (IAM), give the newly-created Service Principal Contributor access to the resources. If the Virtual Networks don’t reside in the resource group, ensure you give them proper access there as well. You can also use a more-restrictive custom role below.
-
If the Contributor role is restricted in your environment, you can utilize the custom role template at the bottom of this page. Select the Start from JSON option when creating the custom role and attach the provided JSON file. You can also use this link to deploy the custom roles to your environment automatically.
Custom Roles
-
Hydra - Resource Access Role
A fine-tuned role to allow the SP or managed identity of Hydra to operate the resources of Azure Virtual Desktop. More restrictive than the default Contributor role that is typically utilized. -
Hydra - Change Permissions Role
This role is used by Hydra starting in 1.2.0 to change the permissions on Azure Resources, such as adding/removing access to application groups, to assign users to virtual machines, or to allow Power-on-Connect. We recommend assigning this role as restrictively as possible, such as to the Resource Group only containing AVD resources, as this role is highly privileged and can be used to grant identities access to Azure resources.
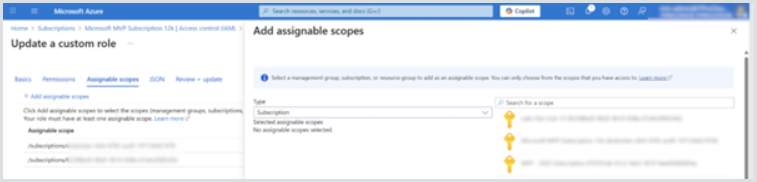
If you have multiple subscriptions, modify both custom roles and add other subscriptions in Assignable scopes:
Allowing Hydra to Manage User Assignments
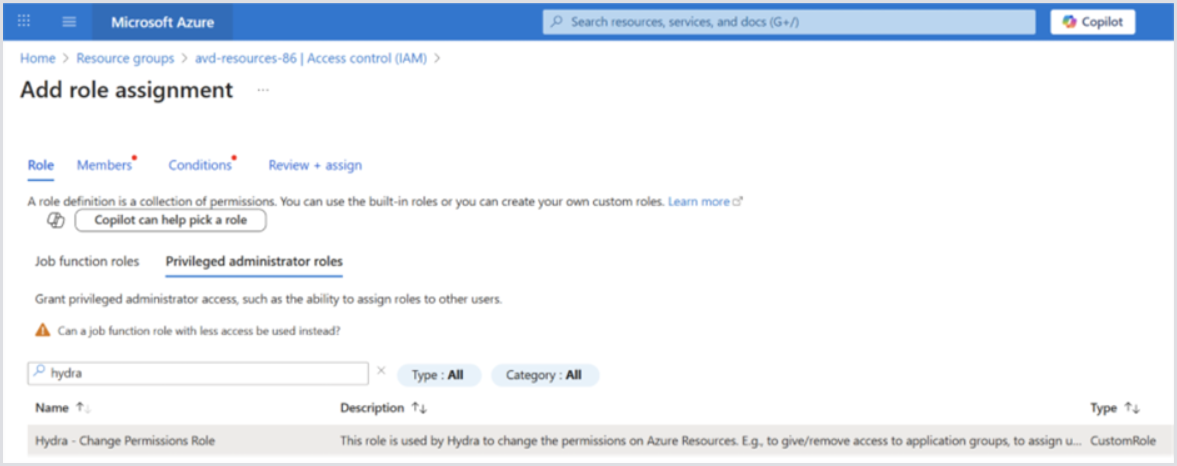
Starting in 1.2.0, Hydra can manage user assignments to resources after creating them by using the Hydra - Change Permissions Role, noted above.
To allow this, add a role assignment for the Hydra Identity or Service Principal with the role “Hydra - Change Permissions Role” to all resource groups containing your Azure Virtual Desktop resources. The role is a Privileged administrator role:
-
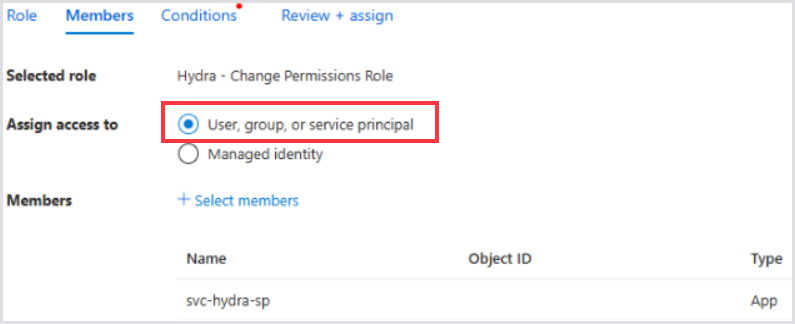
Under Members, select the Hydra Service Principal or Identity.
-
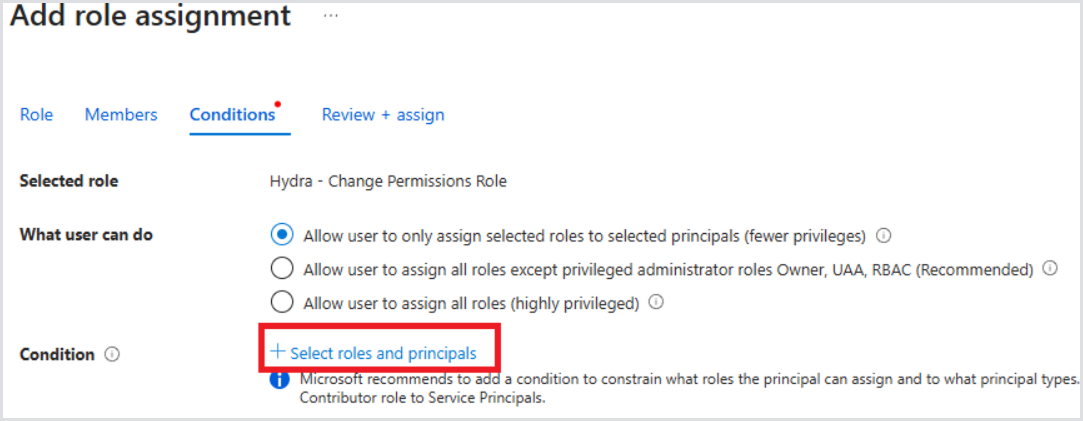
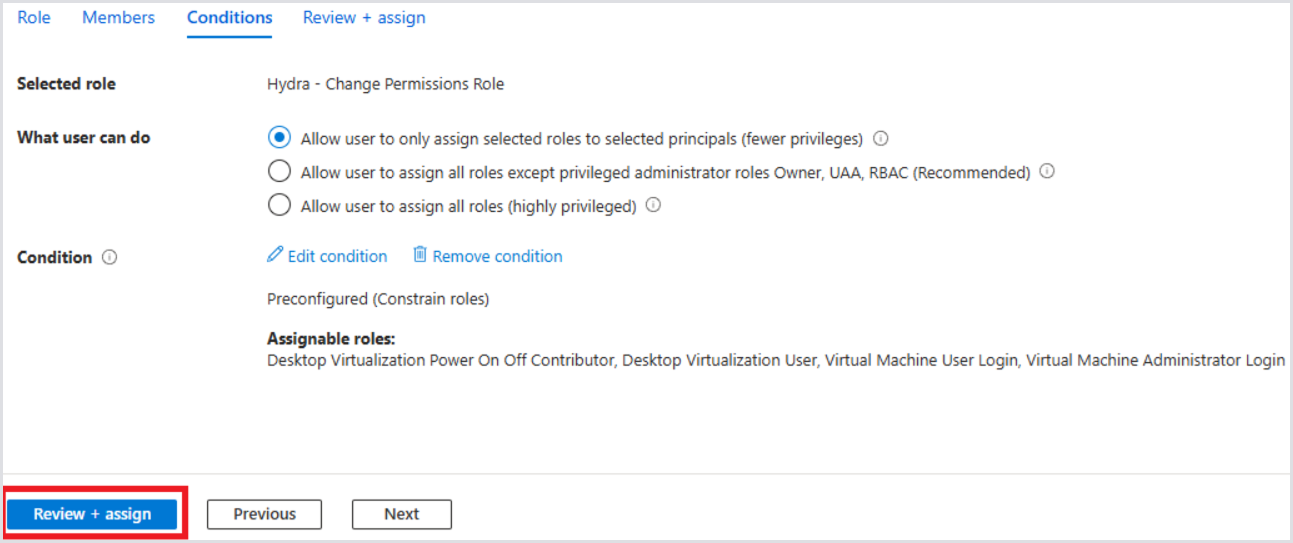
Under Conditions, select Allow users to only assign selected roles to selected principals (fewer privileges).
-
Click + Select roles and principals.
-
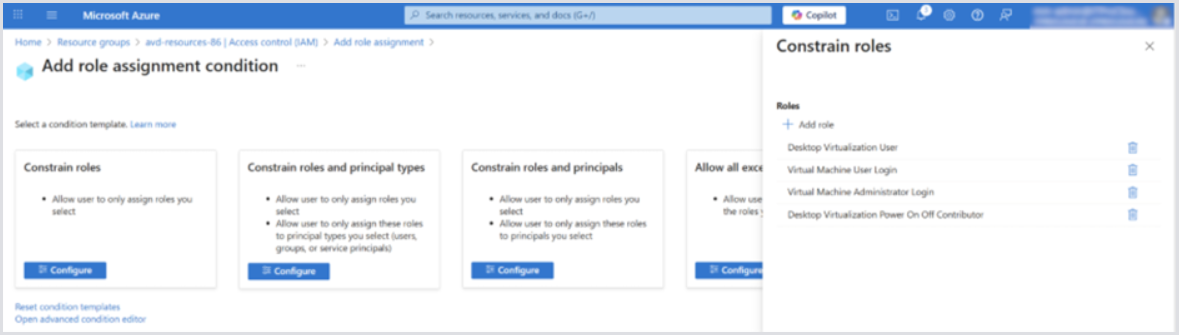
Under Constrain Roles, select Configure and add the following roles:
-
Desktop Virtualization User
-
Virtual Machine User Login
-
Virtual Machine Administrator Login
-
Desktop Virtualization Power On Off Contributor
-
This configuration limits the Hydra Identity's ability to assign these roles to other identities.
-
Select Review + assign twice to finish the role assignment wizard:
Granting Entra Permissions
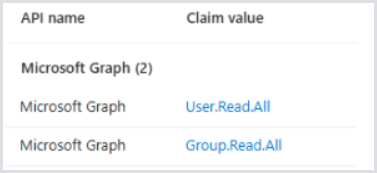
Finally, the Hydra Service Principal or Identity must be granted the User.Read.All and Group.Read.All permissions in Graph. Otherwise, existing assignments and searches will appear blank. These permissions must be consented from an Entra administrator:
Adding the Service Principal to Hydra
-
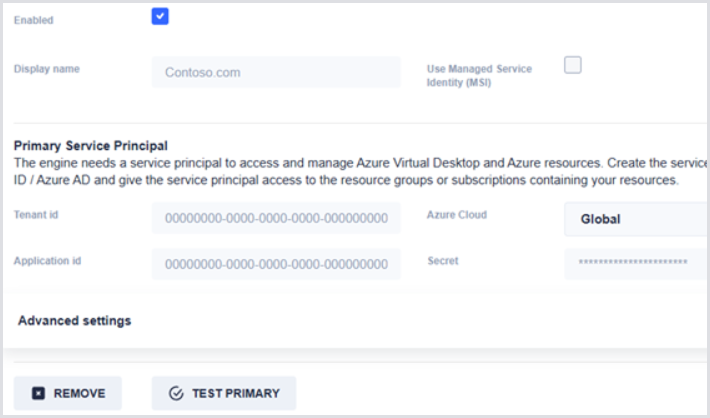
In the Hydra portal, head to Tenants and add a new tenant. Fill in the Display Name you wish to align with the tenant, Tenant ID, Application ID, and Secret.
-
Click Test Primary prior to saving to ensure that the values are correct. If the test is successful, click Save.

-
If the Host Pools do not appear in the Dashboard after several minutes, click Restart Engine at the top right. Wait several minutes and then try reloading the Hydra portal again. The Host Pools should now be visible.